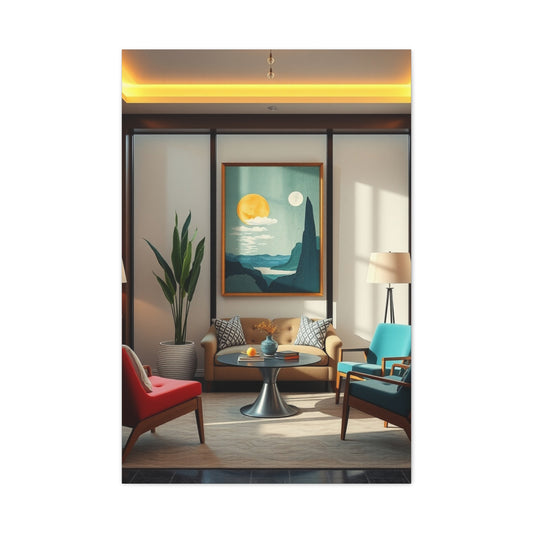
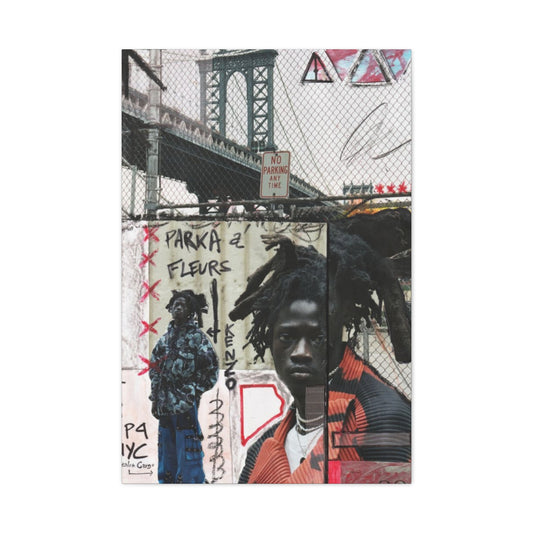
Photography offers a unique and vibrant way of capturing the world, allowing us to express ourselves through images. Whether you're a professional photographer or an enthusiastic hobbyist, you may sometimes find yourself looking for creative ways to elevate your work. One of the most exciting ways to do this is by turning your photos into paintings. This not only adds an artistic flair to your photos but also opens up a whole new realm of creativity. Using Photoshop, you can take your images and apply various effects to give them a painted look, replicating different art styles or creating something entirely new. In this guide, I will walk you through a step-by-step process to transform your photos into paintings using Photoshop.
Why Turn Your Photos into Paintings?
The allure of transforming a photo into a painting lies in its ability to unlock boundless creative possibilities, offering a fresh and engaging perspective on your images. Photography, in itself, is a powerful art form that captures the nuances of life, the intricacies of nature, and the emotions of human experiences. Yet, sometimes, a photograph might not fully capture the essence of an artistic vision. This is where the ability to turn photos into paintings comes into play. Photoshop, with its suite of advanced tools and features, makes it incredibly easy to apply different painting techniques, giving your photos a unique, hand-crafted look. The process can help you explore a wide variety of artistic styles—from classic oil paintings to impressionistic strokes, and even contemporary abstract art.
Through this technique, photographers and digital artists alike can experiment with various effects that mimic the brushstrokes, texture, and color palette of traditional paintings. The results can turn a simple photo into something truly extraordinary, enhancing its emotional impact and visual appeal. The ability to transform a photograph into a painting opens up a world of creativity that is only limited by your imagination.
Let’s explore in greater detail why turning your photos into paintings can be a game-changer, both artistically and technically.
Creative Control
One of the most significant advantages of turning your photos into paintings is the complete creative control it grants you over the image. Traditional painting techniques involve using brushes, colors, and textures to create a piece of art, which can be time-consuming and challenging to master. However, Photoshop simplifies this process, giving you the flexibility to adjust various elements of the image to fit your artistic vision. Whether you're trying to replicate a classic oil painting or create a surreal watercolor effect, Photoshop provides you with a range of filters, brushes, and adjustment tools that allow you to manipulate the image to your liking.
|
Related Catagories: |
You have the freedom to experiment with different color palettes, brush styles, and textures, enabling you to achieve the exact look you want. You can adjust the saturation, brightness, and contrast to enhance the mood of the image or apply specific painting techniques like the oil paint effect to replicate the brushwork seen in real-life paintings. Photoshop allows for quick and easy adjustments, ensuring you don't need to worry about making irreversible changes to the image. If you're not satisfied with one effect, you can always undo it and try a different approach. This flexibility is an invaluable asset to any artist, enabling you to refine and perfect your work at every step of the process.
Variety of Styles
The ability to replicate different painting styles is one of the most exciting aspects of turning photos into paintings. Photoshop offers a diverse range of filters and brushes that mimic the look of various painting techniques. Whether you're drawn to the fluidity of watercolors, the boldness of acrylics, or the depth of an oil painting, Photoshop allows you to experiment with these different styles to suit your preferences.
For instance, you can use Photoshop’s Oil Paint filter to emulate the rich, textured feel of an oil painting. This effect is designed to simulate the appearance of real brushstrokes, giving your photo the depth and texture typically found in traditional oil paintings. On the other hand, if you're inspired by the soft blending of colors found in watercolor paintings, Photoshop offers various watercolor brushes and techniques to replicate this effect.
Beyond classic styles, you can also use Photoshop’s features to explore more contemporary and abstract styles. From minimalist sketches to surreal dreamscapes, the variety of effects available in Photoshop allows you to bring any artistic vision to life. You can easily switch between different effects, blend styles, and even combine multiple techniques to create a unique visual expression. The possibilities are endless, making Photoshop an indispensable tool for artists looking to push their creative boundaries.
Whether you prefer a more realistic look or a highly stylized image, Photoshop’s versatile tools enable you to tailor the painting effect to your exact specifications. You can fine-tune each brushstroke, adjust the texture of the paint, and even manipulate the lighting to enhance the overall composition. This level of customization allows you to create paintings that reflect your unique artistic style and vision.
Personalized Artwork
Turning your photos into paintings is an excellent way to create personalized artwork that stands out. Whether you are creating art for yourself, for a client, or for a gift, transforming a photo into a painting adds a unique, handcrafted touch that a simple photograph cannot achieve. Photographs are often viewed as a realistic representation of a moment in time, but they can sometimes lack the depth and emotional impact that a painting conveys.
When you turn a photo into a painting, you are not just altering its appearance—you are infusing it with your own artistic expression. By applying different painting techniques and effects, you can create a piece of art that reflects your personal taste, style, and vision. The process allows you to experiment with color schemes, textures, and brushwork, making the final result a true reflection of your creativity.
For example, you could take a beautiful landscape photo and turn it into an abstract painting that highlights the colors and shapes within the scene. Alternatively, you could transform a portrait into a classical oil painting that adds an air of sophistication and timelessness. Personalized artwork holds a special place in people's hearts, and a painted photo can evoke strong emotional responses from the viewer, making it an ideal gift for special occasions such as birthdays, anniversaries, or holidays.
Additionally, transforming a photo into a painting gives you the opportunity to reinterpret the image in a way that aligns with your personal aesthetics. You may have taken a photo of a landscape or an event that holds sentimental value, but by turning it into a painting, you can reinterpret that memory through a different lens—emphasizing the feelings and emotions associated with it, rather than just the visual details.
The Artistic Experience
Creating a painted version of your photo allows you to tap into the world of artistic expression in a way that enhances your understanding of art itself. The process encourages you to think beyond mere photo manipulation and dive deeper into the world of creative design. By experimenting with different effects and techniques, you can gain a better understanding of traditional painting methods and how they translate into the digital world.
Photoshop’s painting tools offer a digital canvas where you can explore the fundamentals of brushwork, texture, and composition. The act of applying these painting effects can also be a therapeutic experience. Much like traditional painting, you can lose yourself in the process, taking time to refine every detail, adjust every color, and perfect every brushstroke. This process of creation can be as rewarding as the final result, giving you a sense of accomplishment as you transform a simple photo into a work of art.
Moreover, experimenting with various painting techniques can help you develop your own artistic style. As you explore the different painting effects available in Photoshop, you may discover new ways to express yourself and develop a visual language that resonates with you. This experience of creating digital art can serve as a stepping stone toward pursuing other forms of artistic expression, such as traditional painting, drawing, or graphic design.
What You Need for the Transformation
Before you embark on transforming your photos into paintings, it is important to gather the right materials and understand the tools you'll need for the process. This is the foundation that will ensure your final piece of artwork not only looks great but also stays true to the artistic vision you wish to create. While Photoshop provides the powerful tools needed to accomplish this, using the right starting materials can make all the difference in the outcome. Here’s what you need to begin this exciting creative journey:
1. High-Resolution Photo
A high-resolution photo is crucial to ensure the best results when transforming your images into paintings. The resolution refers to the level of detail that is captured in the image, and it plays a significant role in determining the clarity and sharpness of the final artwork. Ideally, a photo should have a resolution of at least 300 pixels per inch (PPI), which is standard for printing and ensures that the image retains its fine details during the editing process. A higher resolution not only guarantees better image quality but also makes it easier to apply artistic effects without compromising on the clarity of the final result.
Using a low-resolution image can lead to blurry or pixelated results, which can be problematic, especially when applying painting effects that often add texture and detail. This can cause a loss of sharpness, making your artwork appear distorted or unrealistic. Additionally, if you're planning to print your transformed painting, a high-resolution photo ensures that it looks crisp and professional when displayed in any size.
It’s essential to choose a photo that not only has a high resolution but also has good composition and lighting. A photo with a clear focal point, well-defined subjects, and good exposure will serve as a stronger base for the artistic transformation. Natural light works especially well, as it captures true colors and details that will make the painting effect more authentic.
In summary, a high-resolution image is essential not just for quality but also for ensuring the success of the painting transformation. The higher the resolution, the better the final outcome will be, with rich details and vibrant colors that remain intact even after applying various effects.
2. An Image of a Painting
The second essential item in the process of transforming a photo into a painting is a reference image of a painting that will guide your artistic direction. This reference image is crucial because it will influence the color palette, texture, and style of the final artwork. The choice of painting will have a significant impact on the overall aesthetic of your photo transformation, as different painting styles require different approaches to color and texture.
There is a wide array of painting styles you can choose from. You might be drawn to classical oil paintings, where rich, textured brushstrokes and deep color contrasts are used to create depth and atmosphere. Alternatively, you could opt for the fluidity of watercolor paintings, which have a soft, delicate feel with beautiful gradients of color. If you're inspired by more modern or abstract styles, you can explore different techniques, such as Impressionism, Cubism, or even Pop Art, depending on your creative goals.
Selecting a reference painting that resonates with your desired outcome is essential. For instance, if you want to mimic the style of a famous artist like Vincent van Gogh, you might choose one of his post-impressionist pieces that feature bold, thick brushstrokes and intense colors. Similarly, if you're looking for something more delicate and soft, a watercolor painting by an artist like Claude Monet could serve as an ideal reference. The color palette and the texture of the brushwork in the painting you select will serve as a guide as you apply various effects in Photoshop to replicate that style.
It’s important to keep in mind that your chosen reference painting doesn’t have to be famous or traditional. It could be a contemporary artwork, a modern piece, or even an abstract painting you personally admire. What matters most is the style and mood it evokes, which will guide your transformation process. Whether you’re trying to mimic the rich textures of an oil painting or the delicate blending of watercolors, your reference image will give you the inspiration needed to take your photo and turn it into something truly artistic.
3. Adobe Photoshop
Adobe Photoshop is the cornerstone tool in this entire transformation process. With its vast array of features, Photoshop allows you to apply multiple artistic filters, brushes, and adjustments to create stunning painting effects from your photographs. Photoshop is widely recognized as the industry-standard image editing software and is renowned for its powerful capabilities, offering users complete control over their creative process.
While there are other software programs available for photo editing, Photoshop stands out due to its unparalleled versatility and advanced tools. In this case, Photoshop’s various filters, such as the Oil Paint and Watercolor filters, as well as the use of texture brushes, make it the perfect choice for transforming photos into paintings. The built-in adjustments for color correction, saturation, contrast, and brightness ensure that you can match your chosen painting’s color palette precisely, achieving the perfect tone and mood for your final artwork.
|
Related Catagories: |
For this guide, we’ll be using Photoshop CS6, but this technique applies to most versions of Photoshop, including the latest releases. The process may vary slightly in terms of the interface, but the fundamental features remain consistent. Photoshop also allows you to work with layers, which is crucial for non-destructive editing. Layers enable you to make changes to your image without permanently altering the original photo, giving you more flexibility and freedom to experiment with different painting effects.
Another important feature of Photoshop is its brush tools. These tools allow you to simulate the look of traditional paintbrushes, offering control over the texture, opacity, and flow of the paint applied to the image. This gives you the ability to replicate various brushstroke effects, from broad, sweeping strokes to fine, detailed lines. The ability to customize brushes ensures that you can fine-tune the painting effect to suit your vision perfectly.
Having Adobe Photoshop at your disposal means you have the freedom to experiment with different artistic techniques and apply intricate details to your painting, all while maintaining complete control over the image. This software provides an array of painting tools that allow you to mimic not only traditional painting styles but also create entirely new and innovative artistic expressions.
Step-by-Step Guide: Transforming Photos into Paintings
1. Open Your Images in Photoshop
Begin by launching Adobe Photoshop. Open the photo that you wish to transform into a painting. To do so, navigate to the File menu and select Open… Choose the photo from your computer and click open. If you want to apply a painting style, you will also need a painting image. Open the painting image as well. Both files will open in separate windows, and you can toggle between them by clicking on the window you want to work with.
2. Create Layers for Editing
One of the fundamental steps in transforming a photo into a painting using Photoshop is working with layers. Layers provide a non-destructive way to edit and manipulate images without altering the original photograph, giving you the freedom to experiment with various effects, filters, and adjustments without the risk of permanently changing the base image. This feature is essential in digital photo manipulation, as it enables greater flexibility and control over the final result. By creating multiple layers in Photoshop, you can apply different painting effects and fine-tune each one individually to achieve the desired look.
Layers in Photoshop function similarly to sheets of transparent paper stacked on top of each other, allowing you to work on different aspects of the image separately. With layers, you can isolate changes to specific elements of the photo—such as applying the pixelation or oil paint effect—without affecting the rest of the image. This makes the entire editing process smoother and more efficient, as it allows you to adjust or remove certain effects at any point without losing previous work.
Why Layers Matter in Photo to Painting Transformation
When you're transforming a photo into a painting, it's important to maintain control over each aspect of the editing process. Using layers, you can separate different editing techniques—such as color adjustments, texture effects, or painting filters—into distinct layers. This organization not only helps to keep the workflow manageable but also enables you to make individual adjustments without affecting other elements of the image.
For example, in the process of applying the oil paint effect, you may want to adjust the color palette and texture of the photo. With layers, you can apply the effect on one layer and then fine-tune its opacity, blending mode, and texture settings to get the perfect result. If the effect is too harsh or does not blend well with the original photo, you can easily reduce the opacity of the oil paint layer or use layer masks to selectively hide or reveal parts of the painting effect. This gives you the flexibility to make adjustments on the fly and experiment with different levels of intensity.
How to Create and Organize Layers in Photoshop
To begin working with layers in Photoshop, follow these steps:
Open Your Images: First, open both your original photo and the reference image of the painting you wish to emulate. To do this, go to the File menu and select Open. Choose your photo and the painting reference from your computer, and they will open in separate Photoshop windows.
Create a New Layer: Once both images are open, it's time to set up your layers for editing. In Photoshop, the easiest way to add a new layer is to navigate to the Layer menu at the top of the screen, select New, and then choose Layer from the dropdown menu. Alternatively, you can press the shortcut key Shift + Ctrl + N (Windows) or Shift + Cmd + N (Mac) to create a new layer quickly. This new layer will be added above the currently selected layer in the Layers panel, allowing you to apply adjustments or effects to this newly created layer.
Duplicate the Background Layer: A faster method to create a new layer for your editing process is to duplicate the background image. To do this, click on the Background Layer in the Layers panel, then press Ctrl + J (Windows) or Cmd + J (Mac). This action will create a duplicate of the original photo on a new layer. Duplicating the background layer is useful because it preserves the original photo, allowing you to make changes without affecting the base image. This way, if you’re not happy with the edits, you can always return to the original layer.
Create Layers for Effects: Now that you’ve created your new layers, you’ll need to organize them based on the effects you want to apply. It’s common practice to create separate layers for each effect you wish to use. For example, one layer will be dedicated to applying the Pixelate Effect, while another will be used for the Oil Paint Effect. By keeping these effects on separate layers, you have more control over the intensity and visibility of each effect.
Organizing Layers for Easy Access: As you work with multiple layers, it’s important to keep them organized. Photoshop provides several ways to label and organize layers to help you stay on track. In the Layers panel, you can double-click the name of a layer to rename it, making it easier to identify its purpose. For instance, you might label one layer as Pixelate Effect and another as Oil Paint Effect. Additionally, grouping related layers can help you keep the editing process streamlined. To group layers, hold Shift while selecting the layers you want to group, then press Ctrl + G (Windows) or Cmd + G (Mac). This will create a folder in the Layers panel that contains all the selected layers.
Adjusting the Layer Order: The order of your layers is critical to how the effects interact with each other. For example, if you're applying both the Pixelate Effect and the Oil Paint Effect, you should place the Oil Paint Effect layer above the Pixelate Effect layer. This ensures that the oil paint texture is applied on top of the pixelated image, resulting in a seamless blend between the two effects. If you place the layers in the wrong order, it could cause the effects to clash or result in an unsatisfactory final image. The layering hierarchy is a simple but essential aspect of Photoshop that dictates how each effect is applied and blended.
Blending Modes and Opacity: Once your layers are set up, you can further refine how the effects blend together. Photoshop offers a variety of blending modes that determine how the pixels on one layer interact with the pixels on the layers beneath it. For instance, if you want to create a more subtle transition between the pixelated and oil paint effects, you can adjust the Opacity of each layer. Lowering the opacity reduces the intensity of the effect, allowing some of the original photo details to shine through. You can find these options at the top of the Layers panel, just above the list of layers.
Layer Masks for Precision: Layer masks are another powerful feature in Photoshop that give you even more control over the editing process. A layer mask allows you to hide or reveal parts of a layer without permanently deleting them. This is useful when you want to apply the pixelation effect to only certain areas of the photo, while leaving other parts untouched. To add a layer mask, click the Add Layer Mask button at the bottom of the Layers panel (it looks like a rectangle with a circle in the middle). Once the mask is applied, use a brush to paint black (to hide) or white (to reveal) areas of the effect.
Experimenting with Layer Combinations
Now that you understand the importance of layers and how to organize them, it's time to experiment with different combinations and effects. Don’t be afraid to try multiple effects at once to see what works best for your photo. The beauty of Photoshop is that you can always adjust, undo, or try something new. You might find that using a combination of multiple painting effects creates a more dynamic and interesting result than sticking to one technique.
For instance, you could layer a Pointillize Effect under the Oil Paint Effect to create a unique texture, giving your photo an impressionistic feel. You can also play with the blending modes and opacity of each layer to create smoother transitions between the different effects. By using layers creatively, you can add depth and complexity to your painting, making it more visually striking.
3. Apply the Pixelation Effect
The goal of this step is to adjust the color palette of your photo to match the style of the painting you’ve chosen. Here’s how you can do it:
Select the Pixelate effect layer to ensure it's active.
Navigate to Image > Adjustments > Match Color.
In the Source dropdown menu, select the painting image to use its color palette for the transformation.
Set Luminance, Color Intensity, and Fade to 100% and click OK.
Next, apply the Pointillize filter to pixelate the image:
Go to Filter > Pixelate > Pointillize.
A box will appear where you can adjust the size of the pixels. Smaller pixels provide finer detail, while larger pixels offer a more abstract effect. Start by setting the pixel diameter to around 3, but feel free to experiment with different sizes to achieve the desired level of detail.
To make the pixelation effect less noticeable, you can adjust the opacity of the Pixelate effect layer. Lowering the opacity to around 40-50% allows the effect to blend smoothly with the original photo.
4. Apply the Oil Paint Effect
Now, let’s focus on adding the texture that makes the image resemble a painting. Follow these steps to apply the Oil Paint filter:
First, select the Oil Paint effect layer.
As before, go to Image > Adjustments > Match Color, and choose the painting image to match the colors once again.
To apply the oil paint filter, navigate to Filter > Stylize > Oil Paint. A new window will appear with sliders to adjust the appearance of the painting.
Here’s a suggested starting point for the settings:
Stylization: 10
Cleanliness: 7-8
Scale: 0.1
Bristle Detail: 10
Shine: 0.5
These settings will give you a rich, textured look typical of oil paintings. Feel free to tweak these values to achieve the desired effect. When you’re satisfied with the texture, click OK to apply the changes.
5. Final Touches and Adjustments
At this stage, your photo should already resemble a painted image, but there are still a few adjustments you can make to enhance the look:
Auto Adjustments: Go to Image > Auto Tone, Auto Contrast, and Auto Color to fine-tune the image. These options automatically balance the colors, highlights, and shadows to create a more polished final piece. If you’re unhappy with the results, you can always undo the changes by pressing Ctrl + Z (Windows) or Cmd + Z (Mac).
Adjust Saturation: If the colors seem too saturated, particularly for certain artistic styles (such as impressionism), you can adjust the saturation to create a more muted look. To do this, create a Hue/Saturation adjustment layer by clicking the New Adjustment Layer icon at the bottom of the Layers panel. In the properties panel, lower the Saturation slider until you achieve the desired effect.
6. Review and Save Your Work
Once you’ve completed all the adjustments and are happy with how your photo has turned out, take a final moment to review the image. Ensure that it captures the essence of a painting and looks like the style you had envisioned. When satisfied, save your work by going to File > Save As and choosing your preferred file format (e.g., JPEG or PNG).
Tips for Enhancing the Painting Effect
Experiment with Different Painting Styles: Photoshop allows you to experiment with a wide range of painting effects, from watercolors to abstract styles. Don’t be afraid to mix and match different filters to create a truly unique piece.
Brush Customization: Use custom brushes in Photoshop to add even more texture and style to your painting effect. Custom brushes can replicate different paint strokes, from rough and textured to smooth and fluid.
Add Details: If you want to give your painting a more authentic touch, use a soft brush to add finer details like highlights, shadows, or even small strokes that resemble brushwork.
Layering: Don't hesitate to add additional layers for experimenting with different filters or effects. This way, you can easily modify and adjust the layers without affecting the rest of the image.
Use Smart Objects: If you plan to make adjustments later, convert your image to a Smart Object before applying filters. This will allow you to change the filters without permanently altering the image.
Conclusion
Turning your photos into paintings with Photoshop is a delightful and creative way to explore artistic expression. With Photoshop’s powerful tools, including the Pixelate and Oil Paint effects, you can transform any photo into a piece of art, whether you're emulating a famous painting style or creating something entirely new. Remember to experiment with different settings, layers, and techniques to discover the style that best suits your creative vision. Photoshop’s versatility allows you to push the boundaries of your imagination, making it an invaluable tool for transforming photos into stunning, painted masterpieces.
By following this guide, you’ll be well on your way to creating beautiful, one-of-a-kind artwork from your photographs. Embrace the creative process, and don’t be afraid to try new effects and techniques to make your photos come to life as paintings. Happy editing!


