Self-portraiture is not just a means of documenting one’s appearance; it is a deeply reflective and imaginative form of visual expression. This artistic genre has grown in popularity thanks to the accessibility of cameras, smartphones, and editing software, allowing photographers to turn the lens inward and explore identity, emotion, and personal style. Whether you're a seasoned image-maker or a novice with a creative itch, self-portrait photography is one of the most fulfilling ways to refine your visual voice, test lighting techniques, and experiment with character building.
Self-portraits can serve many purposes—from emotional storytelling and mood exploration to professional branding and portfolio development. Below is a comprehensive collection of inventive self-portrait concepts that will stimulate your imagination, help you confront creative blocks, and allow you to capture yourself in ways you might never have considered.
1. Step Into Character Through Costumes and Props
One of the most exhilarating freedoms in self-portraiture lies in the ability to shed your daily identity and slip into the skin of someone—or something—entirely different. Costumes and props are more than accessories; they are the vocabulary of visual performance. By donning vintage apparel, theatrical garments, or handmade masks, you can construct an alter ego who tells a story far removed from your day-to-day persona.
Use eccentric items like antique umbrellas, musical instruments, or feathered hats to infuse your portraits with narrative layers. Perhaps you wish to evoke a 19th-century poet lost in reverie, a mythical forest dweller, or a surreal dreamscape entity. Self-portrait photography becomes a stage where you direct not just the camera, but an entire fantasy. This method encourages the synthesis of photography with theater, mythology, and abstract emotion—producing visuals that are as thought-provoking as they are visually stunning.
2. Use Light and Color to Paint Your Face
Light is the painter’s brush in the world of photography, and in self-portraiture, it can be harnessed to create otherworldly effects without touching editing software. Experimenting with light refraction opens doors to stunning visual phenomena that elevate your portraits to a new dimension. Reflective surfaces—such as compact discs, crystal prisms, mirrors, or even the base of a wine glass—can fragment light and scatter rainbow hues across your face.
These spectral illuminations can transform your visage into a kaleidoscopic canvas. Try placing a prism in front of a flashlight, or catch the late afternoon sun bouncing through glass. The interplay between light and skin can give rise to dreamlike atmospheres and ephemeral moods. Incorporating colored gels or transparent fabrics over your light sources can also add cinematic tonal shifts, ideal for evoking mystery, wonder, or even melancholy.
3. Embrace the Mystery of Silhouettes
Silhouette photography is an evocative technique that embraces minimalism while speaking volumes. By shooting against a strong light source—such as a golden sunset, a brightly lit window, or a glowing curtain—you reduce yourself to a shadowed form, devoid of facial features yet full of emotive resonance. This visual abstraction invites viewers to interpret the portrait subjectively, imbuing it with personal meaning.
Silhouettes have long been used to express solitude, introspection, and anonymity. They create a poetic contrast between presence and absence, form and void. By positioning your body in expressive stances—whether curled inward or standing tall—you can suggest narratives of transformation, vulnerability, or strength. This technique is particularly powerful when paired with natural backdrops like forests, oceans, or cityscapes, turning your outline into a symbolic presence within a broader environment.
4. Craft Artistic Double Exposures
Double exposure photography allows you to merge two realities into a single, symbolic image. This method is more than a visual trick—it’s an invitation to explore the interplay between identity and environment. Whether created in-camera or through post-processing software, a well-executed double exposure can evoke deep emotion and narrative richness.
Start by capturing a strong silhouette or profile shot, ideally against a neutral or overexposed background. Then blend it with a secondary image—a moody skyline, a wildflower field, a swirling pattern, or even handwritten text. The key lies in the juxtaposition: urban textures can suggest inner chaos, while natural imagery might allude to serenity or rebirth. This fusion of inner and outer worlds results in self-portraits that are at once personal and universal, dreamlike and grounded.
5. Create DIY Backdrops from Everyday Items
Transforming your living space into a personal photo studio doesn’t require expensive gear or elaborate setups. With a little imagination, ordinary household items can become extraordinary backdrops. Printed bedsheets, patterned curtains, vintage quilts, or even a wall of paper cranes can provide unexpected depth and texture.
By layering fabrics or incorporating string lights, you can introduce contrast and luminosity into your images. Try suspending lace curtains to catch natural light in interesting ways, or hang old postcards or book pages to create a literary tableau. These DIY setups allow for endless customization and encourage you to see your environment through a more artistic lens.
Even reflective objects like aluminum foil, bubble wrap, or water droplets on glass can contribute to a rich, dynamic background. Such elements introduce visual intrigue and texture, enriching the story you're telling with each photograph.
6. Highlight Your Passions and Hobbies
A deeply personal approach to self-portraiture is to document yourself doing the things that make your heart light up. Capturing moments while engaging in your passions—whether it’s strumming an acoustic guitar, painting intricate watercolors, tending to succulents, or practicing calligraphy—imbues your photos with sincerity and a strong sense of self.
Rather than posing, let the camera observe. Set a timer or use a remote shutter while fully immersed in your activity. These lifestyle portraits reflect your truest essence and communicate individuality and joy. The candid energy that arises when you're focused on your craft often leads to more compelling and emotionally resonant images. This method also naturally integrates storytelling, as each object, movement, or expression reveals a fragment of your daily rhythm and personal identity.
7. Include Pets or Loved Ones in Your Frame
Adding your pet or a beloved companion introduces a dimension of warmth, affection, and intimacy that transforms your portraits into shared memories. Animals, in particular, bring unfiltered energy to the frame—they're unpredictable, expressive, and effortlessly charming. A gentle nuzzle from a dog or the curl of a cat in your lap can soften your body language and elicit spontaneous joy, leading to photos that feel deeply real and heartfelt.
When photographing with pets, patience is key. Embrace their curiosity and movement instead of trying to control the moment. This spontaneity often results in the most genuine captures. Similarly, incorporating a friend, sibling, or partner can produce portraits that explore themes of connection and companionship. The body language shared between people—an interlaced hand, a shared laugh, or a side glance—offers emotional cues that draw viewers into the narrative.
8. Play With Makeovers and Transformative Looks
Transform your self-portrait sessions into creative experiments by exploring different looks, eras, and aesthetics. Makeup, wigs, and accessories provide the tools to reinvent yourself visually, giving you the power to channel alternate personas or dive into themed concepts. From androgynous minimalism to whimsical fairytale characters or retro-glam elegance, each transformation opens up new visual and emotional territory.
This approach goes beyond surface appearance; it’s an opportunity to challenge self-perception, gain confidence, and engage with art direction in a hands-on way. Photographing yourself with these transformative elements invites bold styling choices—think glitter-dusted eyelids, painted freckles, sculptural hairstyles, or geometric eyeliner designs. The resulting images are often layered with meaning and aesthetic richness, allowing you to stretch your creative limits.
9. Focus on Body Details Over Faces
Sometimes, less reveals more. By focusing your lens on details—such as the bend of an elbow, the arch of a foot, or fingertips tracing across a textured surface—you draw attention to gesture, form, and tactile nuance. These intimate studies shift the narrative away from traditional identity and redirect it toward mood, emotion, and composition.
Close-ups of specific body parts, such as a hand clutching wildflowers or lips silhouetted against morning light, become poetic fragments of the self. These minimalist portraits can feel abstract, yet intensely emotional, leaving room for interpretation. They are particularly effective for creating a sense of vulnerability or mystery, making them ideal for conceptual and artistic series. Shadows, lines, skin textures, and even wrinkles tell stories when isolated and thoughtfully framed.
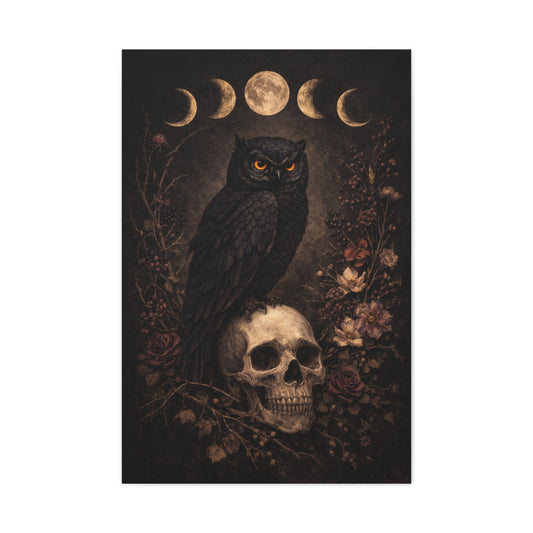
10. Accessorize With Handmade Headpieces
Elevate your self-portraits with handcrafted headpieces that double as wearable sculptures. Creating floral crowns, twig halos, or headbands made from natural or upcycled materials is not only a fun craft but also a way to infuse your images with originality and mythic storytelling. These accessories draw immediate attention to the upper frame of the image and establish a mood—be it regal, wild, romantic, or fantastical.
Consider using seasonal blooms, dry branches, satin ribbons, metallic wire, or even paper cutouts to construct your design. Handmade headpieces allow you to explore themes such as nature, rebirth, folklore, or elemental symbolism. They also serve as visual anchors that tie the whole composition together, providing a harmonious balance between your expression and the surrounding visual elements.
11. Practice Expressiveness and Play With Your Emotions
The human face is a dynamic canvas of emotion. In self-portraiture, tapping into your facial expressions transforms ordinary compositions into deeply emotive stories. Your eyes, brows, lips, and even the lines in your forehead become powerful communicators of internal states—serenity, sorrow, exuberance, longing, or defiance. Rather than masking your emotions, self-portraiture invites you to lean into them.
This creative space is uniquely personal—there’s no director behind the lens but you. That solitude fosters vulnerability and experimentation. With practice, you’ll begin to notice the subtleties: the tilt of your chin that suggests confidence, the furrow of your brow that speaks of contemplation, or the softness in your gaze that conveys vulnerability. These micro-expressions, when captured intentionally, form portraits that resonate with depth and sincerity.
Adding hand gestures further enhances expressiveness. You might cradle your cheek with a pensive hand, cover your eyes in mock disbelief, or stretch your arms in joy or surrender. These gestures, combined with nuanced facial language, turn your portraits into visual sonnets—frames that feel less posed and more poetic. Practicing emotion-based photography also builds camera confidence. Over time, you become more fluid, unguarded, and courageous in front of the lens, cultivating an authentic visual voice that’s hard to replicate.
12. Photograph Through Objects or Layers
Adding physical layers between your camera and your subject infuses your self-portraits with dreamlike texture and a sense of narrative depth. Shooting through objects—like a rain-flecked window, gauzy fabric, or translucent plastic—introduces distortion and abstraction, subtly concealing elements while adding tactile atmosphere. These layers act as visual metaphors, evoking mood, memory, or mystery.
Each object you use will color the image differently. A lace curtain diffuses light and casts romantic patterns, while condensation on glass can blur features to resemble fading memories. Transparent cellophane, especially when colored, lends a psychedelic or surreal mood, transforming natural lighting into vibrant washes. Foliage, like ferns or hanging branches, creates natural framing that suggests seclusion, serenity, or connection to the earth.
Even everyday materials become tools for visual experimentation. Try stretching plastic wrap across your lens, letting sheer scarves flutter in front of your frame, or allowing sunlight to refract through glass bottles. These partial obstructions shift focus, inviting the viewer to peer through the layers—both literal and metaphorical. The resulting portraits are not just seen; they are interpreted. These visual veils add an element of introspection, leaving space for ambiguity and emotional storytelling. They also serve as a creative exercise, pushing you to find unusual materials in your surroundings to build mood-driven compositions without heavy digital editing.
13. Obscure Part of Your Face
Sometimes, concealment can speak louder than full revelation. Obscuring portions of your face brings intrigue and narrative tension into your self-portraits. Rather than revealing your full expression, you invite viewers to engage with the fragments: a single illuminated eye, a shadow-drenched cheekbone, lips caught between words. This selective exposure emphasizes what’s shown and amplifies what’s hidden—blending mystery with emotion.
This visual strategy lends itself especially well to symbolic storytelling. Covering part of your face with your hands suggests self-protection or shyness. Draping fabric across your features may signify vulnerability or transformation. Letting your hair fall across your face introduces an element of disarray or rebellion. Even architectural shadows, window blinds, or projected shapes can carve your face into segments, each imbued with different emotional weight.
Such portraits break away from traditional facial symmetry and lead viewers into more interpretive terrain. The imbalance often heightens the artistic tension in the composition, making it feel emotionally charged and conceptually bold. It also offers a refreshing way to challenge photographic norms that emphasize full facial clarity and direct gaze. In doing so, you grant your audience an invitation—not to view passively, but to decipher meaning from visual clues.
Obscuring your face also opens doors to explore identity in abstract terms. When less of you is immediately visible, your photograph becomes more universal, even archetypal. It becomes less about showcasing a person and more about communicating an idea, emotion, or sensation. Whether subtle or dramatic, this technique has the power to turn a simple self-portrait into a thought-provoking piece of visual art.
14. Stage a Cinematic Scene
To create a cinematic self-portrait is to become both the director and the protagonist of a moment frozen in time. Instead of focusing solely on aesthetics, this technique invites you to ask a deeper set of questions: Who is this character? What are they feeling? What story just unfolded—or is about to? Through the deliberate use of lighting, wardrobe, environment, and composition, your photo becomes a frame within a larger, implied film.
Begin by identifying the tone and setting. You might envision a hazy film noir tableau drenched in shadow, a retro dreamscape tinged with pastel nostalgia, or a stark dystopian room washed in cold light. Once your concept is solidified, curate props and attire to support the visual narrative. Every detail—whether it’s a half-empty glass, an open book, or a flickering television—adds emotional subtext and subtle storytelling cues.
Lighting plays a critical role in establishing atmosphere. Employ chiaroscuro, the cinematic interplay of deep shadow and directed light, to evoke mystery or internal tension. Use practical lights like table lamps, neon signs, or even candlelight to create mood and depth. You can position your light source to mimic golden hour for warmth, or use colored gels to imbue the scene with psychological tones—teal for detachment, amber for memory, violet for surrealism.
To reinforce the filmic quality, consider altering your image’s aspect ratio. Cropping your frame to widescreen dimensions (such as 2.35:1) mimics the look of cinema and immediately cues the viewer to interpret your image as a scene rather than a snapshot. Further enhance this illusion with subtle post-production color grading—adjust the saturation, contrast, and temperature to replicate film stock or a specific genre’s palette.
Camera angles and body language also matter. Instead of centering yourself in every frame, experiment with over-the-shoulder views, reflections in mirrors, silhouettes in doorways, or close-up profile shots that suggest emotion rather than explain it. These choices imbue the viewer with the sensation of watching a character rather than simply observing a person.
The magic of cinematic self-portrait photography lies in its immersive nature. Each frame becomes a story—a glimpse into a world that feels both intimate and untold. It allows you to embody different identities, emotions, and timelines, transforming your self-portrait into a visual narrative that feels alive.
15. Convert to Monochrome for Timeless Impact
While color photography often dazzles with vibrancy, removing color can introduce a depth of emotion and abstraction that color cannot replicate. Converting your self-portraits to black and white is a deliberate act of simplification—one that elevates mood, enhances texture, and focuses the eye on shape, tone, and meaning.
In monochrome, every detail becomes amplified. The lines on your skin, the grain of a backdrop, the way light falls across your features—all take on a heightened importance. By stripping away hue, your viewer is no longer distracted by the color of your shirt or the tone of a background wall. Instead, they are drawn into the essence of the image: the interplay of light and shadow, the raw emotion, the silent narrative.
High-contrast lighting works exceptionally well in black and white photography. Use side-lighting to carve out facial structure, emphasizing cheekbones, jawlines, and the curve of your shoulders. Let shadows fall dramatically across half your face, or backlight yourself to create a luminous silhouette. These sculptural effects bring a sense of gravity and drama to your self-portraits, often reminiscent of classic film stills or timeless portraiture.
Grayscale tones also lend themselves to a range of emotional palettes. Soft, misty grays and gentle midtones evoke introspection, melancholy, or calmness—perfect for delicate or somber moods. Meanwhile, deep blacks contrasted with stark whites suggest intensity, resolve, or stark beauty. These tonal decisions shape the emotional framework of the image.
Monochrome photography invites experimentation with texture and abstraction. You might zoom in on your hand brushing fabric, your reflection in a mirror, or the curvature of your collarbone caught in slanting light. These images don’t need to reveal your full face or form—they suggest your presence through nuance, offering more to feel than to see.
There’s also a deep sense of nostalgia and timelessness inherent in black and white. Without the timestamps that color often imposes, your self-portraits transcend trends and appear suspended in a liminal space—neither past nor present, but always relevant. Viewers are more likely to associate black and white imagery with permanence, depth, and seriousness. This psychological response can deepen the impact of your work and connect more profoundly with your audience.
Importantly, choosing monochrome should not be an afterthought or editing default. It should be part of your vision from the start—reflected in your lighting choices, composition, and emotional intent. It’s not about simply removing color; it’s about reinterpreting your subject through the language of light, tone, and shadow.
16. Limit Your Setting for a Creative Challenge
One of the most effective ways to spark originality is by limiting your spatial canvas. Confining yourself to a single room, a narrow hallway, or even a specific corner forces you to reinterpret the familiar. Within that boundary, you’ll begin to notice textures on the wall, angles of incoming light, forgotten corners, or how shadows shift throughout the day. These overlooked details become tools in your creative arsenal.
This form of constraint encourages you to experiment with unconventional framing, floor-level perspectives, ceiling reflections, or using mirrors to expand perceived space. You may discover how a plain chair or curtain becomes an evocative prop under specific lighting. Working within a limited environment compels you to extract beauty from the mundane, refining your eye for subtlety and symbolism. This minimalist discipline can result in deeply personal and introspective portraits, capturing quiet narratives that may otherwise go unseen.
17. Build Diptychs or Side-by-Side Stories
Juxtaposition is a powerful compositional tool. Creating diptychs—two images placed side by side—lets you tell more complex visual stories. These paired portraits can showcase opposing moods, time lapses, alternate identities, or a before-and-after transformation. For instance, you could contrast soft vulnerability in natural light with a bold, structured persona in artificial lighting. Or use two color palettes to depict internal conflict and harmony.
Diptychs work exceptionally well for thematic series or visual storytelling projects. They offer rhythm and symmetry while also inviting interpretation. Play with horizontal or vertical alignments, symmetrical poses versus asymmetry, and facial expressions that engage in silent dialogue with each other. By presenting duality or metamorphosis, you add psychological depth and encourage your audience to read between the frames.
18. Explore a Color Theme for Visual Consistency
Color is one of the most emotive and unifying elements in visual art. Choosing a dominant hue—like ultramarine blue, terracotta red, or sage green—as the backbone of your portrait elevates its cohesiveness and amplifies mood. Coordinate this chosen color across your wardrobe, backdrop, props, and lighting to construct an immersive and visually harmonious scene.
Monochromatic themes evoke a sense of intentional design and mood-based storytelling. For example, rich emerald green suggests groundedness and serenity, while crimson ignites drama and intensity. Even subtle shades like beige or muted lavender can infuse a scene with tranquility and softness. Use colored gels, painted backdrops, or clothing to match your theme. This method is especially impactful for portfolio building, Instagram curation, or editorial-style self-portrait series where consistent aesthetics strengthen visual identity.
19. Use Light and Shadow as Artistic Tools
Light is more than illumination—it’s the sculptor of emotion, shape, and mystery in photography. Deliberate shadow play adds depth, abstraction, and allure to your self-portraits. Utilize window blinds to cast linear patterns across your face, or let foliage filter natural light to create organic motifs. Even holding up lace, mesh, or netting in front of a light source can result in intricate overlays and soft diffusion.
A single directional light source, such as a desk lamp, flashlight, or candle, can transform your composition into a chiaroscuro tableau—emphasizing contrast and mood. Allow shadows to veil parts of your face or body, inviting intrigue and layered emotion. Move around the light source or change its distance to experiment with fall-off and intensity. These explorations let you capture cinematic drama or delicate subtlety without any post-editing, creating raw, tactile images straight from the lens.
20. Stitch a Self-Portrait Panorama
When a single frame feels too limiting, panoramic self-portraits allow you to tell broader, more immersive stories. This technique involves capturing a series of overlapping images that include both you and your environment, which are then merged digitally using photo editing software like Lightroom or Photoshop. The result is a sweeping, cinematic portrait that feels grand, expansive, and rooted in context.
Use a tripod to ensure consistent framing and lighting across shots. Change your position in each frame to appear multiple times within one composition—perhaps as different characters or performing a sequence of actions. This layered presence adds movement and narrative to your work. Panoramic self-portraits are ideal for conveying solitude in large spaces, creating conceptual themes, or showcasing intricate environments such as your studio, a wild landscape, or a curated interior.
This technique not only elevates the scale of your storytelling but also merges documentary realism with visual fiction, blurring the line between staged and spontaneous. It’s a method that allows your personality and environment to coexist and interact, revealing multidimensional stories with dramatic scope.
21. Capture Yourself Across the Seasons Start a personal project that spans an entire year by taking one self-portrait per season. Let the changing light, colors, and atmosphere reflect your evolving mood or appearance. These seasonal images become a visual diary of time, transformation, and nature’s rhythm.
Essential Tools for Self-Portrait Photography: A Complete Guide for Precision and Creative Freedom
Self-portrait photography is one of the most personal and liberating forms of visual storytelling. It allows you to explore identity, mood, and artistic vision on your own terms. While you don't need an elaborate studio or expensive gear to create impactful self-portraits, having the right tools can significantly elevate both your creative process and final results. From stability and lighting to remote triggering and reflectors, each tool plays a distinct role in helping you refine your technique and focus fully on artistic expression.
Let’s delve into the essential equipment that can transform your self-portrait photography practice, whether you're shooting in your living room, a sunlit backyard, or a makeshift indoor studio.
1. Tripod: The Foundation of Stability and Composition
A reliable tripod is perhaps the single most indispensable tool for self-portraiture. Unlike handheld photography, which introduces camera shake and inconsistent framing, a tripod ensures that your camera remains rock steady. This consistency is crucial not just for sharp images but also for maintaining identical angles across multiple shots—particularly useful for panoramas, diptychs, or compositing multiple versions of yourself in one frame.
Choose a tripod with adjustable height and a fluid head for flexibility. Some models feature a center column that can be inverted for flat-lay or overhead angles, which opens up new perspectives. Compact and travel-friendly options are great for outdoor sessions, while sturdier models with weight hooks provide added support in windy or unstable conditions. Using a tripod gives you the freedom to step away from your camera and concentrate entirely on posture, facial expression, and artistic concept.
2. Wireless Remote or Built-In Timer: Unleashing Fluid Movement
Self-portrait sessions can quickly become frustrating without a way to trigger the shutter remotely. Constantly running back and forth between the camera and your posing spot disrupts your flow and often results in awkward, rushed expressions. That’s where a wireless remote control or your camera’s built-in timer becomes invaluable.
A wireless shutter release lets you control the timing of each shot with minimal effort. Some advanced remotes offer interval shooting or time-lapse features, perfect for capturing a sequence of poses without returning to your camera each time. Others even come with mobile app integration, allowing you to preview and trigger shots via your smartphone.
Alternatively, most modern cameras offer timer settings with 5, 10, or even 20-second delays. Combine the timer with burst mode to capture several frames in rapid succession—this gives you more options to choose from and helps create candid, natural movement.
3. Continuous Lighting: Sculpting Mood With Controlled Illumination
Light is the backbone of compelling photography, and in self-portraiture, having control over your light source is crucial. Natural window light is beautiful, but it’s inconsistent and limiting. To achieve consistent, flattering lighting regardless of the time of day, a ring light or continuous softbox can be a game changer.
A ring light, often circular and mounted around the camera lens, produces an even, shadow-free glow—ideal for portraits that highlight facial features with softness. This type of lighting is particularly effective for close-up beauty shots, moody expressions, or editorial looks. Softboxes, on the other hand, diffuse light over a larger area, creating depth and dimension while minimizing harsh contrasts.
For more advanced setups, consider LED panels with adjustable color temperatures. These allow you to match ambient light or create mood-specific tones—cool for a dreamy, introspective feel or warm for a cozy, sunlit glow. Having dedicated lighting lets you shoot anytime, anywhere, without depending on fleeting golden hour rays or overcast conditions.
4. Reflectors: Filling Shadows and Adding Glow
Even with a great light source, shadows can sometimes dull the impact of your self-portrait. Reflectors offer an elegant solution by redirecting light to illuminate shadowed areas of your face or background. This subtle bounce of light adds nuance, texture, and clarity, making your images look more professional and refined.
Reflectors come in various finishes: silver for bright, crisp reflections; gold for warm, sun-kissed tones; white for gentle fill light; and black for absorbing light and creating contrast. A collapsible 5-in-1 reflector is a versatile option for both indoor and outdoor sessions.
You can prop your reflector against a chair, hang it with clips, or use a light stand. In the absence of a professional reflector, DIY versions like white foam boards, aluminum foil, or even a light-colored bed sheet can serve the purpose admirably. Mastering how to bounce and manipulate light will dramatically improve the three-dimensionality and emotional tone of your self-portraits.
5. Backdrops and Mounting Gear: Shaping Your Visual Environment
Though not often considered a core tool, a backdrop setup transforms your shooting space and frames your subject matter with clarity and cohesion. Backdrops help eliminate distractions from your environment and allow you to experiment with textures, colors, and styles that reinforce the story you’re telling.
Fabric backdrops such as muslin, velvet, or sheer curtains offer beautiful texture and light diffusion. Paper rolls are ideal for clean, editorial-style backgrounds. For creative shoots, consider painting your own canvas or hanging patterned textiles, lace, or even hand-written notes as background elements.
Support systems range from professional backdrop stands to clever DIY solutions using tension rods or wall-mounted hooks. Keeping your background intentional and clean helps guide focus toward your expression and composition.
Final Reflections: Self-Portraits as Artistic Discovery Self-portrait photography is not simply about documentation—it's about transformation, exploration, and vulnerability. Through self-portraits, you learn how to see yourself not just as a subject, but as a storyteller, a muse, and a creative force. Each image becomes a fragment of your journey as an artist, reflecting your growth and personal evolution.
Don’t wait for perfect conditions or the perfect look. Use what you have, trust your instincts, and create without inhibition. Your self-portraits will not only improve your photographic skills but will also help you discover your narrative voice—one frame at a time.