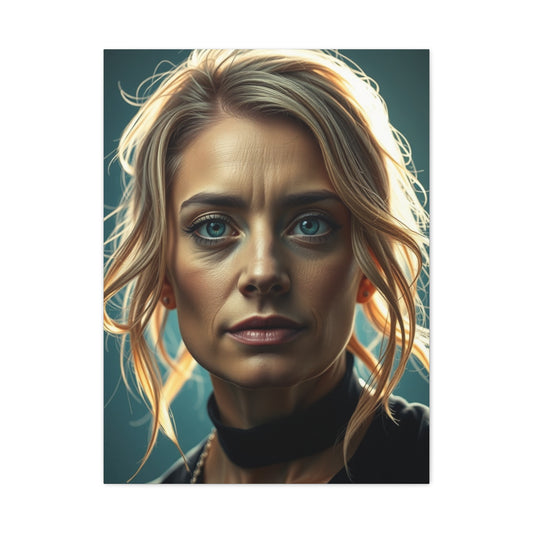
If you are looking to add a little more flair to your portrait photography, neon-inspired portraits are a fantastic and dynamic option. Neon portrait photography offers bold colors and dramatic lighting effects, creating a fresh and exciting twist on traditional portraiture. Whether you are capturing models in a street-style setting or experimenting with glowing, vibrant backgrounds, neon-inspired portraits give you the opportunity to play with light, colors, and shadows in innovative ways. What’s even better is that you don’t need expensive professional lighting setups to create this neon look. There are simple and affordable techniques that you can use to achieve striking results indoors with common tools. Let’s explore three easy and creative methods for capturing neon-like portraits at home or in a studio.
Using a Large Screen for a Neon Glow Effect in Portrait Photography
Creating neon-inspired portraits has become a popular and visually captivating way to experiment with lighting and color. One of the most accessible and cost-effective methods to replicate the striking glow of neon lights in portrait photography is by using a large screen, such as a TV, laptop, or tablet, as the light source. This technique enables photographers to control the lighting, colors, and overall aesthetic of their portraits without the need for expensive, professional neon signs or specialized equipment. The result is a vibrant, dynamic glow that mimics the neon lighting often seen in street photography, but with full creative freedom.
To get started with this technique, the first step is to find or create a bright, neon-colored image to display on the screen. The neon glow effect can be achieved with anything from neon signs to colorful abstract artwork or even custom-made neon designs. The beauty of using a screen is that you can have complete control over the image displayed, allowing you to experiment with different neon colors, shapes, and patterns that match the mood you want to convey. For example, you could use bold, eye-catching colors like bright pinks, blues, greens, and yellows or explore softer pastel neon hues. Customizing the screen’s design will help set the tone of your photo shoot and bring out the desired atmosphere. Whether you aim for a lively, energetic look or a calming, moody vibe, the possibilities are endless.
Once you have selected or created the ideal image, position your model in close proximity to the screen. The light from the screen will reflect onto your model's face, creating a beautiful neon glow that is both striking and ethereal. This technique works by utilizing the screen's brightness to illuminate the model from a unique angle, generating a soft, yet colorful light that complements their features. You’ll have full control over how the light interacts with the model’s skin tone and the overall look of the shot. Experimenting with various neon hues will allow you to emphasize different aspects of the subject's face, such as their eyes or facial features, by reflecting complementary colors onto them.
This technique works best in a dark environment, such as a room with minimal or no additional light sources. The darkness allows the neon glow from the screen to stand out and give the photo its vibrant, high-contrast effect. When the background is dark, your model will pop against the neon glow, making them the focal point of the portrait. However, to add some depth and visual interest to the composition, you can introduce low-level background lighting. This will help to add some subtle layers to the image, but it's essential to keep these background lights dim. Too much ambient lighting could compete with the neon effect and dilute its impact, making the model blend into the background.
One of the major advantages of using a screen for the neon glow effect is the level of creative freedom it offers. Unlike working with fixed neon signs outdoors, you can switch up the colors and imagery on the screen as many times as you like, allowing you to experiment with different looks throughout the shoot. For example, you could start with a soft pink glow and gradually shift to a bold red or blue to change the mood of the photos. If you prefer a more abstract or conceptual portrait, you could experiment with animated patterns, moving lights, or dynamic colors. This flexibility gives you the opportunity to explore a variety of neon-inspired aesthetics, helping to create a collection of unique portraits that stand out.
The ability to manipulate the screen's image also allows for more nuanced lighting effects. For instance, you can explore how different colors of light interact with your model's skin tone and their clothing, creating varied moods. Cool colors like blue and green can evoke a sense of calm or mystery, while warmer hues like red and orange can generate energy, excitement, or even tension. You can also explore more experimental combinations, like blending contrasting colors to create a more psychedelic or surreal effect. Playing with color gradients or choosing neon colors that highlight specific areas of your model's body will bring added depth to the portrait, making it feel more alive and three-dimensional.
When using this technique, it’s important to consider the positioning of your model. The way the light from the screen hits your subject will greatly affect the final look of the portrait. If you place the model too far from the screen, the neon glow might become too faint, resulting in a less dramatic effect. On the other hand, if the model is positioned too close to the screen, the light might become overwhelming, making it difficult to capture the details of the subject’s face. It’s essential to find the sweet spot where the neon light can gently illuminate the model without overpowering their features.
This method of using a large screen for creating neon-inspired portraits also offers immense convenience. Instead of hunting for neon signs or other outdoor light sources, which can be time-consuming and costly, you can simply turn on your device and start experimenting immediately. This technique also allows you to shoot in the comfort of your own space, whether it's a studio or a room in your home, without having to rely on outdoor conditions or specific locations. Additionally, by having complete control over the lighting, you can tweak the screen's brightness and the image being displayed to achieve the perfect lighting effect for your shot.
Another consideration when using a large screen as a light source is the potential reflection of the screen's light on other surfaces in the environment. To minimize unwanted reflections, you can adjust the angles of nearby objects or surfaces that might catch the screen's glow. A good trick is to keep the room as free of reflective surfaces as possible or to use soft materials to absorb excess light. Alternatively, if you want to incorporate reflections creatively, you can use reflective surfaces, such as mirrors or glass, to enhance the composition, adding another layer of visual interest.
Not only does this technique offer a fantastic way to create a neon effect, but it also provides a controlled and repeatable method for achieving similar results every time. The consistency in color and lighting makes it easier to produce a series of portraits with a unified style. This can be especially helpful for photographers working on themed shoots or projects where they need to maintain a cohesive look throughout a series of images. By having full control over the colors, you can ensure that each shot aligns with your artistic vision.
Create Surreal Portraits with Colored Cello Paper
For photographers looking to add a touch of creativity and a unique flair to their portraits, colored cello paper offers an exciting and affordable way to introduce neon lighting effects into their work. This simple technique can elevate your photos by adding bold, surreal neon-like colors to the composition, creating striking visual effects that are often seen in conceptual or surreal photography. Cello paper is a versatile and inexpensive material that, when combined with powerful light sources, such as torches or lamps, can create glowing, dreamlike effects that transform an ordinary portrait into something extraordinary.
The beauty of using colored cello paper in your photography lies in its accessibility and ability to create high-impact results with minimal equipment. To start, you’ll need a few basic items: at least two torches or lamps, sheets of colored cello paper (available in a wide range of neon shades), and your model. Cello paper can be found at craft stores or online, and it typically costs very little, making it a budget-friendly option for photographers who want to experiment with vibrant neon lighting. Once you’ve gathered your materials, you can begin experimenting with colors and placement to achieve the desired effect.
One of the best aspects of using colored cello paper for neon effects is the ability to create a variety of lighting combinations and intensities. Some of the most popular color pairings include blue and pink, which evoke a soft, dreamy, and otherworldly atmosphere. This combination is ideal for creating a calm, ethereal vibe, especially when you’re aiming to convey a sense of tranquility or mystery in your portraits. Other color pairings, such as red, yellow, or green, can provide more intense or passionate tones, depending on the mood you wish to create.
To use cello paper for this technique, the first step is to cut or wrap the colored cello paper around each torch or lamp. The colored light will pass through the paper, creating a glow that reflects onto your model’s face and surroundings. The closer the lights are to your subject, the more intense and saturated the neon effect will be. By controlling the distance between the light source and the model, you can fine-tune the intensity of the glow, allowing you to experiment with different levels of brightness and saturation.
Once the cello paper is secured around the lights, position the torches or lamps on opposite sides of your model. This setup ensures that the light is evenly distributed and creates a balanced, symmetrical effect. If you’re working with a team, you can have assistants hold the lights in place during the shoot. However, if you don’t have any helpers, you can place the torches or lamps on tripods or tables to achieve the same result. Using tripods allows you to have more control over the position of the lights, especially if you want to achieve specific lighting angles or experiment with different compositions.
The magic of this technique lies in how the neon-colored light interacts with your model’s features. Depending on the color of the cello paper and the proximity of the lights to your subject, you can create different emotional effects and atmospheres. For example, blue and pink lighting tends to evoke a sense of calmness and serenity, perfect for portraits that capture a peaceful or dreamy essence. Alternatively, if you’re looking to add more drama or intensity to your shots, you can opt for red or orange lights. These warm, fiery hues are ideal for conveying passion, excitement, or even tension, adding a layer of emotional depth to the portrait.
The versatility of colored cello paper gives you the freedom to experiment with a wide range of colors and light combinations. You can try a simple two-tone setup, where each torch uses a different color, or experiment with more complex setups that involve layering multiple colors of cello paper. The latter can create a more dynamic, multi-dimensional effect, where different colors blend and interact with one another, resulting in a surreal, glowing aura around your subject. For instance, you might use a combination of blue, pink, and purple lights to create a soft, pastel-like atmosphere that gives the portrait a mystical, otherworldly quality.
One important consideration when using this technique is the color temperature of the lights you’re using. While cello paper is available in a variety of neon shades, it’s crucial to select lighting that complements or enhances the colors of the paper. For example, warm-toned lights, such as yellow or orange, will create a different effect compared to cool-toned lights, such as blue or green. The key is to experiment with different light temperatures to see how they interact with the cello paper and your subject. You can also adjust the power or brightness of the lights to achieve a softer or more intense effect, depending on the mood you’re aiming for.
This technique is also highly customizable based on the type of portrait you’re capturing. For close-up or headshot portraits, positioning the lights closer to your model will create more pronounced neon glows, emphasizing facial features and creating a more dramatic look. If you’re shooting full-body portraits, you may want to keep the lights slightly farther away to create a more even glow across the entire subject. Additionally, you can experiment with the angle of the lights to cast intriguing shadows and highlights that will further enhance the surreal, dreamlike quality of the image.
Another way to enhance the impact of your neon-inspired portraits is to incorporate props or background elements that complement the colorful lighting. For instance, you might include reflective surfaces, such as mirrors or metallic objects, to create additional reflections of the neon light, adding depth and dimension to the shot. Alternatively, using textured materials, such as fabric or transparent plastic, can further diffuse the light and create an interesting, layered effect.
The cello paper technique also provides opportunities for creative storytelling in your portrait photography. You can use the neon lighting to reflect the personality or mood of your subject, adding a layer of narrative to the image. For example, if you’re capturing a portrait of someone with an edgy or bold personality, vibrant red or purple neon lighting might work well to reflect their confidence or intensity. For more subtle, introspective portraits, you might opt for softer neon shades like pastel pinks or blues to evoke a sense of vulnerability or contemplation.
When combined with the right composition and posing, this technique can help you create truly unique and captivating portraits. The vibrant colors and glowing effects will instantly catch the viewer’s eye, while the surreal, dreamlike atmosphere will leave a lasting impression. Experimenting with different combinations of light, color, and positioning will allow you to push the boundaries of traditional portrait photography and discover new, imaginative ways to capture the essence of your subject.
Add Extra Sparkle with Saturated Fairy Lights in Neon Portrait Photography
Fairy lights are one of the most affordable and creative ways to enhance neon-inspired portrait photography. These tiny glowing lights not only add whimsy and enchantment to your photos but also provide a versatile tool for creating layers of lighting and color. Fairy lights can be used to introduce a soft glow, accentuate your model's features, and add depth to both the foreground and background of your portraits. When strategically incorporated, they can elevate the mood of the entire image and complement the vibrant neon lighting effects you're working with.
The beauty of using fairy lights lies in their simplicity and the vast number of ways they can be used to enhance a portrait. Fairy lights are small and affordable, often available in long strands with hundreds of tiny bulbs. These lights are perfect for both practical and creative use, offering a gentle, diffuse light source that can be manipulated to create magical effects. You can use them in various ways: as a background feature, a prop for your model to interact with, or even as a direct light source that adds sparkle to the model’s face.
To begin using fairy lights in your neon portrait photography, one of the easiest and most effective methods is to place them in the background of your shot. Whether you choose a string of white lights or colored lights, their subtle glow will add depth and dimension to the scene. The soft light creates a bokeh effect that works wonders to separate your model from the background, creating a sense of distance and drawing attention to the subject. The blurred shapes of the fairy lights, when captured with the right aperture, will have a dreamy, almost ethereal quality, contributing to the surreal atmosphere that neon-inspired portraits are known for.
If you want to take your fairy light photography to the next level, you can have your model interact with the lights. For example, they could hold a string of fairy lights near their face or in their hands. This interaction will allow the light to wrap around them, illuminating their features in a soft and gentle glow. The closer the lights are to the subject, the more intense the light will be on their skin. This can help highlight facial features, giving them a warm, glowing appearance. The fairy lights will add another layer of light to complement the neon glow, allowing you to balance out the intensity of the neon light without overpowering the subject.
When your model is positioned in front of a neon-colored light source, the fairy lights provide an extra layer of light that adds an additional dimension to the portrait. For example, when shooting with blue, pink, or purple neon lights, the fairy lights can create a soft, warm contrast. This balance between harsh neon tones and the soft, sparkling light of fairy lights can make the model stand out in a subtle yet effective way. The result is a more harmonious and visually interesting image where the model’s features are illuminated without competing against the bold neon hues.
In addition to enhancing your model’s features, fairy lights also have the power to create a magical, sparkling effect in your portraits. This is especially true when the lights reflect off of certain surfaces. For instance, if your model is wearing glasses, the fairy lights will reflect off the lenses, adding a sparkling effect to their eyes. This subtle detail can bring your portrait to life and add an enchanting layer of depth. The reflection of the lights in the glasses will draw the viewer's attention to the model’s eyes, often giving the portrait a more intimate or surreal feel. If you want to emphasize the sparkle effect, you can experiment with positioning the lights to ensure they create reflections that enhance the overall aesthetic.
If you're aiming for a softer, more subtle effect, opt for white or warm-toned fairy lights. These lights will produce a gentle, ambient glow that complements the neon light without overwhelming it. White fairy lights are great for portraits that require a softer touch, providing just enough light to add definition without taking away from the vibrant neon colors. Warm-toned fairy lights, such as amber or golden, will create a cozy, inviting feel in your portraits. These lights can add a touch of romance or warmth to the neon atmosphere, perfect for portrait photography that tells a story or conveys a particular mood.
For portraits that require more vibrancy and energy, colored fairy lights are a fantastic option. When paired with neon lighting, colored fairy lights can enhance the overall neon effect by creating a dazzling, multi-colored scene. If you're working with neon green or blue lights, try pairing them with yellow, pink, or red fairy lights to create a complementary, eye-catching color palette. The interaction between the colored fairy lights and the neon hues will create a dynamic, energetic vibe that can make your portrait photography stand out.
A key technical tip when working with fairy lights is to use a wide aperture, such as f/1.8, to create a shallow depth of field. This will allow you to focus on your model while blurring the background, ensuring that the glowing fairy lights stand out in the image. A shallow depth of field will also create beautiful bokeh effects that add a dreamy, almost magical quality to your photos. Bokeh refers to the out-of-focus points of light in your image, which can be captured as soft, circular shapes. This effect works wonderfully with fairy lights, turning them into glowing orbs that add to the dreamlike quality of the neon-inspired portraits.
If your model is wearing glasses, this effect can be amplified. As the fairy lights reflect off their lenses, you’ll create additional layers of sparkle, further enhancing the magical atmosphere. This can be particularly effective for portraits where you want to highlight the eyes or bring a sense of wonder to the shot. The reflections in the glasses will not only emphasize the fairy lights but also provide an additional focal point that draws the viewer’s attention to the model’s face.
Fairy lights can also be used creatively to enhance different areas of your portrait. For instance, you might place fairy lights in the foreground to frame the subject, creating a more immersive composition. The lights will add dimension to the shot, making the model feel more integrated into the glowing environment. If you have the flexibility to control the lights in the background, you can create a sense of depth by varying the distance of the lights from the camera. Placing some lights closer to the model and others farther away will create an interesting layering effect, adding complexity to the shot without distracting from the main subject.
The versatility of fairy lights makes them an invaluable tool for any photographer interested in experimenting with neon-inspired portraiture. They can be used to add subtle highlights or bold, colorful effects, depending on the mood and style of the shoot. Whether you're shooting in a dark studio or using ambient neon lights as a backdrop, fairy lights offer a simple yet effective way to enhance the atmosphere and bring your portraits to life.
Additionally, using fairy lights offers an element of playfulness and creativity to your work. The gentle sparkle and soft glow they produce can bring a sense of joy and whimsy to portraits, making them ideal for capturing fun, energetic moments. Whether you are experimenting with neon lighting or simply adding an extra layer of depth and dimension, fairy lights provide a unique way to push the boundaries of traditional portrait photography and create something truly magical.
Technical Tips for Capturing Neon Portraits
When it comes to neon portrait photography, creativity plays a crucial role in producing eye-catching images. However, it’s equally important to have a solid understanding of your camera settings and how to manage lighting conditions effectively. Neon photography often involves low light and dynamic, colorful lighting, making it necessary to fine-tune your camera settings to achieve well-lit, sharp, and balanced images. Below are several essential technical tips that will help you master the art of neon portrait photography and elevate the quality of your shots.
1. Use a Fast Lens for Sharp, Well-Lit Shots
In neon portrait photography, a fast lens with a wide aperture (such as f/1.4 or f/1.8) is a vital tool for achieving sharp and well-lit images. Fast lenses allow more light to enter the camera, making them ideal for low-light conditions, which are common in neon photography. Neon lights are typically dimmer than conventional lighting, so capturing enough light is essential to properly expose your shots and bring out the vivid colors of the neon glow.
The advantage of using a large aperture (low f-number) is that it enables you to achieve a shallow depth of field. This effect helps isolate your subject from the background, making the model stand out clearly against the colorful neon lighting. By blurring the background, you draw the viewer’s attention directly to the subject, which is especially important when you want the model to be the focal point in a dynamic neon-lit portrait. Additionally, a shallow depth of field creates a dreamy, ethereal look that enhances the overall mood of the shot.
If you’re new to using a fast lens with a large aperture, you might find it a bit challenging to achieve the right focus at first. Because the depth of field is narrow, getting the subject in sharp focus can require a bit of practice. However, once you become familiar with manual focusing and adjusting for large apertures, you’ll be able to capture images with beautiful, crisp details and softly blurred backgrounds that make the neon glow pop.
A fast lens not only helps in achieving sharpness and beautiful bokeh but also helps to maintain a high-quality image in low-light settings. Without the proper lens, neon colors can appear muted or washed out, but a fast lens ensures that the neon effect is vivid, bright, and true to life. This technique is particularly useful when you’re shooting in darker environments and want to ensure the neon lights come through with full intensity while maintaining sharpness in your subject’s facial features.
2. Don’t Be Afraid to Increase Your ISO
In low-light photography, especially with neon lighting, adjusting your ISO is a critical step in capturing well-exposed images. ISO refers to the sensitivity of your camera’s sensor to light, and increasing your ISO allows you to capture more light, which is especially important when shooting in dark environments with neon lighting. While higher ISO values can introduce grain or noise in your images, they also help in achieving proper exposure, ensuring that your subject is clearly visible without needing to increase your lighting intensity.
If you're photographing with neon lights, the brightness of the light source may not always be sufficient to properly expose your shot, particularly if you're working with smaller or dimmer neon signs. Raising your ISO setting will allow your camera to pick up more light, making it easier to achieve a balanced exposure. For example, increasing your ISO to settings such as ISO 800 or 1600 can help you capture the neon glow without sacrificing detail. This is particularly beneficial for portraits where you need to maintain the vibrancy of the neon lighting without underexposing your subject.
While using a higher ISO setting can lead to more noise in the image, this can be easily addressed during post-processing. Shooting in RAW format will provide you with more data to work with when editing, allowing you to fine-tune exposure and reduce noise without losing essential details. In editing software like Lightroom or Photoshop, you can apply noise reduction tools that preserve the overall quality of your photo while minimizing any graininess caused by high ISO settings.
Additionally, if you’re shooting neon portraits for artistic purposes, embracing a bit of grain can add character and a cinematic feel to the image. Many photographers intentionally add grain to their neon portraits to enhance the mood or evoke a particular atmosphere. Finding the balance between clarity and atmosphere is key when shooting in low light, and experimenting with different ISO settings can help you achieve the desired effect.
If you find that your image becomes too noisy even with a higher ISO, you can balance it out by using a larger aperture (smaller f-number) to let in more light, or you can stabilize your camera by using a tripod. The tripod will prevent camera shake, enabling you to use a slower shutter speed and avoid increasing the ISO too much.
3. Use Manual Focus for Greater Control
Autofocus is a useful feature in many photography scenarios, but in neon portrait photography, it can sometimes become an obstacle, particularly in low-light conditions. When working with neon lights, autofocus systems can struggle to find the right focus point because the camera often has trouble locking onto the subject in a dark, colorful setting. In such cases, switching to manual focus can give you greater control over the sharpness and clarity of your portrait.
Using manual focus allows you to choose exactly where you want to focus, which is essential when working with vibrant neon lighting. Neon lights can create multiple reflections and bright spots in the frame, and autofocus may mistakenly focus on the wrong part of the image. By manually adjusting the focus, you ensure that the model’s face remains crisp and clear, even when surrounded by strong, colorful neon lights.
Manual focus also allows you to fine-tune the focus to suit your artistic vision. For instance, if you want to highlight your model’s eyes or a specific facial feature, you can easily adjust the focus to ensure that the area you want to emphasize is sharp. This is particularly useful in neon portraits, where the light interacts with the subject in unique ways and where small details, like the reflection of the neon light in the eyes or the contours of the face, can add to the overall impact of the image.
If you're new to manual focus, it may take some time to get comfortable with it, but practicing with simpler subjects before working with neon lighting will help. A good technique to practice is focusing on objects or details in your environment, like textures or patterns, to get accustomed to how the focus ring works. Once you get the hang of manual focusing, it will give you complete control over your neon portraits and allow you to create sharp, well-focused images even in challenging lighting conditions.
For photographers who are still adjusting to manual focus, some cameras have focus peaking, which highlights the areas in focus, making it easier to adjust. If your camera has this feature, you can take advantage of it to improve your manual focusing accuracy, particularly in dark, low-light scenarios.
Conclusion
Neon-inspired portrait photography is an exciting and creative way to explore new lighting techniques, and you don’t need expensive gear to achieve striking results. By using simple tools such as large screens, cello paper, and fairy lights, you can create vibrant and dynamic portraits that capture the magic of neon light. Additionally, by understanding essential technical skills like using a fast lens, adjusting ISO, and mastering manual focus, you can take your neon portrait photography to the next level. With some practice and experimentation, you'll soon be able to capture stunning, neon-lit portraits that are both dramatic and captivating.


