Clouds are far more than weather elements floating across the sky—they're powerful compositional tools that can transform an ordinary photo into something emotive, surreal, or even epic. Whether you’re a hobbyist capturing fleeting beauty on your morning walk or an aspiring landscape photographer building your portfolio, understanding how to incorporate clouds into your work can elevate your images from good to exceptional.
This comprehensive guide offers eight refined techniques for photographing clouds that will help you capture breathtaking visuals, boost your storytelling through imagery, and maximize the emotional resonance of your photos.
1. Understanding the Emotional Influence of Cloud Formations in Photography
Clouds are far more than transient vapors drifting across the atmosphere—they're poetic, symbolic elements that can dramatically alter the emotional undertone of any photograph. Whether you're shooting expansive landscapes, minimalist portraits, or architectural studies, clouds can either support your subject or become the centerpiece of the frame. Mastering the ability to read and predict the sky's canvas is an essential skill for any photographer who wants to harness the sky’s atmospheric power.
Clouds provide a unique opportunity to tell visual stories. Their patterns, colors, altitude, and density all work together to evoke feelings ranging from tranquility to turmoil. Some photographers spend their entire careers chasing storms or documenting delicate cirrus veils during golden hour—all because the skies above offer an infinite range of compositional moods. To capture clouds effectively, you must first understand their types and the roles they can play within your creative vision.
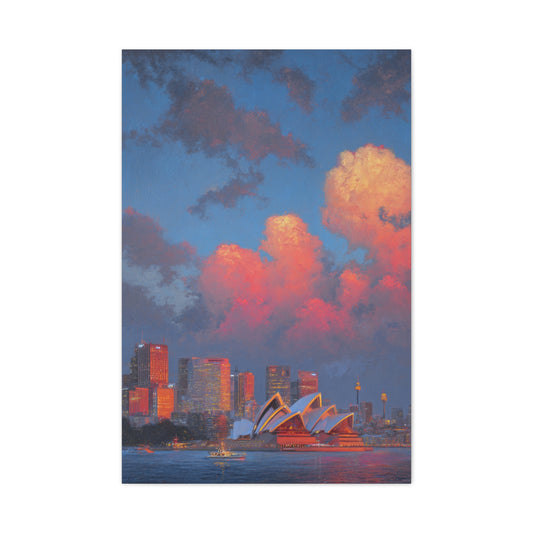
Cumulus clouds are often the first kind that comes to mind—fluffy, rounded, and scattered across deep blue skies. These are fair-weather clouds and are synonymous with calmness, innocence, and the lightness of summer afternoons. Photographs that feature cumulus clouds often carry an upbeat, cheerful energy. Whether framing them above a sunflower field, a coastal harbor, or a mountain pass, these clouds offer striking contrast and natural balance. Their bold shapes work beautifully with wide-angle lenses, particularly when paired with polarizing filters that deepen the sky’s hue and make the whites pop.
|
Related Catagories: |
In stark contrast, cumulonimbus clouds are the sky’s most dramatic performers. Towering into the stratosphere and often shaped like anvils, they signify the onset of electrical storms, torrential rain, or even tornadoes. For the atmospheric photographer, these clouds are a goldmine. They offer a sense of intensity and movement, ideal for storytelling with themes of natural power, unpredictability, and awe. To effectively capture these turbulent behemoths, a telephoto lens helps compress distance and exaggerate their scale against relatively tiny human-made elements or geographical landmarks. These images often strike a cinematic chord, hinting at the sublime power of nature and man's relative smallness within it.
Stratus clouds, on the other hand, present a more subdued palette. These low-hanging layers blanket the sky with uniform grayness, obscuring the sun and muting natural light. At first glance, they may seem unappealing to photographers seeking vibrant colors, but these overcast conditions create soft, diffused lighting—ideal for evenly lit portraits, moody street photography, and introspective black-and-white imagery. The lack of shadows makes it easier to maintain consistent exposure across a scene, particularly useful when capturing facial expressions or subtle architectural textures. Stratus-filled skies are also excellent for incorporating silhouetted objects, especially trees, structures, or figures that can break through the homogenous gray and create tension in the frame.
Then there are stratocumulus clouds—visually somewhere between cumulus and stratus. These clouds form low in the sky in irregular clusters or bands and often cover large sections of the sky without completely blocking out light. They offer a unique aesthetic—soft, woolen textures that hint at a melancholic stillness. These clouds can introduce rhythm into an otherwise static composition and lend an atmospheric edge to minimalist or meditative photography. When placed behind still lakes, desolate roads, or solitary subjects, stratocumulus formations evoke serenity tinged with ambiguity.
Matching Cloud Personalities with Creative Intent
Photography is all about intent. Before releasing the shutter, the best photographers visualize the emotional impact of the scene they are capturing. Clouds should never be an afterthought; they are visual indicators of tone. Think of them as environmental characters—setting the stage for your narrative.
Cloud density and structure matter as much as light direction. A cumulus-filled sky, with strong midday sunlight, will cast stark shadows and offer high-contrast drama. This is perfect for documentary-style work or travel shots emphasizing vibrancy and clarity. In contrast, a soft cloud veil during early morning fog can create painterly, ethereal compositions suited for fine art prints or conceptual series.
Reading the motion of clouds can also transform your photographic timing. Wispy cirrus clouds high in the atmosphere signal calm weather and usually precede sunsets with radiant color explosions. Planning your shoot based on these cues allows you to compose your frame in a way that leads the viewer’s eye naturally. Whether using leading lines in a wheat field or reflections in still water, aligning these elements with cloud movement elevates your composition’s harmony.
Certain clouds invite slow shutter experimentation. The slow drift of stratocumulus or the energetic swell of cumulonimbus becomes a stunning blur when captured over several seconds. Long-exposure cloud photography creates an illusion of time suspended—a technique that is both technically satisfying and visually rewarding. It emphasizes transience and the ever-shifting mood of the sky, something few static subjects can deliver.
Technical Considerations for Capturing Atmospheric Cloud Imagery
Translating clouds from what your eyes see to what the camera records requires careful attention to settings, gear, and timing. Each cloud type reacts differently to natural light, and different lighting conditions demand distinct configurations. For example, capturing the full depth of a bright cumulus sky typically calls for narrower apertures such as f/11 or f/13 to maintain clarity across the frame. Lower ISO settings, around 100 or 200, preserve fine cloud texture without digital grain. Use of a circular polarizer here can intensify contrast between sky and cloud, especially when the sun is at a 90-degree angle to the lens.
Storm clouds, with their unpredictable light patterns, often require bracketing multiple exposures to capture the full dynamic range. HDR techniques are particularly effective for cumulonimbus structures, ensuring that neither the dark base nor the illuminated crown is lost in the process. Post-processing is essential in such cases—not to alter reality, but to restore the visual balance perceived in the moment of capture.
With stratus and stratocumulus clouds, subtle tonal shifts become more important than contrast. Soft curves and gentle gradients are what define the visual appeal. Shooting in RAW format preserves this nuanced detail, giving more control during the editing phase. Minimalist compositions benefit from leaving large portions of the frame occupied by these cloud types, especially when paired with a strong, singular subject in the foreground to ground the visual narrative.
Another technical tip is to use weather apps that indicate not just precipitation but cloud base levels and sky cover percentage. Knowing in advance that the sky will be 75% covered with low-altitude clouds can help you prepare gear like wide-angle lenses, filters, and even drones if aerial photography is in your plan. Drones offer entirely new perspectives on cloud interaction with the earth’s surface, especially over coastal or mountainous regions where mist and sky merge.
2. Unlocking the Power of Weather Intelligence in Cloud Photography
Capturing striking cloud imagery doesn’t rely solely on instinct or luck—it requires calculated planning and a keen understanding of meteorological patterns. Professional and amateur photographers alike can elevate their cloud photography game by mastering the use of modern weather forecasting tools. These technologies have transformed the way we prepare for outdoor shoots, turning uncertainty into strategy.
While many wait passively for photogenic skies to appear, seasoned photographers rely on data-driven insights to anticipate not only when clouds will be present, but what type they’ll be, how they’ll move, and how they’ll interact with changing light. This foresight leads to more purposeful shooting, where every frame benefits from timing, precision, and atmospheric awareness.
The best time to photograph clouds often coincides with shifting weather systems. Transitional periods—such as after a rainstorm or during the golden hour before a cold front—produce the most expressive and vibrant cloud formations. These are moments of atmospheric drama, and by learning to track them, you place yourself in a position to capture clouds at their most visually compelling.
Utilizing Digital Weather Platforms for Artistic Advantage
Thanks to the evolution of mobile applications and web-based tools, photographers now have access to hyper-detailed environmental data that was once reserved for pilots or meteorologists. Platforms such as AccuWeather, Windy, and The Weather Channel provide an abundance of information including cloud coverage forecasts, precipitation intensity, wind direction, and dew point—all of which can influence how the sky will behave in your chosen location.
Cloud coverage maps, for example, are instrumental in predicting photographic conditions. A partially overcast sky may produce layered light with strong highlights and deep shadows—ideal for dynamic compositions. Meanwhile, high overcast conditions often yield softer lighting, suitable for portraits or minimalist scenes where cloud uniformity complements subtle foreground subjects.
Radar overlays are particularly valuable. These live-updating visuals display the movement and evolution of cloud systems in real-time, giving you the ability to anticipate dramatic shifts before they occur. Watching a bank of cumulonimbus clouds roll in from a neighboring region allows you to travel ahead of the weather and set up before the storm reaches its visual climax. This level of preparedness can be the difference between an average snapshot and an award-worthy image.
For those photographing in remote locations, downloading radar data or using offline map features can ensure continued access to cloud movement patterns even when internet connectivity is limited. Wind flow animations, often available in advanced apps like Windy, also provide directionality cues—ideal for time-lapse photography where the horizontal drift of clouds can create breathtaking movement sequences.
Humidity levels and air pressure readings offer further insight. High humidity often correlates with denser, more defined cloud formations. Meanwhile, rapidly dropping pressure typically indicates incoming weather shifts—valuable information for storm chasers and those aiming to capture volatile skies.
Aviation Weather Tools and Sky Layer Analysis
Beyond common weather apps, photographers can unlock even more precise forecasts through aviation-specific tools. These resources, built primarily for pilots, offer exceptional detail about sky conditions that can be repurposed for creative photography. METAR reports, TAF data, and aviation maps allow users to track cloud base height, visibility, ceiling layers, and temperature variations at specific altitudes.
Understanding cloud base height is crucial for aligning your shoot with the right lens, angle, and subject. For instance, a low cloud base over a mountainous region can create the illusion of peaks piercing through the mist—a composition that evokes mysticism and isolation. Conversely, high-altitude cirrus clouds during sunset can act as massive color reflectors, producing ethereal pastel shades across the sky.
Another fascinating phenomenon to watch for through aviation tools is temperature inversion. This occurs when a layer of warm air traps cooler air beneath it, leading to fog-like conditions or cloud decks that rest dramatically on terrain. When captured from above—whether from a high mountain, tall building, or drone—these inversions can deliver surreal imagery that feels otherworldly.
Aviation maps also provide forward visibility and wind shear reports, which are important for drone-based cloud photography. Knowing whether conditions are suitable for aerial photography ensures safety and prevents wasted effort in unpredictable skies. Additionally, sunrise and sunset forecasts—often integrated into these platforms—can help plan for the exact angle and quality of light, aiding photographers aiming to time their shoot with golden or blue hour transitions.
Planning a photoshoot around rare atmospheric occurrences like lenticular clouds, noctilucent clouds, or crepuscular rays becomes much more achievable when you're using aviation-grade forecasting tools. These uncommon visual elements offer photographers a chance to create something truly rare and mesmerizing—images that stand out in an oversaturated visual landscape.
Planning Strategically for Maximum Sky Impact
With all these digital resources at your fingertips, the next step is strategic execution. Begin by selecting a target location based on both topographical and meteorological synergy. Locations with wide-open views—such as coastlines, deserts, and plains—tend to produce the most expansive cloud vistas. Mountain ridges and rolling hills can also create fascinating interactions with low-hanging clouds or fog banks.
Use historical weather trends for that region to determine optimal shooting seasons. For example, certain areas may have monsoon periods or dry seasons that are more conducive to forming dramatic skies. Use archive data to study patterns in storm development or high-altitude wind changes that could influence cloud dispersal or coloration.
Plan your route and arrival time with ample cushion to adjust your position based on shifting radar signals. Bring a printed map or download offline versions of your weather data, as signal loss in remote areas is common. Mark out multiple vantage points ahead of time so you can reposition quickly based on where the cloud activity intensifies.
When on location, always remain observant. The sky is a living, breathing canvas, and clouds can evolve quickly. What starts as a dull, hazy morning can erupt into a fiery spectacle of color and shape within minutes—especially when backlit by the rising or setting sun. Being mentally present and responsive to these changes allows you to adapt creatively in the moment.
In addition, use natural landmarks as compositional anchors to lend scale and structure to your cloudscape. A lone tree, a distant mountain, or a quiet lake can give spatial context to your sky, turning even simple cloud formations into evocative visual narratives. Consider also the motion of clouds when composing your frame—diagonal movement can lead the eye, while vertical motion can create a feeling of elevation or ascent.
When paired with your camera’s histogram, radar tools can help avoid overexposure or loss of detail in complex lighting scenarios. Monitoring cloud density and sun position in tandem ensures better control over highlights and shadows, resulting in well-balanced exposures and minimized editing in post-processing.
3. Mastering Technical Control for Captivating Cloud Photography
Photographing clouds may appear effortless at first glance—after all, they’re abundant and ever-present. Yet truly evocative cloud images demand more than a casual click. They require deliberate adjustments of your camera’s exposure settings to reveal detail, capture dynamic range, and enhance the cloud’s texture, form, and motion. When done right, the results can be emotionally stirring and visually memorable.
Understanding how to optimize your camera for the conditions in front of you is an essential part of creating well-balanced cloud photos. Each decision—ISO, aperture, and shutter speed—affects how the clouds are rendered, whether you’re aiming to freeze their fleeting structure or smooth their movement across the sky. Striking this balance between clarity and creativity transforms cloud photography from reactive to intentional.
Manual control allows you to adapt your gear’s capabilities to the dynamic qualities of the sky. Since clouds change shape, density, and tone constantly throughout the day, you must be able to respond with precision. The interplay of available light and cloud opacity makes exposure a moving target. Having a firm grasp on how each setting influences your image is a crucial skill that leads to consistently strong compositions.
Balancing Exposure: ISO, Aperture, and Shutter Synergy
The foundation of any successful photograph lies in properly balanced exposure. For cloud photography, this often begins with ISO settings. Low ISO values—such as 100 or 200—should be your go-to during daylight hours. These values ensure minimal digital noise, preserve subtle gradations in tone, and help maintain the intricate textures often found in cumulus or stratocumulus formations. As natural light diminishes during twilight or in heavily overcast conditions, increasing ISO to 400 or 800 may become necessary to avoid underexposed frames. However, it’s wise to avoid venturing beyond ISO 800 unless absolutely needed, as higher values tend to erode the fine details that make cloud structures compelling.
|
Related Catagories: |
Aperture plays a vital role in controlling depth of field and image sharpness. Cloudscapes, especially those involving foreground elements such as mountains, trees, or urban silhouettes, benefit from deeper depth of field to keep all elements sharp. Using an aperture setting between f/11 and f/16 typically produces crisp results throughout the frame. These mid-to-small apertures optimize clarity while minimizing distortion at the edges. However, avoid exceeding f/16 on most lenses, as diffraction can introduce softness and reduce the overall sharpness of your image.
Shutter speed, the third element of the exposure triangle, adds a creative layer to your cloud compositions. If you’re interested in freezing clouds to showcase their defined shape against a vibrant sky, a fast shutter speed—such as 1/500 second or faster—is recommended. These settings work particularly well on breezy days when clouds move rapidly or during high-contrast lighting, like at midday. If instead you wish to capture the motion of clouds to express time, movement, or emotion, slow shutter speeds ranging from one second to thirty seconds allow the clouds to smear softly across the frame, creating a dreamlike or ethereal quality.
Creative Exposure Techniques for Atmospheric Effects
Beyond the basics of exposure, there are specific techniques tailored to cloud photography that can help you achieve distinctive artistic results. One such approach involves using exposure bracketing. This involves taking a series of images—typically three to five—at different exposure values (one underexposed, one overexposed, and one at standard exposure). These images can later be blended in post-processing to create high dynamic range (HDR) cloudscapes. This method is particularly useful when shooting sunrises or sunsets, where bright skies contrast with darker landscapes, and a single exposure would either blow out highlights or lose shadow detail.
Another method is to shoot in Aperture Priority mode when speed is of the essence. This semi-automatic setting allows you to choose your preferred aperture while the camera adjusts the shutter speed accordingly. It’s ideal for fast-changing light conditions, such as clouds parting unexpectedly to reveal strong sunlight. Aperture Priority helps maintain creative control over depth of field while ensuring proper exposure as the sky evolves.
If your goal is to produce long-exposure images during the day, using neutral density filters is essential. These filters reduce the amount of light hitting the sensor, allowing for much longer shutter speeds even in bright environments. With an ND filter in place, you can achieve shutter speeds of ten seconds or more in midday conditions, turning scattered clouds into streaks and capturing the sensation of motion that otherwise remains invisible to the naked eye.
Manual mode, though less forgiving, gives the photographer complete control and is especially useful for low-light shooting or night scenes where clouds are illuminated by the moon or city lights. In these situations, you might use a wider aperture such as f/4 or f/5.6, combined with a longer shutter speed—up to 30 seconds—to capture enough light without pushing ISO to extremes. Always use a tripod for stability, and consider a remote shutter release to avoid unintended camera shake during these longer exposures.
Fine-Tuning for Optimal Sharpness and Detail Retention
To make your cloud photographs stand out, attention to detail is critical. One often overlooked factor is white balance. While auto white balance does a reasonable job in many conditions, setting it manually allows you to enhance the tonal character of the sky. For cooler tones, such as early morning mist or moody overcast conditions, use a Kelvin temperature setting around 5500–6000. For warmer, golden-hour scenes, setting your white balance between 6500–7000 brings out the fiery oranges and reds that enrich sunset clouds.
Metering mode is another area where subtle changes can significantly influence results. Evaluative or matrix metering works well for balanced exposures in evenly lit skies. However, for high-contrast scenes where the sun may be peeking through the clouds, spot metering helps you properly expose for the brightest or most important part of the image, preventing blown-out highlights.
Using your camera’s histogram is invaluable when shooting clouds. A well-exposed cloud photograph should show a smooth curve across the tonal range, with no spikes at the extreme ends (unless you're intentionally creating high-key or low-key images). Relying on the LCD preview alone can be misleading, particularly under bright sunlight, so the histogram serves as an objective guide to ensure your highlights retain detail.
Autofocus can struggle in low-contrast or low-light sky scenes. Switching to manual focus and using live view zoom can help ensure critical sharpness, especially when working with clouds at twilight or capturing celestial events in the same frame. Some mirrorless cameras also offer focus peaking, which highlights the sharpest areas in real-time—a valuable feature for precision shooting.
Finally, consider the aspect ratio when composing cloud images. While the traditional 3:2 format works well for most scenes, experimenting with 16:9 or even 1:1 ratios can enhance composition, especially when isolating sections of the sky or emphasizing symmetry. Cropping with intent in post-processing allows for further refinement and visual focus, especially when the sky’s patterns become the subject itself.
4. Unlocking the Dreamlike Aesthetic of Cloud Movement
Long exposure photography offers a gateway to transforming everyday scenes into otherworldly landscapes. When applied to cloudscapes, this technique reveals the passage of time in ways our eyes can’t perceive. Instead of capturing clouds in sharp, frozen states, long exposures stretch their motion across the sky, painting them into soft ribbons, sweeping currents, or ghostly layers depending on their speed and form. This visual transformation often evokes feelings of serenity, mystery, or even surrealism.
Clouds are inherently transient, drifting silently in and out of form, and long exposure photography gives that transience a visual language. Whether you’re shooting coastal seascapes with fast-moving cumulus formations or tranquil countryside horizons under layered stratus decks, long exposures allow you to distill hours or minutes into a single expressive image. In essence, you are not simply capturing a moment—you are sculpting time itself.
This technique is commonly embraced in fine art photography because it moves beyond literal representation and into interpretation. Blurred clouds can serve as abstract backdrops, atmospheric textures, or dynamic storytelling devices. They elevate your composition, adding a temporal element that static exposures often lack. However, mastering this creative approach requires a blend of technical precision, awareness of weather patterns, and the right tools for execution.
Configuring Camera Settings for Artistic Motion Blur
To begin crafting long exposure cloud images, it’s essential to gain full control over your camera’s settings. Automatic modes can’t interpret motion the way you intend, so switching to full Manual mode is non-negotiable. This gives you independent control over shutter speed, aperture, and ISO—each of which plays a critical role in shaping the final outcome.
Start with ISO. Choose a low value—ideally 100 or 200—to minimize noise and preserve tonal smoothness across the sky. Low ISO is particularly important during daytime shoots, where exposure control becomes more challenging due to abundant natural light. Keeping ISO at its lowest possible setting reduces the sensor’s sensitivity and helps maintain cleaner gradations between the shifting hues and cloud layers.
Next, adjust your aperture to fall within the f/11 to f/16 range. This aperture range provides optimal sharpness, particularly across wide scenes where you want foreground and background elements to remain in focus. Smaller apertures also allow less light into the sensor, enabling slower shutter speeds without risking overexposure. However, it’s best not to go smaller than f/16, as most lenses begin to lose resolution due to diffraction at that point.
Shutter speed is where the artistic element enters the equation. Depending on ambient lighting and cloud velocity, exposure durations can range from a few seconds to several minutes. For fast-moving clouds during the day, try starting with shutter speeds between 1 and 5 seconds. This will introduce subtle motion while maintaining some recognizable structure. During twilight or blue hour, you can extend exposures to 15, 30, or even 60 seconds to achieve dramatic, streaky textures that span the sky.
For exposures longer than 30 seconds, switch your camera to Bulb mode. This setting allows you to keep the shutter open as long as you hold down the release—ideal for multi-minute captures of slow-moving clouds or night scenes illuminated by moonlight or ambient city glow. In this case, using a remote shutter release or an intervalometer is crucial to avoid physically touching the camera, which could introduce motion blur.
Many mirrorless and DSLR systems also allow you to engage electronic shutter or mirror lock-up features. Activating these further reduces internal vibrations, giving you sharper base images—an essential factor when you intend to print or present your work at larger scales.
The Essential Role of Equipment and Environmental Awareness
Executing long exposures isn’t just about internal camera settings—it’s equally about stability, preparation, and responding to environmental variables. A solid tripod is absolutely vital. Even the slightest shake can render a long exposure unusable, as the camera captures not just cloud motion but unintended blur from vibration. Invest in a weighted tripod with a sturdy center column, and hang your camera bag or a sandbag from the base for added ballast during windy conditions.
Remote triggers, whether wired or wireless, are indispensable tools in this setup. They allow you to initiate and end the exposure without touching the camera body. Some advanced models even let you program exposure duration, making it easier to maintain consistency during a time-lapse or multiple long exposure attempts under shifting light.
Weather conditions are also key to determining your exposure length and creative direction. Strong winds will cause clouds to move faster, requiring shorter exposures to capture that sense of flow. In contrast, slow-moving cloud banks need longer durations—often up to several minutes—to register any noticeable motion in the frame.
Cloud type also matters. Cirrus clouds, which are thin and wispy, create delicate streaks during long exposures and are excellent for minimalist or abstract scenes. Cumulonimbus formations bring drama and volume, forming thick, layered motion patterns when captured over time. Stratocumulus, with their low and clustered shapes, produce a rolling texture that can dominate the sky and fill wide-angle compositions with mood and movement.
It’s wise to pair long exposure planning with forecasting tools. Apps that show wind direction, cloud density, and sunset timing can help you anticipate how a scene will develop. Knowing the wind’s direction, for instance, helps you align your composition to maximize the diagonal movement of clouds, guiding the viewer’s eye through the frame. It also informs whether you should use a vertical or horizontal orientation for your shot.
When shooting during the day, you’ll need neutral density (ND) filters to extend your shutter speed. ND filters act like sunglasses for your lens, limiting the amount of light that enters. An ND64 filter cuts six stops of light, making it possible to shoot 30-second exposures in full daylight. Combine it with a polarizer to reduce glare and enhance contrast between the clouds and the sky’s color gradient. Always check your exposure with a test shot and fine-tune from there.
Elevating Composition Through Movement and Tonality
With your settings dialed in and your equipment stabilized, the final piece of the long exposure puzzle lies in composition. Cloud movement should never be an afterthought. It must serve the visual balance and emotional tone of the frame. Aim to compose in a way that allows the motion to interact with other elements in your scene. If clouds are moving diagonally, compose your shot to include a road, river, or fence line that echoes that direction, creating visual harmony.
Leading lines created by blurred clouds can draw attention to focal points such as a lighthouse, mountain peak, or tree. In symmetrical scenes—such as reflections in water—long exposure clouds add a layer of complexity that can make the composition feel cinematic or timeless.
Also, consider how the tonality of your long exposure will interact with your subject matter. High-key images with brighter cloud blur can evoke calmness, wonder, and introspection. Low-key exposures, on the other hand—where the sky is dark and the clouds are heavy and brooding—can suggest melancholy or impending change. Color temperature also plays a role here. Cooler tones can feel distant or mysterious, while warmer tones introduce intimacy and vibrancy.
Shoot in RAW format to retain maximum dynamic range and tonal information. This allows for finer adjustments in post-processing, especially when recovering highlights or enhancing cloud contrast. Tools such as graduated filters in Lightroom or selective masking in Photoshop can help refine the transitions in the sky without compromising natural gradients.
As with all photography, practice, experimentation, and review are key to mastering long exposure cloud photography. Study your results carefully. Notice which combinations of exposure time, cloud type, and motion direction create the most compelling visuals. The more intentional your process becomes, the more distinct your images will feel.
5. Employ Neutral Density Filters to Shoot in Broad Daylight
Shooting long exposures under a bright sun can be challenging. That’s where neutral density filters come into play. These are essentially darkened pieces of optical glass that sit in front of your lens, reducing the amount of light entering the camera. The result? You can use slower shutter speeds without blowing out your highlights.
ND filters come in varying strengths, typically ranging from ND2 (1-stop light reduction) up to ND1000 (10-stops). For cloud photography, ND8 or ND16 are particularly effective during daytime conditions. They allow you to extend your exposure time long enough to create movement blur without overexposing the image.
Stacking filters is another creative option. Combine an ND filter with a polarizing filter to deepen sky color, cut glare, and add contrast between clouds and the blue sky.
When using stronger filters, manual focusing becomes necessary as auto-focus often struggles in low light. It’s advisable to pre-focus your scene, then switch to manual focus before attaching the filter. Also, be sure to block viewfinder light leaks with your camera’s built-in cover or a piece of tape.
6. Leverage the Magic of the Golden Hour
There’s no better time to photograph clouds than during golden hour. The quality of light just after sunrise and shortly before sunset is diffused, warm, and angled, casting elongated shadows and highlighting cloud formations with vivid hues.
At these times, even ordinary clouds become radiant—bathed in oranges, pinks, and deep reds. This natural color enhancement eliminates the need for post-processing filters or heavy editing.
Golden hour also accentuates three-dimensionality. The low-angle sunlight interacts with the contours of the clouds, creating highlights and shadows that give the sky more structure. It’s an ideal moment to shoot silhouettes, reflections, or high-contrast imagery.
Use a moderate aperture like f/8 or f/11 to keep the scene crisp. Bracket your exposures for dynamic range and consider underexposing slightly to retain details in the highlights. This preserves texture in the clouds and prevents the sky from looking washed out.
7. Enhance Your Composition by Including Earth Elements
Clouds often appear most impactful when juxtaposed with elements from the landscape. Including terrestrial features like forests, mountains, skyscrapers, or open fields can add scale, context, and visual intrigue to your cloud compositions.
For instance, storm clouds rolling over a cornfield offer a narrative of impending weather change. A lone hiker beneath an expansive sky can evoke themes of solitude and exploration. The contrast between man-made and natural environments—like a city skyline beneath turbulent clouds—can create compelling visual tension.
Use the rule of thirds to guide your composition. Place the horizon lower in the frame if the sky is your focus, or higher if the foreground holds the story. Symmetry can also be powerful, especially when photographing clouds mirrored in bodies of water.
Shoot wider than you need—clouds are constantly shifting. Cropping in post gives you flexibility to reframe without losing resolution.
8. Explore the Sky Through Various Focal Lengths
Clouds are dynamic and ever-changing, and one way to highlight their versatility is by photographing them through multiple focal lengths. A wide-angle lens captures vast, panoramic cloudscapes and dramatic perspectives, perfect for grand, cinematic scenes.
On the flip side, telephoto lenses let you isolate interesting shapes or textures. A 70–200mm lens allows you to zoom into distant cumulus clouds and reveal subtleties—like light shafts piercing through gaps or edges lit with golden hues.
Try shooting a single cloud formation at various zoom levels. Start wide for environmental context, then tighten your frame for abstract compositions. Reframing even slightly can produce a series of completely distinct images from one location.
This technique is especially useful when clouds are sparse or unusually shaped. Turn an ordinary afternoon sky into a creative exercise in minimalism, texture, or symmetry.
Final Reflection: Harness the Power of the Sky
Photographing clouds is both a study in patience and an exercise in spontaneity. They move, evolve, and disappear—often within minutes. That’s why having your camera ready, knowing your gear, and anticipating atmospheric conditions is key to mastering cloud photography.
Whether you're capturing fleeting sunrays bursting through a storm front or soft pink wisps at dawn, clouds lend mood, depth, and dimension to any scene. Understanding how to work with them—technically and artistically—can turn simple sky views into portfolio-worthy masterpieces.