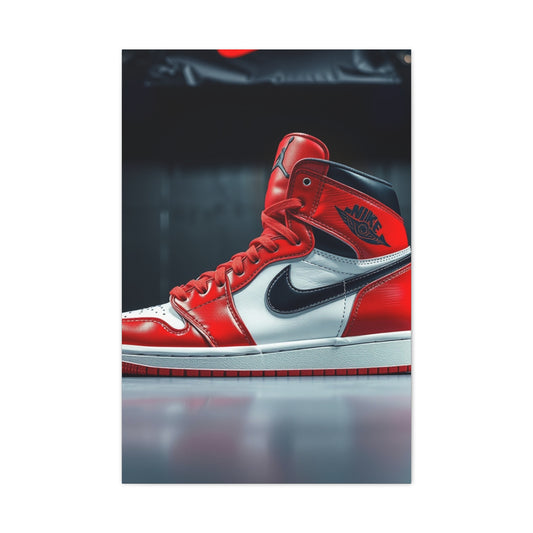
If you're looking to infuse your photos with more vibrancy and contrast, Color Dodge is an invaluable technique to achieve this. This powerful tool works wonders when you want to emphasize the light in your image, especially in situations where there is a light source like the sun, a candle, or artificial lighting. Color Dodge can enhance the way light interacts with your image, giving it a glowing and dramatic effect. Whether you're looking to create a soft halo around a light source or emphasize natural lighting in your photos, Color Dodge can completely transform the look and feel of your shots. In this guide, we will explore how to use Color Dodge effectively in Photoshop, with a particular focus on manipulating light and fine-tuning your image's overall tone.
To begin using Color Dodge, it’s essential to start by adjusting the overall tone and color balance of your image. This serves as the foundation for all of the adjustments to come. The first step is to use the Curves adjustment layer. When you add a Curves layer, it allows you to precisely adjust the tonal range of your image, enhancing both highlights and shadows. To start, open your image in Photoshop, and select the "Add Fill or Adjustment Layer" icon at the bottom of the Layers panel. From the dropdown menu, select "Curves" to open the Curves panel.
The Curves tool is indispensable for modifying the brightness and contrast of your photo. It gives you the flexibility to adjust the shadows, midtones, and highlights separately. Once the Curves panel opens, click on the "RGB" dropdown menu and select the "Red" channel. Here, you’ll be able to adjust the tonal range of the red spectrum in your image. By tweaking the top anchor point, you can warm up the highlights, giving them a more golden, radiant feel. To add a cooler tone, simply drag the anchor point down, which will introduce cyan into the highlights. Moving on to the Green and Blue channels, you can further fine-tune the balance of colors in the image. Adjusting these channels allows you to create the desired atmosphereeither warming up or cooling down the overall look to match the tone you envision.
However, it’s important to keep in mind that this adjustment affects the entire image, including the shadows, which may not be ideal if you’re looking to target just the highlights. To prevent the shadows from being altered, you can make use of the Layer Style options in Photoshop. Hold "Alt" and double-click on the Curves adjustment layer, which will bring up a new window with the "Underlying Layer" sliders. From here, you can drag the black triangle on the slider all the way to the right. This action ensures that the shadow areas remain unaffected by the Curves adjustment, allowing you to only enhance the highlights. This technique is a critical step in ensuring that the shadows maintain their natural depth while the highlights pop with a new radiance.
Once the highlights have been fine-tuned, it’s time to refine the areas you wish to enhance. For this, you’ll use a layer mask. The beauty of layer masks in Photoshop is that they give you the power to apply effects with precision. Click on the mask thumbnail of the Curves layer, and select the Paintbrush tool. Using black paint on the mask will remove the effect from areas you don’t want to alter, while painting with white will reinstate the effect in areas where you do want it. This gives you total control over which parts of the image receive the light enhancement.
Applying Color Dodge to Enhance Light and Contrast
With the highlights adjusted to your satisfaction, the next step in the process is applying the Color Dodge effect. Color Dodge is a blending mode in Photoshop that helps to brighten light areas, creating a glowing, almost ethereal effect. To get started, create a new layer by selecting "Layer" from the top menu, then "New" and "Layer." Once the new layer is created, set its blending mode to "Color Dodge." This setting will apply the Color Dodge effect to the areas where you paint on this layer.
Next, you’ll want to lower the layer's fill to around 60%. This is important because reducing the fill makes the effect more subtle, allowing you to gradually build up the effect without overwhelming the image. The goal is to create a soft, glowing effect, not a harsh one. Once the fill is adjusted, use the Paintbrush tool to paint over the areas that need the extra highlight. Hold down the "Alt" key (Option on Mac) and click on the lightest area in the image. This will sample the color of the light, setting it as your brush color. With the brush flow set to a low value, around 10%, gently paint around the light sources in your image. By doing this, you'll create a soft glow or light haze that mimics the natural light leaks commonly seen in photography.
The beauty of using the Color Dodge blending mode is how it interacts with the underlying tones. It emphasizes the highlights and can add a sense of depth by introducing contrast between the bright areas and the rest of the image. To make the effect look more natural and seamless, you’ll want to refine the blending between the highlights and the surrounding areas. You can go back to the Curves layer and adjust the color balance again, but this time, make smaller, more subtle changes. This fine-tuning ensures that the lighting effect doesn’t look too artificial, but rather complements the overall image, giving it a more balanced and harmonious feel.
An important aspect of the Color Dodge effect is controlling its intensity. It’s easy to get carried away and overdo the effect, so it’s essential to constantly evaluate and adjust the layer mask. Adding a layer mask to the Color Dodge layer will allow you to paint over any areas where the effect may have been applied too strongly. Using black paint, you can gently mask out any overdone areas, allowing the effect to fade in places where it may be too intense. Remember, the key to successful Color Dodge work is subtletygradually building up the effect while maintaining control over the overall look.
Enhancing Shadows and Adding Depth
Once the light in your image has been enhanced using Color Dodge, it’s time to give attention to the shadows in your image. Adding depth and contrast to the shadows can create a more dynamic look and bring balance to the image. To do this, create a new Levels adjustment layer. Levels are a great way to manipulate the overall tonal range in your image, and they are especially effective for fine-tuning shadows and midtones.
In the Levels panel, adjust the midtones by dragging the middle triangle toward the right. This action will darken the overall tone of the image. You can then refine the shadows by adjusting the black point (the left triangle) and the white point (the right triangle). Moving the black triangle slightly to the right will intensify the shadows, while moving the white triangle to the left will keep the highlights intact. This ensures that while the shadows become more pronounced, the light areas in your image retain their brilliance.
If you want to add a warmer or cooler tone to the shadows, you can adjust the individual color channels. For example, select the "Red" channel from the RGB dropdown menu and adjust the middle and left triangles to subtly infuse the shadows with warmth or coolness, depending on your desired effect. This small change can have a dramatic impact on the mood of your image, giving it a more cohesive feel.
To preserve the highlights while darkening the shadows, return to the Layer Style options. As with the Curves adjustment, hold "Alt" and double-click on the Levels adjustment layer thumbnail to open the Layer Style window. From here, adjust the white triangle to the left to protect the highlights, ensuring they don’t get darkened by the Levels adjustment. This subtle tweak ensures that the bright areas of the image remain protected while the shadows receive the necessary enhancement for greater depth.
By following these steps, you can achieve a beautifully enhanced image where the light pops, the shadows are deepened, and the overall contrast is elevated. Color Dodge is a remarkable tool for bringing life and atmosphere to your images, and with careful adjustments to highlights, shadows, and midtones, you can create stunning, high-contrast photographs that capture the essence of light in a way that feels natural yet striking. With a little practice, this technique will become an essential part of your Photoshop toolkit, helping you bring your photos to life with depth and brilliance.
Mastering the Art of Contrast with Color Burn
When it comes to editing photos, one of the most powerful techniques for creating depth and drama is the use of blending modes. While Color Dodge helps to brighten highlights, its counterpart, Color Burn, has the opposite effect, deepening shadows, intensifying contras,t and giving your images a more dynamic and moody feel. By combining Color Dodge and Color Burn, you gain the ability to manipulate both the light and shadow elements in your photos, taking your editing to the next level.
To start experimenting with Color Burn, the first thing you’ll need to do is introduce two new solid color layers to your image. This process begins by clicking the “Add new fill or adjustment layer” icon and selecting “Solid Color.” The key to using Color Burn effectively is to choose a color that contrasts sharply with the tones already present in your image. For instance, if your image has a predominance of warm tones, you might want to add a cooler color like cyan. On the other hand, for cooler-toned images, introducing a warm red color can create a striking contrast.
Once these solid color layers are in place, you’ll need to adjust their blend modes. Set the blend mode of the red layer to "Color Burn" and the cyan layer to "Color Dodge." These blend modes will begin to work their magicwhile the red layer darkens the shadows in your image, the cyan layer will enhance the highlights, making them appear brighter. At first, the colors might seem overly saturated, but that’s a temporary effect. The next steps will help you refine these adjustments and bring balance to the image.
Fine-tuning the Effect: Balancing Intensity and Color
Fine-tuning the effect after applying the Color Burn and Color Dodge layers is an essential step to ensure your image retains balance and does not become overwhelmed by excessive saturation or contrast. At first glance, these effects can appear intense, pushing the colors and tonal ranges into extreme values that might distort the natural harmony of the image. The key lies in making subtle adjustments that preserve the integrity of the image while still enhancing its visual impact. One of the first adjustments you’ll want to make is reducing the Fill of both the red and cyan layers to around 15%. This step is crucial because it helps to dial down the excessive intensity of the Color Burn and Color Dodge layers, which, if left unchecked, can dominate the image and obscure details in the shadows and highlights.
This reduction in Fill allows for greater control over the color dynamics, providing a more refined balance between the dark and light elements of your image. While these effects are designed to increase contrast, they can also have a tendency to create overly sharp transitions between shadows and highlights, resulting in an unnatural look. By carefully adjusting the intensity of the effects, you regain the ability to shape the image more subtly, with a deeper understanding of how light interacts with color. In this process, it's not just about lowering the Fill but also about keeping the tonal integrity intact, so that the enhanced color contrasts don't overpower the original subject matter.
However, even after dialing back the saturation and intensity, you may still encounter an issue that often arises when working with Color Dodge layers: overexposed highlights. This issue is especially noticeable in areas where the light is most intense, and it's crucial to preserve those details. In the case of overexposed highlights, the highlights can begin to lose all texture, turning into flat, blown-out areas that strip the image of its dynamic range. These highlights, if not carefully managed, can create an unnatural or unflattering effect that diminishes the overall quality of the image.
To address this problem, a practical solution is available by adjusting the highlight protection settings within the Color Dodge layer. By holding the Alt key and double-clicking on the thumbnail of the Color Dodge layer, you open the Layer Style menu, where you’ll find the slider for highlight protection. At this point, a white triangle will appear, indicating the maximum exposure point. By dragging this triangle to the left, you effectively reduce the brightness of the highlights, keeping them from reaching the point of overexposure. This allows you to retain the delicate texture in these bright areas while still benefiting from the increased contrast provided by the Color Dodge layer. The beauty of this adjustment lies in its subtlety highlights will remain bright and vivid but will no longer overwhelm the image with unnatural brightness.
As you continue to refine your image, consider experimenting with the colors you use for your solid color layers. The colors you choose can dramatically influence the overall tone and mood of the photograph. For instance, a warm color like orange can introduce a sense of energy and vibrance, while a cooler tone such as blue can evoke a sense of calm and tranquility. The possibilities are vast, and the way each color interacts with the rest of the image will play a significant role in shaping the final visual outcome.
What makes this process even more interesting is the ability to manipulate the blending modes and the saturation levels of your solid color layers. Blending modes such as Overlay, Soft Light, and Hard Light provide different interactions between the layers, creating effects that range from subtle enhancement to bold transformations. By adjusting the saturation levels, you have the power to control how much of the color shifts through to the underlying image, offering you another tool for creating dynamic visual compositions. It’s also essential to remember that adjusting these elements isn't a one-size-fits-all solution; each image will respond differently based on its composition, lighting, and overall mood.
Another key aspect to consider is the relationship between shadows and highlights. By fine-tuning these areas, you can bring depth and dimensionality to your image, allowing it to breathe while maintaining a striking visual impact. Shadows, when deepened, can create a sense of mystery and drama, while highlights can add a layer of sophistication and brilliance. Striking the right balance between these elements and allowing the effect to flow naturally will elevate your image to a more refined and polished state. This nuanced approach is where the magic happenswhere creativity and technical understanding combine to produce a harmonious, balanced visual experience.
Ultimately, achieving a harmonious result requires patience and experimentation. The right adjustments might not always be obvious at first, and fine-tuning the effects may take time as you explore how different colors, blending modes, and saturation levels interact. But by continuing to refine your image with subtle adjustments, you’ll have the opportunity to create a truly unique and visually captivating resultone that balances intensity and color in a way that enhances, rather than overpowers, the natural beauty of the photograph.
Leveraging Layer Masks for Precision and Control
One of the most useful features in Photoshop when working with blend modes and color adjustments is the ability to use layer masks. Even after applying Color Burn and Color Dodge to your image, you might find that certain areas are either too dark or too bright. In such cases, layer masks become invaluable. A layer mask allows you to selectively remove or restore effects in specific parts of your image. This gives you precise control over where the Color Burn or Color Dodge effects are applied.
To use a layer mask effectively, simply select the layer that you want to adjusteither the red or cyan color layerand then add a mask. Once the mask is added, you can paint on it with black to remove the effect from areas that are too intense. Conversely, painting with white will restore the effect, allowing you to fine-tune the application of light and shadow in your image. This technique enables you to apply Color Burn and Color Dodge selectively, ensuring that the overall effect is balanced and doesn’t overwhelm certain areas.
The beauty of using Color Burn and Color Dodge together lies in the ability to manipulate both light and shadow in a natural, organic way. It’s not just about making the image brighter or darker; it’s about enhancing the existing elements of your photo to create a more dramatic and visually compelling scene. By adjusting the saturation, blending modes, and using layer masks to refine the application of these effects, you can transform your image into something that feels more dynamic and full of contrast.
Incorporating Color Burn into your editing workflow gives you more control over the depth and tone of your photos, allowing you to create stunning, high-impact images. The combination of Color Dodge and Color Burn helps you work with the full tonal spectrum, giving your photos a richer, more complex look. Whether you're aiming for a more subtle enhancement or a dramatic transformation, the careful application of these tools can make all the difference in achieving a compelling final result.
Remember that there’s no one-size-fits-all approach when it comes to photo editing. Every image has its own unique characteristics, and the interplay of light and shadow will vary depending on the colors and mood you wish to evoke. With Color Burn and Color Dodge at your disposal, you can experiment with different intensities, colors, and blending modes until you find the perfect balance that brings out the best in your photo. Keep experimenting with layer masks, and don’t be afraid to push the boundaries of your creativity, as this will allow you to discover new and exciting ways to enhance your images.
Ultimately, mastering Color Burn and Color Dodge opens up endless possibilities for creating bold, dramatic effects that enhance the mood and atmosphere of your photos. By learning how to harness the full potential of these blending modes, you’ll be able to add a whole new level of depth and contrast to your image editing toolkit.
Refining Highlights for a Balanced Image
When editing an image, one of the key elements to focus on is the handling of highlights. These brighter parts of your image are essential for conveying light and creating visual impact. If you've experimented with Color Dodge to brighten these highlights, you may have noticed that they sometimes appear overly bright or unnaturally intense. This can detract from the natural flow of the image and make the lighting feel unrealistic.
To fix this, a simple yet effective method is to use the Curves adjustment layer. By selectively adjusting the red, green, and blue channels within Curves, you can fine-tune the overall color balance of your highlights. The subtle shifts in these channels help create a more harmonious blend of light across the image, ensuring that the highlights don’t feel like they’re standing out too sharply or harshly. The goal is to achieve a smooth transition from the bright areas to the darker regions, which contributes to a more cohesive and visually pleasing composition.
The key to success in adjusting highlights is subtlety. While it can be tempting to make drastic changes, small adjustments go a long way in making a real difference. Each tiny tweak can improve the image's depth, keeping the highlights vibrant yet integrated within the rest of the tonal spectrum. In the process, you'll ensure that the bright parts of the image stay crisp and clean without dominating the overall aesthetic.
Additionally, when you manipulate the highlights, it’s important to think of how they relate to the rest of the image. A well-balanced photo requires highlights to naturally complement the shadows and midtones. If the highlights are too overpowering, they might create an imbalance that detracts from the emotional tone of the image. This is where careful use of the Curves adjustment comes into play, helping you control the intensity of highlights and create a more realistic scene. When done correctly, it can elevate the brightness of the image without sacrificing the natural harmony of the lighting.
Mastering Shadows for Depth and Drama
On the flip side, shadows provide an essential role in defining the depth of an image. They are the areas that bring contrast and drama, highlighting textures and shapes that might otherwise go unnoticed in a flat, evenly lit scene. This is where Color Burn really excels, as it allows you to darken the shadows, adding richness and complexity to the image. The deeper the shadows, the greater the sense of volume and dimension. It is this contrast between light and dark that often gives an image its dynamic quality and makes it feel more cinematic.
However, shadows, like highlights, need to be handled carefully. While deepening the shadows with Color Burn can create an appealing contrast, there’s a risk of going too far. Overdoing the shadow effect can result in an image that feels heavy, overbearing, or muddy, where the subtle details get lost in the darkness. In such cases, it’s important to revisit the Levels adjustment layer to refine the image further. By adjusting the midtones and highlights in Levels, you can maintain the depth of the shadows while ensuring that they don’t dominate the overall image.
A useful tip when adjusting shadows is to think about the balance between light and dark. The interplay between these two elements is what creates the mood of the image. If your shadows are too strong and your highlights too light, the picture may end up looking overly dramatic or even artificial. Subtle adjustments can help you strike the right balance. Consider the emotional tone you want to evoke with your imagedarker shadows might create a sense of mystery, drama, or somberness, while more subdued shadows can lend an air of softness and realism.
When working with shadows, remember that depth is more than just darkening areas. It’s about adding complexity and layers to your image. By carefully crafting the contrast between shadows and highlights, you can make your image come to life, drawing attention to the most important elements without overwhelming the viewer with too much darkness or light. With the right approach, you’ll create a captivating tonal range that holds the viewer’s attention from the moment they look at the image.
Achieving the Perfect Tonal Balance
Ultimately, balancing highlights and shadows is a delicate art. Achieving a harmonious balance between these two elements is crucial for maintaining the visual integrity of the image while maximizing its impact. The most successful photos are often those where the interplay of light and dark is thoughtfully considered, ensuring that the image remains dynamic but not overly chaotic.
The secret to creating an image with the perfect tonal balance lies in using a combination of techniques, including Color Dodge and Color Burn, as well as fine-tuning adjustments through Curves and Levels. These tools allow you to control the brightness and depth of the image, providing flexibility to refine the highlights and shadows according to your vision. However, it’s important to approach these adjustments with care, as too much contrast can quickly overwhelm the composition.
To enhance the overall tonal balance of your image, consider the following strategies. When working with Color Dodge on the highlights, focus on creating a natural gradient that doesn’t create harsh lines between light and dark. This can be achieved by refining the colors and tones in the highlights through the use of Curves, making sure they feel integrated with the rest of the image. In terms of shadows, Color Burn can add depth, but careful monitoring is necessary to ensure that the shadows enhance the image without detracting from the light areas.
Another aspect to keep in mind when balancing the tonal range is the overall mood you want to evoke. The use of highlights and shadows can significantly influence the emotional tone of your photo. Lighter areas often create a feeling of airiness and openness, while darker areas lend an element of mystery or moodiness. Experiment with different levels of light and shadow to see how they impact the viewer’s perception of the image.
Finally, always step back and review your work. Sometimes, the most effective way to balance highlights and shadows is to take a break from the editing process and return with fresh eyes. This helps you notice subtle discrepancies or imbalances that may have been overlooked during the editing process. Striking the perfect tonal balance is not a one-size-fits-all approach requires experimentation, fine-tuning, and a keen eye for detail.
Mastering the Art of Color Dodge and Color Burn for Stunning Results
Achieving a polished and professional look in your image editing process involves a delicate balance of creative techniques and precise adjustments. While tools like Color Dodge and Color Burn can dramatically enhance your images by adding luminous highlights and deep shadows, their true potential lies in the fine-tuning process that comes afterward. These tools allow for bold changes, but to elevate the image to a more sophisticated level, it is essential to refine how these effects interact with the rest of your image.
The key to achieving a flawless look is not simply applying the Color Dodge and Color Burn effects and leaving them at that. Instead, the real artistry begins once you start working with layer masks, adjustment layers, and subtle color blending. By adjusting the intensity of these effects, you can fine-tune them to perfectly complement the existing elements of the photo. Whether you're looking to add a radiant glow or create deep contrasts that evoke mood and drama, mastering these adjustments will give you the power to craft images that captivate the viewer’s eye.
An essential step in the fine-tuning process is learning how to balance the opacity of your layers. Sometimes, the initial effects created by Color Dodge and Color Burn may feel overly dramatic or harsh. This is where opacity adjustments come into play. By lowering the opacity of these layers, you can soften the overall impact, allowing the effects to blend more seamlessly with the underlying image. This method offers you more control over how subtle or bold the changes appear, ensuring that your image does not become too aggressive or unnatural.
Additionally, blending these layers in a way that highlights certain areas of the image can introduce dynamic contrasts, making the image feel more alive. For example, using Color Dodge to brighten specific areas while simultaneously utilizing Color Burn on others can create an energetic interplay between light and shadow. This not only adds visual interest but also helps to guide the viewer’s eye toward the focal points of the image. The result is an image that feels balanced and harmonious, yet striking in its contrast.
Achieving Subtle Refinement through Gradient Maps and Selective Adjustments
Once you've applied the primary effects, the next step is to fine-tune the overall color balance and ensure that the image maintains a natural yet enhanced appearance. Here, tools like gradient maps and selective color adjustments can make a significant difference. Gradient maps allow you to control the tonal range of your image in a sophisticated way. By assigning a specific gradient to different parts of the tonal spectrum, you can achieve a more cohesive and harmonious color palette. This adds an extra layer of depth to your image, giving it a sense of richness and complexity.
Selective color adjustments are another valuable technique for refining your image. This method involves targeting specific colors or areas within the image to either intensify or mute them. For example, if the warm tones in the image feel too overpowering, you can selectively tone them down without affecting the cooler areas. Conversely, if you want to enhance certain colors to bring attention to particular elements in the photo, selective adjustments can help you achieve this without disrupting the overall color scheme.
These tools, when used effectively, provide an opportunity to push your image further, transforming it from good to great. They allow you to add nuance to the image’s color composition and create a mood that matches the story you want to tell. Whether you're aiming for a vibrant, high-contrast look or a more subdued, monochromatic feel, the ability to refine the color balance with these tools is essential for achieving a polished result.
Perfecting Light and Shadow with Layer Masks and Blending Techniques
A crucial component of fine-tuning your image lies in the careful manipulation of light and shadow. While Color Dodge and Color Burn are powerful tools, they work best when combined with the strategic use of layer masks and blending techniques. Layer masks enable you to apply adjustments to specific parts of the image without affecting the entire composition. This is particularly useful for fine-tuning the areas where you want to emphasize light and shadow, allowing you to create the perfect balance between brightness and depth.
Blending modes play an essential role in how the layers interact with one another. By experimenting with different blending modes, you can create various effects that range from subtle enhancements to dramatic transformations. For example, soft light blending can add a gentle glow to your image, while overlay blending may provide more pronounced contrast, creating a bold visual impact. By using these modes creatively, you can add texture, depth, and a sense of dimensionality to your image.
Another technique to consider when refining your light and shadow is the use of gradients. Gradients can help create smooth transitions between light and dark areas, giving the image a more natural and organic feel. This technique is especially effective in portrait photography or any image where you want to highlight a subject in a more subtle, flattering manner. Using gradient layers strategically can help you build a sense of depth and movement within the image, making it feel more dynamic.
The goal of these fine-tuning steps is to introduce contrasts that are visually engaging while also guiding the viewer’s attention to the key elements of your image. By mastering the interplay of light, shadow, and color adjustments, you can create photographs that feel alive and immersive. The subtle adjustments made through layer masks and blending techniques allow you to control the atmosphere of your image, ensuring that it evokes the exact emotional response you want.
Ultimately, the process of fine-tuning your images with Color Dodge, Color Burn, and additional techniques requires both technical skill and artistic vision. It is not about overloading your image with dramatic effects, but rather enhancing the inherent beauty and dynamic contrasts that already exist. Through careful adjustments, thoughtful masking, and selective color manipulation, you can elevate your images to a professional level, creating visual stories that captivate the viewer from start to finish. Whether you're working on a portrait, landscape, or product shot, mastering these fine-tuning techniques will enable you to produce polished, eye-catching images that truly shine.