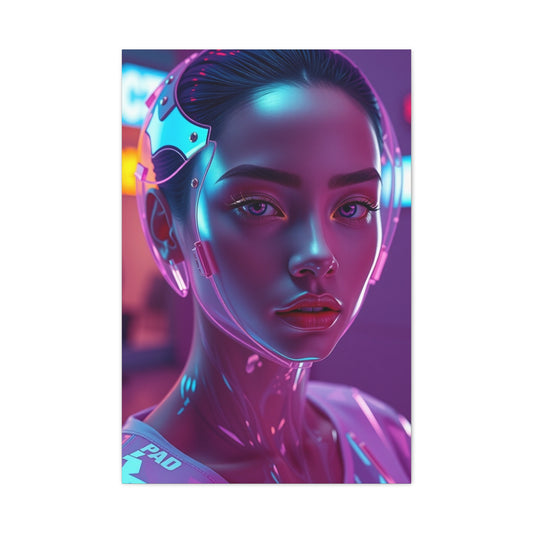
Portrait photography of women offers an incredible opportunity to convey emotions, tell unique stories, and create timeless memories. While many may feel intimidated by the task, photographing women in a flattering and captivating way is achievable with the right techniques, settings, and a bit of practice. This guide will break down essential steps and strategies to help you capture beautiful and impactful female portraits.
The Role of Lens Type and Aperture in Female Portrait Photography
One of the most important aspects of portrait photography is understanding the impact of lens selection and aperture settings. These technical elements help produce sharp, high-quality portraits that highlight the subject’s natural beauty.
Selecting the Ideal Lens for Capturing Female Portraits: A Comprehensive Guide
When it comes to portrait photography, the lens you choose plays a crucial role in shaping the final outcome of your shot. In female portrait photography, the right lens can elevate the overall image by providing flattering perspectives, sharp details, and beautiful background blur. With so many different lenses available, it can be difficult to know where to start. This guide will help you understand the key differences between prime lenses and zoom lenses, their specific advantages for portrait photography, and how to choose the best lens based on your desired aesthetic and shooting environment.
Zoom Lenses: Versatility and Flexibility for Various Settings
Zoom lenses are a popular choice among portrait photographers because of their versatility. These lenses allow you to zoom in and out, giving you a wide range of focal lengths within one lens. This flexibility is especially helpful when photographing in dynamic or changing environments, such as outdoor shoots or events where you may not have the luxury of being able to move your subject around or control your distance from them.
One of the main benefits of using a zoom lens for portrait photography is the ability to shoot from a distance without disturbing the subject, particularly in public spaces or when working with models who may feel more comfortable with a little space between them and the photographer. Zoom lenses allow you to capture sharp images without needing to get too close, which can be ideal for candid portraits, street photography, or situations where you don’t want to impose too much on your subject’s personal space.
However, while zoom lenses offer great convenience and flexibility, they come with certain limitations, particularly when used for close-up portrait shots. Wide-angle zoom lenses, for example, should be avoided for close-ups. The reason for this is that wide-angle lenses tend to distort facial features when used too close to the subject. This distortion can make the face appear wider or unnaturally shaped, which is usually not the desired effect in portrait photography. To avoid this, it’s important to choose a zoom lens that allows you to maintain a natural perspective, like a mid-range zoom lens in the 50mm to 100mm range.
|
Related Catagories: |
Prime Lenses: Sharpness, Depth of Field, and Intimacy in Portrait Photography
Prime lenses are a favorite choice for many portrait photographers because of their exceptional sharpness and the shallow depth of field they provide. Unlike zoom lenses, prime lenses have a fixed focal length, meaning that they cannot zoom in or out. This characteristic encourages the photographer to be more mindful of their position relative to the subject, which often results in a more deliberate and thoughtful composition.
One of the main advantages of using a prime lens in portrait photography is the ability to create a beautifully blurred background, or “bokeh,” which helps isolate the subject and draw attention to the face. This background blur is achieved because prime lenses typically offer a larger maximum aperture compared to zoom lenses, allowing for a shallow depth of field. A shallow depth of field creates an aesthetically pleasing effect where the subject is in sharp focus while the background becomes beautifully out-of-focus. This effect is particularly flattering in portrait photography, as it directs the viewer’s attention entirely to the subject’s face, making them the undeniable focal point of the image.
In addition to producing a pleasing bokeh, prime lenses are known for their excellent optical quality. Since prime lenses have fewer moving parts compared to zoom lenses, they tend to produce sharper images with less chromatic aberration and distortion. This sharpness is especially beneficial when capturing the fine details of your subject, such as the eyes, lips, and skin texture, allowing your portraits to have an extra level of clarity and realism.
Many portrait photographers prefer prime lenses in the 50mm to 85mm range, as these focal lengths provide a flattering perspective for close-up shots of the face while also allowing for some creative flexibility. For example, an 85mm prime lens is often considered the "golden standard" for portraiture because it offers just the right amount of compression, which makes facial features appear well-proportioned and natural, while maintaining a comfortable distance from the subject.
Choosing the Best Lens Based on Your Shooting Style and Environment
When deciding between a zoom lens or a prime lens, the choice ultimately depends on the photographer’s preferred style and the specific environment in which they are shooting. Each lens type has its strengths, and both can be used effectively to create stunning female portraits.
When to Use a Zoom Lens:
Dynamic and Changing Environments: If you are shooting in an environment where you need to quickly adjust your framing without physically moving, a zoom lens is ideal. This is especially useful for events, candid moments, or street photography, where you might not have full control over your subject’s movement or your shooting distance.
Comfort for the Model: Zoom lenses offer the ability to maintain a greater distance from your subject, which may help the model feel more at ease, especially in public spaces or during more intimate sessions.
Flexibility: Zoom lenses are highly versatile, making them suitable for a range of different photography styles. Whether you are shooting portraits in a studio, outdoors, or on the street, a zoom lens allows you to quickly adjust your composition without needing to swap lenses or reposition yourself.
When to Use a Prime Lens:
For Artistic Portraits: If you’re aiming for portraits with a dreamy, artistic feel, a prime lens with a wide aperture (such as f/1.8 or f/1.4) is the best choice. This allows you to create stunning background blur and beautiful bokeh that adds a soft, ethereal quality to the image.
Sharp, High-Quality Images: If you are looking for the sharpest, most detailed portraits possible, prime lenses are the way to go. With their superior optics and ability to capture fine details, prime lenses are perfect for close-up shots where clarity and precision are crucial.
Flattering Perspectives: Prime lenses, particularly in the 85mm to 135mm range, offer flattering compression that helps create realistic and proportional portraits. These lenses help prevent distortion in facial features, making them ideal for headshots and close-up shots.
Finding the Perfect Lens for Your Portrait Photography Needs
Choosing the right lens for female portrait photography is about understanding how different lenses affect your final images and selecting the one that best suits your style and the environment in which you’re shooting. While zoom lenses provide flexibility and convenience, prime lenses offer exceptional sharpness, beautiful background blur, and a more intimate feel to your portraits.
If you’re looking for versatile performance and adaptability, a zoom lens may be the best choice for your needs. However, if you’re after maximum sharpness, creative control over depth of field, and aesthetically pleasing bokeh, a prime lens is likely the ideal option. Regardless of the lens you choose, understanding how aperture, lens focal length, and shooting distance impact your composition will help you achieve stunning, flattering female portraits that stand the test of time.
Aperture for Flawless Focus: Mastering Portrait Photography
When it comes to portrait photography, there are many factors that contribute to creating a captivating and professional image. Among these, aperture plays a crucial role in determining how sharp or soft your subject appears in the frame. A well-managed aperture setting can elevate the entire photograph, creating a beautiful contrast between the sharply focused subject and a dreamy, blurred background. Understanding how to use aperture in portrait photography is essential for photographers looking to perfect their craft.
What is Aperture and How Does it Affect Portrait Photography?
Aperture refers to the opening in your camera lens that controls how much light enters your camera. It is measured in f-stops, with lower f-stop numbers representing a larger aperture (i.e., a wider opening) and higher f-stop numbers representing a smaller aperture (i.e., a narrower opening). The size of the aperture directly impacts your depth of field, which determines how much of the image is in focus. In portrait photography, the ability to manipulate aperture is essential for isolating your subject from the background.
A wider aperture (such as f/2.8 or f/1.8) produces a shallow depth of field, which allows the subject’s face to remain in sharp focus while the background becomes softly blurred. This effect is known as “bokeh,” and it is one of the most desirable outcomes in portrait photography. By using a wide aperture, you can ensure that the model's face stands out clearly, with the background fading into a soft, pleasing blur that keeps the viewer's attention on the subject.
The Ideal Aperture for Female Portraits
When shooting female portraits, an aperture of f/2.5 or smaller is often considered ideal. This range allows you to maintain the sharpness and clarity of the subject's face, while still achieving that signature blurred background. The beauty of this aperture setting is that it allows photographers to isolate the subject from any background distractions, ensuring that the viewer’s focus remains entirely on the person being photographed.
While f/2.5 is a commonly recommended aperture for portraits, it’s important to remember that the aperture setting you choose will depend on various factors such as the lighting conditions, the distance between your subject and the background, and the specific mood or effect you wish to create. For instance, in a studio setting where the background is controlled, a slightly smaller aperture like f/4 may provide a greater depth of field, allowing for more of the scene to be in focus while still keeping the subject prominent.
If you choose a very wide aperture, such as f/1.4 or f/1.8, you risk creating a very shallow depth of field. While this can create stunningly sharp focus on the model’s eyes or certain facial features, it may also result in portions of the face—such as the ears or the nose—falling out of focus. This can be especially problematic when working with groups or when you want to ensure the entire face remains sharp and clear. Therefore, striking the right balance between aperture size and focus is crucial in portrait photography.
The Importance of Depth of Field in Portrait Photography
Depth of field refers to the zone of the image that appears in focus. In portrait photography, achieving the right depth of field is essential for controlling how much of your image is sharp and how much is blurred. The goal is to ensure that your subject stands out against a soft, blurry background, which draws attention to the subject without any distractions.
A wide aperture creates a shallow depth of field, meaning only a small part of the image is in focus. In portrait photography, this shallow focus effect is often desired because it helps to blur the background and create a sense of separation between the subject and their surroundings. This technique is particularly effective in outdoor portraiture where the background may contain unwanted distractions such as people, buildings, or cluttered landscapes. By using a wide aperture, you can ensure that only the subject remains sharp and clear, while the rest of the scene fades into a beautiful, soft blur.
On the other hand, a smaller aperture increases the depth of field, which means more of the image will be in focus. While this can be useful for certain types of photography, such as landscapes or group shots, it’s generally not ideal for portraits. In portrait photography, you want to direct the viewer's attention to the subject, not the background, and using a shallow depth of field helps achieve this.
Achieving the Right Balance with Aperture
While aperture plays a significant role in controlling the focus and depth of field, it’s important to understand that it is just one part of the overall exposure triangle, which also includes shutter speed and ISO. To achieve the perfect exposure, you need to balance all three of these settings. For instance, when you open your aperture wide to f/2.5 or f/1.8, you may need to compensate by adjusting your shutter speed or ISO to maintain the correct exposure.
In situations where the light is dim, such as in indoor settings or during the golden hour, you may find that a wider aperture allows you to gather more light and achieve a properly exposed image. However, if the light is too harsh, such as during midday in direct sunlight, a smaller aperture may help prevent overexposure by allowing less light into the lens.
It’s also important to note that the choice of aperture can affect the overall mood and feel of the portrait. A wide aperture with a soft background blur can create an intimate, dreamy effect, while a smaller aperture can lend a more traditional and formal look to your portraits. Ultimately, the best aperture for your portrait session depends on the style and emotion you want to convey.
Framing Your Model’s Face with Hair and Natural Features: A Portrait Photographer’s Guide
In the world of portrait photography, the art of composition is paramount. Every element within the frame plays a significant role in drawing attention to the subject, emphasizing certain features, and creating an overall aesthetic. One of the most effective, yet often underutilized, techniques for enhancing portrait compositions is using the model’s hair to naturally frame her face. Hair can act as a versatile tool, guiding the viewer’s focus while adding softness, movement, and depth to the image. By leveraging natural features like hair, photographers can create intimate, captivating portraits that resonate emotionally and visually.
Using Hair to Frame the Face: A Subtle yet Powerful Technique
Hair, with its natural texture, flow, and movement, offers a unique opportunity to emphasize a model’s face in ways that other elements of a portrait cannot. The face, being the focal point of any portrait, can be subtly enhanced with the help of the model’s hair. When positioned correctly, hair can work as an organic frame, helping direct the viewer’s gaze to specific facial features like the eyes, mouth, or cheekbones.
Long hair, for instance, can be used to frame the face in many creative ways. Strands of hair can be positioned delicately around the model’s face, especially along the sides, to create a gentle and balanced effect. By drawing the viewer’s eye towards the model’s eyes or smile, the photographer can ensure that these key features remain the center of attention. Additionally, the texture and movement of the hair add dynamism to the image, making it feel more alive and engaging.
When working with long hair, it is essential to understand how it can enhance different aspects of the portrait. A soft breeze or slight movement can create a sense of fluidity and elegance, infusing the image with a dreamy, ethereal quality. This technique is especially effective in outdoor settings where natural light and wind can be harnessed to create a sense of movement and spontaneity. A flowing hairstyle also contributes to the overall harmony of the image, blending seamlessly with the background while still keeping the subject’s face as the primary focus.
|
Related Catagories: |
For models with shorter hair, the framing effect may require more deliberate styling or the use of props to achieve a similar result. Scarves, fabrics, or other accessories can act as substitutes for long strands of hair, wrapping around the model’s face or shoulders to create a soft, framing effect. Flowing fabrics, in particular, can add a sense of movement, much like windblown hair, enhancing the visual appeal of the portrait. This can also lend a sense of mystery or sophistication, depending on the mood of the shoot.
The Role of Hair in Softening Facial Features and Creating Mood
One of the reasons why hair works so well as a framing tool in portrait photography is its ability to soften and enhance the model's facial features. Hair has a natural way of contouring the face, especially when it’s strategically placed around the model’s cheekbones, jawline, or forehead. For instance, softly tousled hair can gently soften the sharpness of a model's jawline, lending a more delicate and approachable appearance. This is particularly effective in female portraiture, where the goal is often to capture a sense of beauty, elegance, and warmth.
Windblown hair, in particular, can add an ethereal and romantic touch to portraits. The movement of the hair, combined with soft lighting, can help create a dreamy atmosphere that is both captivating and cinematic. The flow and texture of the hair add layers to the composition, making the portrait feel more dynamic and immersive. This technique is especially useful in outdoor shoots, where natural elements can be harnessed to bring life and depth to the image.
The positioning of hair can also be used to control how light interacts with the subject's face. For example, the way strands of hair catch the light can highlight certain features, such as the eyes or the curve of the lips, further emphasizing these details in the portrait. In this way, hair is not only a tool for framing the face but also for controlling how the viewer perceives the subject’s expression and mood.
In certain conceptual or editorial portrait shoots, the use of hair to obscure or partially cover parts of the face can add an element of mystery, intrigue, or drama. This technique allows the photographer to focus on a particular facial feature, such as the eyes or lips, creating a more artistic or avant-garde feel to the portrait. When done thoughtfully, this can transform a traditional portrait into something more expressive and unconventional.
Incorporating Hair and Natural Features into Various Photography Styles
Portrait photography spans a wide range of genres, each with its own specific set of guidelines and objectives. The use of hair as a framing device can be adapted to suit different styles of photography, whether it’s a simple beauty shot, a high-fashion editorial, or a more creative, conceptual portrait.
Classic Beauty Portraits: In beauty photography, the focus is often on capturing the model’s features in the most flattering light. Hair can be used to frame the face delicately, ensuring that the model’s eyes, lips, and skin are the primary focus. By gently placing hair around the face, photographers can create a soft, glowing effect that highlights the model’s natural beauty. In this context, windblown hair or flowing waves can add an element of softness without overshadowing the model’s features.
Editorial and Fashion Photography: In high-fashion or editorial portraiture, the use of hair as a framing device can be more dramatic and bold. Here, hair may not only soften the face but also serve as an extension of the fashion or style being portrayed. For example, a large, voluminous hairstyle can frame the face in a more structured way, drawing attention to the model’s facial features while enhancing the overall aesthetic of the look. In fashion photography, the model’s hair may also be styled to match the mood of the shoot, whether it’s sleek and polished or wild and untamed, further emphasizing the theme or concept.
Conceptual and Artistic Portraits: In more experimental or artistic portrait photography, hair can be used in unconventional ways to evoke emotion or tell a story. The model may use her hair to obscure parts of her face, creating a sense of mystery or surrealism. Alternatively, props like scarves, hats, or other accessories can be used to create framing effects, playing with texture, color, and pattern to add visual interest. This approach works particularly well for conceptual shoots that aim to communicate a specific narrative or emotional state.
Natural and Candid Portraits: For lifestyle or candid portrait photography, natural hair can be used to enhance the authenticity of the image. A model’s hair may fall loosely around her face, capturing a sense of spontaneity and ease. The natural movement of the hair can contribute to the overall relaxed vibe of the shoot, making the portrait feel genuine and unposed.
Elevating Portraits with Hair and Natural Features
In portrait photography, every element within the frame serves a purpose, from lighting and composition to the positioning of the model and the use of props. Hair, often overlooked as a tool for framing, can have a transformative effect on the final image. Whether used to delicately highlight the model’s facial features or to create dramatic, artistic compositions, hair offers a wealth of possibilities for enhancing portraits. By understanding how to use hair as a framing device, photographers can create stunning, emotionally resonant images that captivate and engage viewers. Whether the model has long flowing locks or a short, chic cut, hair can be harnessed to create portraits that are both visually appealing and deeply personal.
Best Angles for Flattering Female Portraits: A Guide to Perfect Composition
In portrait photography, the angle at which you shoot plays a significant role in how flattering the final image will appear. Small changes in camera position can dramatically alter the perception of facial features, creating a more flattering or less flattering effect. Understanding how to manipulate angles to your advantage is essential in achieving portraits that highlight your subject's natural beauty. Whether you're capturing a close-up, a full-body shot, or anything in between, mastering the right angles will ensure that you create portraits that are visually stunning and true to your model’s best features.
The Importance of Angle in Flattering Female Portraits
Angles can either enhance or distort a subject's features. Close-up shots taken from low angles can often have unflattering results, even when photographing someone with sharp, symmetrical facial features. When you shoot from below or too close to the subject, it can create distortion, emphasizing less desirable aspects of the face, such as the chin or nostrils. This can be particularly unflattering for subjects with certain facial structures, making them appear disproportionate.
For this reason, one of the most essential guidelines in flattering female portraits is to avoid shooting too low. Instead, the key is to position your camera at a level that allows for a natural, proportional view of the face. The most reliable and universally flattering angle in portrait photography is shooting at or near eye level. When you photograph a model from this vantage point, you’re able to capture the subject’s facial features in their true form, creating a balanced and natural appearance. It also enables you to make subtle adjustments to emphasize the model’s eyes, smile, and other important aspects of the face.
Understanding the significance of angles is crucial when you are photographing female models, as certain angles can emphasize different elements of their faces, adding depth, elegance, and beauty. Knowing how to subtly manipulate the angle of your shot can make a world of difference in the final outcome. So, whether you're photographing a model indoors or outdoors, exploring and experimenting with different angles is a key factor in creating stunning, flattering portraits.
Shooting at Eye Level: Creating a Balanced, Proportional Look
Shooting at eye level is one of the simplest yet most effective ways to create a flattering portrait. By positioning your camera in line with the model’s eyes, you maintain a natural perspective and avoid exaggerating any features. This angle allows the viewer to see the model as they truly are, showcasing her facial features in a well-balanced and proportionate way.
When photographing women, the eyes are often considered the focal point, and shooting at eye level naturally brings attention to them. From this perspective, the photographer can capture the emotions, expressions, and nuances of the subject, offering a direct connection between the viewer and the model. Eye-level shots also help avoid any unnatural distortions that may arise from shooting at extreme angles. Since this angle is the most natural, it produces a more relaxed and authentic portrayal of your model, making it suitable for a variety of portrait styles, from beauty shots to environmental portraits.
Additionally, eye-level portraits are versatile and easy to adjust according to the model’s body posture and facial features. For example, you can instruct your model to tilt her head slightly to one side or gaze downward to create a more dynamic composition. While the eyes will remain the focal point, these small shifts can add depth and intrigue to the portrait. It’s important to note that when shooting at eye level, you should also ensure that the lighting is well-balanced to illuminate the face evenly, further enhancing the flattering effects of the shot.
Experimenting with Subtle Angles: Enhancing Specific Facial Features
While eye-level shots are universally flattering, subtle shifts in angle can allow you to emphasize specific facial features and achieve a more polished, professional look. By experimenting with slight changes in angle, you can manipulate the perception of the subject’s face to bring attention to her best attributes. This technique requires careful attention to detail and a keen understanding of how light and shadow interact with the model's features.
Shooting Slightly Above the Model: When you position your camera slightly above your model’s eye level, it can help elongate the neck and create a slender, more elegant appearance. This angle helps to minimize the appearance of a double chin or broad jawline while enhancing the vertical lines of the model's posture. Shooting from above also provides a flattering view of the eyes and cheekbones, as the natural shadows fall softly along the face, creating a more sculpted effect. This angle works well for fashion, beauty, and editorial portraits where you want to create a sleek, refined look.
Shooting Slightly Below the Model: On the other hand, shooting from a slightly lower angle can enhance the subject's facial structure, particularly the jawline and cheekbones. This approach often adds a sense of power and authority to the portrait, making it ideal for more dramatic or high-fashion photography. However, it’s essential to ensure that the angle is not too extreme, as shooting too low can distort the features and lead to unflattering results. A slight upward tilt from below can accentuate the model's chin and help highlight her facial contours, creating a more angular, striking look.
Shooting from the Side or Profile: While the head-on view is most common, shooting from the side or profile can also provide a unique perspective, offering a different angle on the model’s face. This type of shot can reveal the contours of the face, particularly the nose, lips, and chin, which may not be as evident in a front-facing portrait. A profile shot can be particularly flattering if the model has well-defined facial features, as it emphasizes the shape of the jawline and cheekbones. It’s important to ensure that the lighting is positioned well to highlight the contours, as side profiles may cast shadows that need to be carefully managed.
Outdoor Portraits: Using Natural Vantage Points to Create Flattering Effects
When shooting portraits outdoors, the environment itself can offer unique opportunities for experimenting with angles. The natural surroundings—whether it’s a park, a cityscape, or a rustic setting—can influence how you choose to position your camera and model. One of the most flattering outdoor portrait techniques is shooting from a higher vantage point, particularly if you have the model looking upward. This angle allows the face to be evenly lit and avoids harsh shadows that might appear if the model is looking down or the light is coming from a direct overhead source.
Outdoor settings often provide the advantage of natural lighting, which can make a significant difference in achieving flattering results. The soft, diffused light of early morning or late afternoon (golden hour) can help create a warm and glowing effect on the model’s face, further enhancing the flattering aspects of her features. When shooting from a higher angle, the model can look up at the camera, which not only provides even lighting but also adds a sense of openness and engagement with the viewer.
Additionally, shooting outdoors allows you to play with the background and composition. By positioning your model slightly off-center or adjusting the camera’s angle to incorporate natural elements such as trees, flowers, or architectural features, you can create a more dynamic and visually interesting portrait. The natural setting provides depth and texture, helping to elevate the model’s presence in the image while maintaining a flattering overall look.
Harnessing Natural Light for the Perfect Glow
Lighting is arguably the most important element in portrait photography. The right lighting brings out the best in your model’s features, enhancing her natural beauty. For female portrait photography, soft, diffused natural light is the best way to illuminate the model’s skin and make her glow.
Ideal lighting doesn’t require clear skies or sunny weather. In fact, shooting in shaded areas on sunny days provides soft light that’s perfect for flattering portraits. If the weather is cloudy, the diffused light will provide even illumination, eliminating harsh shadows. For indoor shoots, position the model near large windows to take advantage of natural light streaming in.
If you need to enhance the light, reflectors can help bounce light onto your model’s face, especially during the golden hours—early morning or late afternoon when the sunlight is softer and warmer. Experiment with both natural light and artificial light sources to understand how to create a soft, balanced look that brings out the beauty in every portrait.
Encouraging Genuine Expressions for Powerful Portraits
Great portrait photography is all about capturing the subject’s true personality and emotions. While poses are important, the real beauty comes from the expressions that reflect the model’s character.
Engage with your model before and during the shoot to help her feel relaxed and comfortable. Spontaneous moments of laughter, subtle smiles, or even moments of thoughtfulness can result in more authentic and meaningful portraits.
Understanding your model’s preferences and her emotional states will help you direct her effectively. Focus on making her feel comfortable and in tune with her emotions, whether she’s expressing joy, confidence, or reflection. The more you understand the emotions you want to capture, the easier it will be to compose portraits that speak to those feelings.
Experimenting with Your Model’s Gaze
The direction of your model’s gaze can change the entire mood and atmosphere of the photograph. Looking directly into the camera lens can create a powerful, engaging shot that feels confident and bold. However, asking your model to look away from the camera, down, or up can evoke entirely different emotional tones. A downward glance can create a sense of introspection or melancholy, while looking upwards can suggest optimism and hope.
By varying the gaze and posing throughout the session, you allow for creative diversity in the shots, adding depth to the photos.
Simplifying Backgrounds for Maximum Focus
The background can make or break a portrait. A cluttered or overly detailed background distracts from the subject, so it's important to keep backgrounds simple. A plain or neutral backdrop will complement your model and ensure that she remains the focal point of the photograph.
Solid-colored backgrounds, such as black, white, or even pastel tones, create a clean, intimate atmosphere. If you want to introduce a little texture into the background, slightly patterned or muted options work well without detracting from your model.
Final Thoughts: Creating Beautiful Female Portraits
Photographing beautiful, flattering portraits of women requires a blend of technical skills, creativity, and an ability to connect with your subject. By focusing on key factors such as lens selection, aperture, lighting, framing, and angles, you can elevate your portrait photography to new heights.
As you experiment with different techniques—whether shooting in natural light, capturing genuine expressions, or using simple backgrounds—you’ll develop a style that highlights the unique qualities of each subject. Remember to approach each portrait session with the aim to capture the essence of your model, allowing her personality and beauty to shine through in the final photograph. With practice and understanding, you’ll be able to create powerful portraits that tell compelling stories and evoke lasting emotions.


