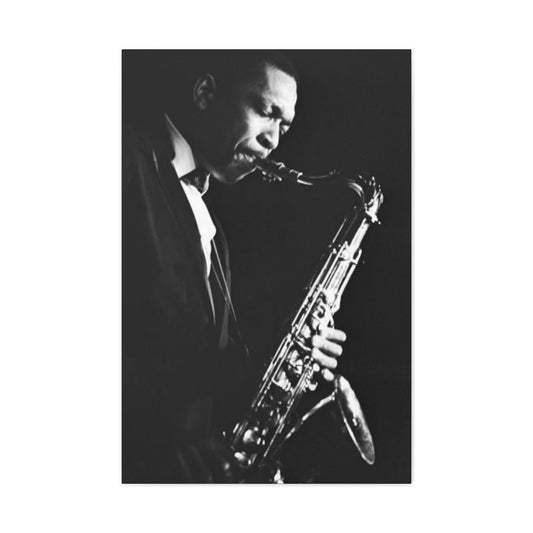
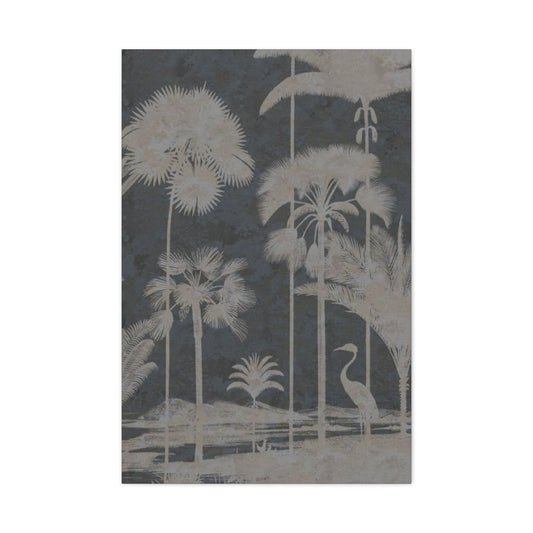
Silhouette photography stands as a captivating genre that imbues your images with drama, mystery, and a sense of artistic elegance. By contrasting the dark outline of your subject against a bright light source, it turns everyday moments into extraordinary compositions. Whether you’re an experienced photographer or just starting out, understanding the core techniques of silhouette photography can elevate your creative vision. By harnessing natural and artificial light sources, you can transform seemingly challenging lighting conditions into opportunities for stunning visual storytelling.
Understanding Silhouette Photography
Silhouette photography revolves around capturing the stark contrast between a dark subject and a bright background, such as a radiant sunset or a glowing artificial light. The subject, whether human, animal, or object, is seen only in silhouette—its intricate details obscured and only its outline remaining visible. Unlike traditional photography, where the goal is to expose the subject and background evenly, silhouette photography deliberately overexposes the background to create a high level of contrast, leaving the subject dark and almost featureless.
At the heart of silhouette photography is the concept of dynamic range—the contrast between the lightest and darkest parts of an image. In silhouette images, the background is deliberately brighter than the subject, and this high contrast allows you to focus on the shape, outline, and overall form of the subject. By stripping away fine details and colors, silhouettes evoke emotion, narrative, and mystery, inviting the viewer’s imagination to fill in the blanks.
The Magic of Silhouette Composition
Creating a compelling silhouette photograph requires a deep understanding of both the technical and creative aspects of photography. One of the core elements that can transform an ordinary image into a stunning masterpiece is how you position your subject in relation to the light source. This may sound simple, but it is crucial to get this relationship just right, as it directly influences the contrast and clarity of the silhouette.
One of the most effective techniques for achieving a striking silhouette is backlighting, a technique that is widely used in many forms of photography. In silhouette photography, backlighting refers to the positioning of the light source behind the subject. This causes the subject’s outline to become darkened while allowing the background, which is illuminated by the light source, to appear bright. This stark contrast creates the dramatic visual effect that is the hallmark of silhouette photography.
The light source can come from a variety of sources, both natural and artificial. One of the most popular and visually pleasing sources of backlight is the sun, especially during the golden hour—the time just after sunrise and just before sunset when the sunlight is soft and diffused. This soft light enhances the contrast of the subject’s silhouette against a glowing sky. However, backlighting does not have to be limited to natural light; streetlights, headlights, or other forms of artificial lighting can also create striking silhouettes, especially in low-light or nighttime settings. For example, city skylines or architectural structures can be captured with backlighting from nearby streetlights, adding a bold, modern touch to the composition.
The key to an effective silhouette is the clear distinction between the subject and the background, achieved by ensuring that the light source shines directly from behind the subject. In most cases, the camera is positioned so that the subject is between the camera and the light source. By doing so, the subject absorbs most of the light in the scene, which results in the subject becoming underexposed and dark, allowing the background to be exposed properly. The background, usually bright and glowing, contrasts sharply with the shadowed figure of the subject, producing the characteristic look of silhouette photography.
In silhouette shots, the shape and outline of the subject are of paramount importance. Unlike traditional photography where the goal is to capture details and textures, silhouette photography focuses on the form and structure of the subject. To achieve the best results, the subject must have a strong, clearly defined shape. When a subject has sharp, unmistakable outlines, the silhouette will be more easily recognizable, even without the inclusion of intricate details.
Human figures, animals, and objects with bold, recognizable outlines work especially well in silhouette photography. For example, the profile of a person is immediately identifiable, and even without facial features or clothing details, the outline of the body can convey emotion and storytelling. Similarly, animals such as birds in flight or a horse running across a field also create dramatic silhouettes because their forms are instantly recognizable. Architectural elements like tall buildings, trees, or statues with unique and recognizable structures also make great subjects for silhouette photography. These subjects, when placed in front of a bright light source, result in images that are simple yet full of visual impact.
One of the challenges in silhouette photography is maintaining clarity in the subject’s form. It is essential that the subject not only has a clear, recognizable shape but also that the edges of the silhouette are sharp and well-defined. A subject with vague or indistinct lines can make the silhouette appear muddled, diminishing its impact. Conversely, subjects with exaggerated curves, angular features, or geometric forms often produce the most striking silhouettes. For instance, a person’s profile with sharp cheekbones or a tree with a defined canopy of branches will create a powerful and dynamic image.
|
Related Catagories: |
The size and position of the subject within the frame also play a significant role in silhouette composition. By positioning the subject in the center or off to the side, photographers can manipulate the composition to create a sense of balance or tension. A centered silhouette can evoke symmetry and stability, while placing the subject off-center can introduce a sense of movement or drama. Experimenting with the rule of thirds—an essential principle in visual composition—can also help create more dynamic and engaging silhouette shots. By positioning the subject along one of the vertical or horizontal lines of the rule of thirds, you can create more tension and interest in the image.
In addition to the subject’s shape, negative space is a crucial component of silhouette composition. Negative space refers to the empty or open space around the subject, which serves to enhance the subject's form. In silhouette photography, negative space emphasizes the subject's outline, making it stand out even more starkly against the illuminated background. When using negative space effectively, the subject appears isolated, emphasizing its shape and form without distractions from the surroundings. Minimalist backgrounds, such as wide-open skies, empty beaches, or simple architectural backdrops, work wonderfully in silhouette photography because they allow the subject to dominate the frame, free from visual distractions.
When composing a silhouette, it’s also essential to consider the distance between the subject and the background. The closer the subject is to the light source, the more intense the contrast will be. For example, a person standing directly in front of a sunset or a tree placed against a bright sky will have a crisp, clear outline. On the other hand, if the subject is farther away from the light source, the silhouette may become less defined, and the contrast between the subject and background may be reduced. The depth of field can also affect the sharpness of the silhouette. Using a smaller aperture (higher f-stop number), such as f/11, allows you to keep both the subject and the background in sharp focus, ensuring that the silhouette is well-defined and striking.
An important aspect of silhouette composition is the timing of your shot. The position of the light source can dramatically change throughout the day, particularly during sunrise or sunset. The angle at which the light hits the subject will influence the shadow and outline of the silhouette. For instance, shooting during the golden hour provides a softer, warmer glow, which contrasts beautifully with a dark silhouette. Conversely, shooting when the sun is higher in the sky may result in harsher light that can create more dramatic shadows and stronger contrasts. In nighttime photography, artificial light sources like streetlights or car headlights can provide backlighting, creating a more mysterious or urban aesthetic.
Another powerful technique to experiment with in silhouette photography is rim lighting. Rim lighting occurs when a small amount of light spills around the edges of the subject, creating a glowing outline that enhances the silhouette’s definition. This technique works particularly well with subjects that have intricate details or delicate features, such as a person’s hair or the branches of a tree. The slight halo effect around the subject can add a soft, ethereal quality to the silhouette without compromising its overall shape.
While backlighting is the primary method for creating silhouette shots, another approach to consider is using multiple light sources. For instance, a subject placed in front of two separate light sources—one from behind and another from the side—can create a unique layered effect in the silhouette. This can introduce subtle highlights or shadows around the subject’s form, adding a touch of dimension to the image while preserving the striking contrast of the silhouette.
Beyond the lighting and positioning, post-processing plays a significant role in silhouette photography. While the shape of the subject is the main focus, editing the image afterward can further enhance the dramatic contrast between the subject and background. Adjusting the contrast, brightness, and shadows can help refine the silhouette and make it stand out even more against the glowing background. Additionally, converting the image to black and white can add a timeless quality to the silhouette, focusing entirely on shape and contrast without the distraction of color.
The Role of Spot Metering in Silhouette Photography
Silhouette photography, known for its striking visual contrast between a dark subject and a bright background, presents unique challenges when it comes to exposure. Since the goal is to keep the subject underexposed while exposing the background properly, getting the right exposure for the subject’s outline becomes crucial. This is where spot metering plays a pivotal role in achieving the perfect silhouette. Understanding how metering modes work—and when to use spot metering—can dramatically improve the quality of your silhouette shots.
In photography, metering modes are the settings that help your camera determine how much light to let into the image through the lens. Each metering mode measures light in different ways and makes different exposure decisions based on the lighting conditions in the scene. There are several metering modes commonly found in most digital cameras, but for silhouette photography, spot metering stands out as the most effective tool.
Understanding Metering Modes
Before diving into why spot metering is particularly useful for silhouettes, it’s essential to understand the other metering modes and how they differ from spot metering:
Evaluative/Matrix Metering: This is the default metering mode on most cameras. It evaluates the entire scene and calculates the exposure based on the average light levels throughout the frame. While this mode works well for general photography in balanced lighting, it struggles in silhouette photography. This is because the camera will often try to evenly expose both the subject and the background, resulting in a loss of contrast. In silhouette photography, we want the subject to remain dark and the background to be brightly exposed, something that evaluative metering is not designed to do.
Center-Weighted Metering: In this mode, the camera prioritizes the exposure for the central portion of the frame, while still considering the surrounding areas to some extent. While it might be useful for portrait photography or general subjects in the center of the frame, it is not ideal for silhouette photography. If the subject is positioned against a bright background, the camera will still try to balance the exposure for the entire image, which can lead to the subject being incorrectly exposed, diminishing the silhouette effect.
Spot Metering: Spot metering, on the other hand, focuses on measuring light from a very specific, small area of the frame. This is ideal for silhouette photography because it allows the photographer to meter directly for the brightest part of the image—the background—while leaving the subject dark and underexposed. When you use spot metering, the camera meters light only from a small spot, which could be positioned at the brightest part of the scene, such as the sky behind the subject. This ensures that the subject remains a dark silhouette against the well-exposed background, creating the dramatic effect you're aiming for.
Why Spot Metering Is Essential for Silhouette Photography
Silhouette photography thrives on the sharp contrast between the dark subject and the illuminated background. In most scenes, the subject will appear darker than the background, which is typically bright—whether it’s the sun during the golden hour, artificial lighting, or a brightly lit cityscape at night. Without proper exposure, the result can be a photograph that lacks contrast, with a subject that’s either too exposed or completely lost in the light. Spot metering solves this problem by ensuring that the exposure is metered from the background, preserving the silhouette effect.
Let’s break down the advantages of spot metering in silhouette photography:
Precise Control Over Exposure: Spot metering allows you to focus your exposure on a very specific part of the scene, typically the brightest area where the light source is located. This precise control is vital for silhouette photography, where achieving the right balance between light and shadow is crucial. By metering for the light, the camera will expose the background correctly while leaving the subject underexposed, preserving the bold contrast that defines silhouette images.
Avoiding Overexposure: Without spot metering, cameras using evaluative or center-weighted modes often attempt to balance the exposure across the entire frame. This can result in a photograph where the subject is either overexposed or incorrectly exposed. The result is a flat image where the dramatic contrast is lost. Spot metering minimizes this risk by ensuring that the camera only meters for the brightest light in the scene, typically the background. The subject, by default, remains dark, which is the desired outcome for a powerful silhouette.
Maintaining the Subject’s Shape: In silhouette photography, the subject’s outline is the focal point, and it needs to be sharp and well-defined. Spot metering helps maintain that by ensuring the background is properly exposed. When using spot metering, the subject’s darkness emphasizes its shape and form, allowing the viewer to focus solely on the silhouette. This is especially important for subjects like people, animals, or objects that have strong, recognizable outlines.
Maximizing Background Exposure: Since the subject is dark, the background typically needs to be significantly brighter in order to achieve the desired contrast. Spot metering allows you to expose the background properly, especially if you’re shooting at sunrise, sunset, or against any bright light source. This technique ensures that the background is well-lit and vibrant, which helps the subject stand out against it.
How to Use Spot Metering for Silhouette Photography
Now that we understand the importance of spot metering in silhouette photography, let’s explore how to use it effectively. While different cameras may have slightly different procedures for selecting spot metering, the general process remains the same.Set Your Camera to Spot Metering: Check your camera's settings and switch to spot metering mode. This can typically be done through the camera’s menu or directly via a dedicated metering button or dial. Once you’ve selected spot metering, your camera will only measure light from a small area at the center of the frame (though some cameras allow you to adjust the metering spot to different areas of the frame as well).
Position the Metering Spot on the Brightest Part of the Scene: With spot metering active, move your camera so that the spot meters the brightest part of the scene, typically the area around the light source, such as the sky, the sun, or a streetlamp. The key here is that you’re exposing for the background rather than the subject, ensuring the background remains properly lit and vibrant.Recompose Your Shot: After the exposure has been locked for the background, you can recompose your shot to position the subject in the frame. The subject will remain underexposed because it is not part of the spot metering calculation. Make sure that your subject is clearly defined and distinct, as this will help the silhouette stand out even more.
Check and Adjust Exposure: After taking the shot, review your image. If the subject is still too light or not dark enough, you can adjust the exposure compensation dial to reduce the exposure further. Most cameras allow you to adjust the exposure by -0.3, -0.7, or even -1 stops. This adjustment deepens the silhouette, making it even more dramatic.Fine-Tune Focus and Aperture: In silhouette photography, it's crucial to have the subject in focus while maintaining sharpness in the background. Use a smaller aperture (such as f/8 or f/11) to ensure that both the subject and the background are in focus, especially if you're using a wide-angle lens. A smaller aperture also helps ensure that more of the light source in the background is in focus, which adds to the overall sharpness of the image.
Common Mistakes to Avoid When Using Spot Metering
While spot metering is a powerful tool for silhouette photography, it requires a certain level of precision. Here are some common mistakes to avoid:
Incorrect Placement of Metering Spot: One of the most frequent mistakes is positioning the metering spot on the wrong part of the scene. If you meter for the subject or for an area of the image that is too dark, the exposure will be off, and the contrast between the subject and background will be lost. Always meter for the light source or the brightest part of the scene.
Not Adjusting Exposure Compensation: While spot metering will ensure the background is correctly exposed, sometimes you need to dial in additional exposure compensation to achieve a deeper silhouette. If the subject is still too light or lacks contrast, adjusting the exposure compensation is necessary.
Failing to Consider Dynamic Range: In scenes with a very high contrast between light and dark areas, the camera's dynamic range might struggle to properly capture both the bright background and the dark subject. In such cases, use HDR (High Dynamic Range) techniques or shoot in RAW to retain more detail in both the shadows and highlights.
Camera Settings for the Perfect Silhouette
Silhouette photography is one of the most visually striking techniques in the world of photography, but achieving the perfect shot requires precise camera settings. The success of a silhouette photo depends largely on how the subject is framed, how exposure is managed, and how light interacts with the scene. For those aiming to capture bold, dramatic, and high-contrast images where the subject is a dark outline against a bright background, understanding the optimal camera settings is crucial.
This guide will delve deeper into the essential camera settings and adjustments needed to ensure that every silhouette shot is perfectly exposed, sharp, and dramatic. From aperture and exposure to focusing and flash settings, these tips will elevate your silhouette photography to the next level.
Aperture: The Key to Sharpness
One of the most critical elements in silhouette photography is ensuring that both the background and the subject are in focus. While the subject itself will typically appear dark, the background plays a significant role in the image’s composition. To achieve this balance, a relatively narrow aperture—such as f/11—is highly recommended.
A narrow aperture allows for a deeper depth of field, which ensures that both the background and the subject’s outline are sharp. With a wide aperture (such as f/2.8 or f/4), the depth of field becomes shallow, meaning only a small portion of the scene will be in focus. This can result in a blurred background or out-of-focus edges around the subject. Since silhouette photography is heavily dependent on the subject’s shape and outline, maintaining focus across the entire scene is essential.
|
Related Catagories: |
In addition to keeping everything in focus, using a smaller aperture also helps you avoid overexposing bright background areas. By controlling the amount of light that enters through the lens, you can ensure that the light source (typically the sky or another light source) doesn't become too bright or overexposed, which can lead to loss of detail in the background. A setting like f/8 to f/11 is ideal for these types of shots.
Focus on the Subject’s Outline
Unlike traditional portrait photography, where fine details and textures are important, silhouette photography is all about the shape and outline of the subject. The focus in silhouette photography should be on the edges of the subject, not on the subject itself.
When composing your silhouette shot, it's essential to focus on the sharpness of the edges rather than the details. For instance, if you're photographing a person or an animal, the human figure or the animal's body should have a crisp, well-defined edge. However, the subject itself will remain dark, leaving only the silhouette visible.
In terms of camera settings, it's often better to use manual focus in silhouette photography. This gives you full control over the focus and allows you to fine-tune the sharpness of the subject's outline without relying on autofocus, which might struggle in low-light conditions. By manually adjusting the focus ring on your lens, you can ensure that the silhouette is as crisp as possible.
If you're shooting with a lens that has focus peaking (common in mirrorless cameras), this feature can help you identify the areas of the image that are in focus, ensuring that your silhouette is as sharp as possible.
Exposure Compensation: Enhancing the Silhouette Effect
Exposure compensation is a key adjustment when shooting silhouettes, as it allows you to control the brightness of the image and adjust how dark the subject appears. Silhouettes rely on a high contrast between the dark subject and the brightly lit background, so if your subject is not dark enough, the desired silhouette effect will be weakened.
If your subject appears too light or not dark enough in the shot, adjusting the exposure compensation dial is the easiest way to fix it. Typically, adjusting the exposure compensation to -0.3 or -0.7 stops will underexpose the image slightly, deepening the silhouette and enhancing the contrast. The exact value will depend on the scene and the light conditions, so it’s important to experiment and review your results.
When you decrease the exposure slightly, you darken the subject’s outline, ensuring that the subject is completely silhouetted. By dialing in the right amount of underexposure, you can achieve a rich, deep silhouette that pops against the illuminated background.
It’s also important to note that exposure compensation works best when combined with spot metering, which ensures that the background light is exposed correctly while the subject remains dark. Without spot metering, the camera may attempt to expose the subject evenly, which can result in a flat image and an ineffective silhouette.
Shutter Speed: Capturing Movement and Detail
While aperture and exposure compensation play a significant role in silhouette photography, shutter speed also has its place. Shutter speed controls how much time the camera’s sensor is exposed to light, and it can impact how motion is captured in silhouette shots.
If you're photographing a still subject, such as a person standing against a sunset, you can typically use a slower shutter speed (e.g., 1/200s or 1/500s) without worrying about motion blur. A slower shutter speed can also be beneficial for capturing subtle movements, such as a person walking or an animal in motion, while still maintaining the silhouette effect.
However, if you're photographing fast-moving subjects—such as athletes, dancers, or animals—you’ll need to use a faster shutter speed (e.g., 1/1000s or faster). This ensures that the movement is captured sharply, without motion blur. In silhouette photography, fast-moving subjects tend to produce dynamic, energetic images, and a quick shutter speed is key to freezing that motion while preserving the contrast and sharpness of the silhouette.
If you’re shooting in low-light conditions, you may need to compensate for the reduced light with either a slower shutter speed or a wider aperture. In such cases, be mindful of your ISO settings to avoid introducing noise or grain into the image.
ISO: Balancing Light and Noise
The ISO setting controls your camera’s sensitivity to light, and it plays a significant role in silhouette photography, especially when shooting in low-light conditions. When you’re shooting a silhouette against a bright background, you typically want to use a lower ISO (e.g., ISO 100 or 200) to maintain the image’s sharpness and minimize noise. A low ISO ensures that you capture clean, crisp outlines without introducing unwanted grain.
However, in some low-light situations (such as shooting at night), you might need to increase your ISO setting to compensate for the reduced light. In these cases, you can increase your ISO to around ISO 800 or ISO 1600. Keep in mind that higher ISO settings introduce more noise, so it’s important to find a balance between achieving the correct exposure and maintaining image quality.
Turning Off the Flash
One of the most crucial aspects of silhouette photography is keeping the subject dark. The flash on your camera, however, is designed to illuminate the subject and reveal details, which is the exact opposite of what you want in silhouette photography. Flash can ruin the silhouette effect by filling in the subject’s details, which breaks the contrast that makes silhouette photography so powerful.
To ensure that your silhouette remains dark and featureless, always disable the flash. In most cameras, the flash can be turned off via the flash settings or the camera’s menu. If your camera automatically attempts to use the flash in low-light situations, make sure to set the flash to "off" or use manual mode to prevent the camera from firing it.
Recompose and Frame the Shot
Once you’ve set your aperture, exposure compensation, shutter speed, and ISO, the final step is to recompose your shot. Since silhouette photography is focused on the shape of the subject, framing becomes crucial. Place your subject between your camera and the light source, ensuring that the light source (e.g., the sun, a streetlight, or an artificial light) is directly behind them. The position of the subject and the light source will dictate the overall impact of the silhouette.
When composing your shot, experiment with the positioning of the subject within the frame. Try different angles and perspectives to create an interesting and visually appealing silhouette. Often, positioning the subject slightly off-center or using leading lines in the background (like the horizon, a road, or a tree line) can create a more dynamic composition.
Finding the Right Backlighting
Backlighting is the essence of silhouette photography, as it’s responsible for creating the iconic contrast between light and shadow. The most effective light sources for silhouettes are bright, direct lights positioned behind the subject. Natural light, especially the sun, is ideal for backlighting, particularly during the golden hour—the period just before sunset or just after sunrise. This time provides a soft, diffused light that creates beautiful, dramatic silhouettes.
For evening or night photography, artificial light can also serve as a backlight. Streetlights, car headlights, or lights from buildings can create dramatic silhouettes, especially when combined with creative composition and positioning.
For optimal planning, apps like The Photographer’s Ephemeris are incredibly useful. They allow you to determine when and where the best lighting conditions will occur, so you can time your silhouette shots perfectly based on the time of day and location.
Choosing the Right Subject for Silhouettes
The success of your silhouette depends heavily on the subject you choose to photograph. In silhouette photography, the subject’s shape and outline are the primary focus, so it’s essential that the subject has a strong, easily recognizable form. This is why people, animals, and objects with clear shapes work exceptionally well.
When photographing people, profile shots often produce the most effective silhouettes. The side view of a human figure is instantly recognizable, even without intricate details like facial features. The same rule applies to animals: profiles or side views make their shapes stand out clearly.
If you're photographing multiple people or objects, remember to leave enough negative space between subjects. Too many objects placed too closely together can result in silhouettes that overlap, making it difficult for viewers to distinguish individual subjects. If you’re photographing structures like trees, statues, or buildings, look for clean, defined shapes with strong outlines. The more distinct the shape, the more recognizable the silhouette will be.
Positioning Yourself for the Perfect Silhouette Shot
Positioning is key when it comes to capturing a stunning silhouette. Ensure that your subject is between you and the light source, and adjust your position as needed to create the desired effect. Even a slight change in angle can have a significant impact on the silhouette’s appearance.
You can experiment with incorporating the light source into your shot or, alternatively, completely blocking the light with your subject. The angle at which you position yourself will determine how much light spills around the subject’s edges, creating a beautiful “rim light” effect. Rim light highlights the edges of the silhouette, and in some cases, it may reveal subtle details without compromising the dark nature of the subject.
For added creativity, consider experimenting with a sunburst effect by using a narrow aperture such as f/22. This aperture creates a starburst pattern around the light source, adding a dynamic element to your silhouette shots. However, be mindful of lens diffraction, which can reduce sharpness when using extremely small apertures.
Simplifying the Background for Impact
A cluttered background can detract from the effectiveness of a silhouette. To ensure that your subject stands out, choose a simple, uncluttered background. Open skies, beaches, and vast fields often make excellent backdrops for silhouette photography because they are naturally free from distractions.
Similarly, urban settings like city rooftops or skylines can work well as backgrounds, especially during sunset or sunrise. When shooting against a cityscape, aim for a clean horizon to ensure that the silhouette of the buildings stands out against the colorful sky.
Advanced Techniques and Creative Ideas
While the basics of silhouette photography are straightforward, there are several advanced techniques that can further elevate your shots. For instance, rimming the subject with light—using backlight to softly illuminate the edges—adds depth and dimension to the silhouette. Another creative approach is using multiple light sources. For example, you can create a silhouette using a combination of natural sunlight and artificial light to highlight specific areas of the subject.
If you’re photographing a subject with intricate patterns, such as a tree with a complex canopy or an object with detailed edges, try using backlighting to emphasize these patterns in the silhouette. The interplay of light and shadow can create intricate textures that add a unique touch to your images.
Conclusion
Mastering silhouette photography is a rewarding endeavor that allows you to transform ordinary scenes into visually captivating works of art. By understanding the interplay between subject, light, and camera settings, you can create dramatic and thought-provoking images that leave a lasting impression. Whether you’re capturing the graceful profile of a person, the strong outline of an animal, or the bold shape of a building, silhouette photography is an incredibly powerful way to convey emotion and storytelling through contrast and shape.
By utilizing backlighting, experimenting with metering modes, adjusting your camera settings, and carefully selecting your subjects, you can unlock a world of creative possibilities. Through practice and exploration, you’ll be able to create silhouette photographs that evoke mystery, drama, and beauty in every frame.


