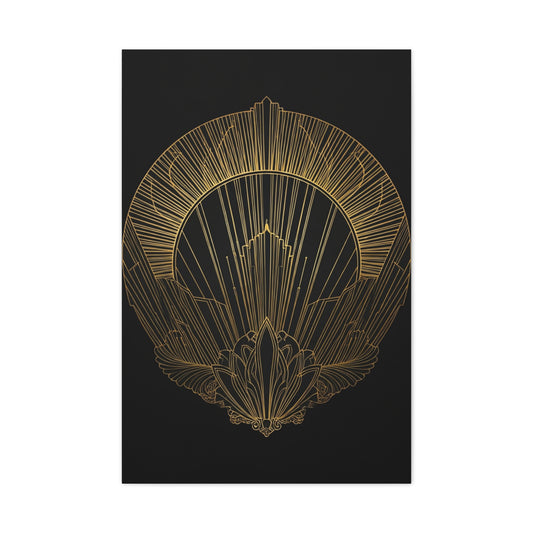
In a world dominated by digital screens and fast-paced living, many are rediscovering the joy of slow, hands-on creativity. Among the most captivating art forms to emerge in recent years is diamond painting, an enchanting craft that marries the methodical elegance of mosaic art with the mesmerizing shimmer of rhinestones. At first glance, diamond painting appears as a simple pastime, yet beneath the surface lies a deeply therapeutic and soul-enriching pursuit that appeals to both novice creators and seasoned artists.
The Beginnings of a Dazzling Trend
Diamond painting may seem like a novel idea, but its roots stretch back to the early 2000s in China, where inventive artisans first began experimenting with resin rhinestones to craft intricate designs on adhesive canvases. This nascent form of art, initially known as 5D Diamond Embroidery, quickly spread throughout Asia. By 2010, it had crossed oceans and captivated the Western world, largely due to its hypnotic visual results and the meditative experience it offers.
In the traditional sense, this art form diverges from its craft cousins like cross-stitch and paint-by-numbers by eliminating the need for thread or paint. Instead, it incorporates tiny, jewel-like drills—flat-backed, faceted rhinestones—that are meticulously placed onto a pre-printed adhesive surface. The result? A luminescent tapestry that shimmers with every glance, echoing the intricacies of mosaic artistry with a modern sparkle.
Understanding the Process
Diamond painting is deceptively simple: each canvas features a coded guide overlaying the image, much like a color-by-symbol grid. Artists use an applicator tool, often a pen dipped in wax or gum, to lift each diamond from a tray and place it precisely where it belongs. The drills themselves come in square or round shapes, and the choice between them often depends on the desired aesthetic and the crafter’s level of experience.
Square drills fit tightly together, offering a seamless finish with no visible gaps, perfect for creating polished, professional-grade artwork. Round drills, on the other hand, are easier to place and more forgiving of minor errors, making them ideal for those just embarking on their diamond painting journey.
Tools of the Trade
A comprehensive diamond painting kit typically includes an adhesive canvas, color-coded rhinestones, a drill pen, a tray for sorting, and tweezers for precise corrections. To elevate the crafting experience, enthusiasts often incorporate supplementary tools such as light boards to enhance symbol visibility, magnifying lenses for meticulous placement, and storage containers to organize the multicolored drills.
Moreover, the methodical nature of this craft necessitates a clean, well-lit, and flat workspace. Organizing drills by hue and symbol before starting can streamline the process and reduce errors. Enthusiasts also use double-sided release papers to segment the canvas, ensuring that only the working area is exposed while keeping the rest protected.
The Meditative Magic
Beyond the radiant visuals, what truly draws people to diamond painting is the meditative ambiance it creates. The repetitive motion of placing each rhinestone induces a state of focused calm, akin to mindfulness practices or slow art therapy. It anchors the mind in the present, allowing crafters to temporarily disconnect from stressors and immerse themselves in a cocoon of tranquility.
This unique blend of creativity and introspection makes diamond painting especially beneficial for individuals grappling with anxiety, trauma, or attention-related disorders. The act of slowly building an artwork stone by stone can foster a sense of control, accomplishment, and self-worth, turning the hobby into a profound emotional balm.
A Universal Pastime
One of diamond painting’s most enchanting traits is its accessibility. It welcomes everyone—children, seniors, art aficionados, and complete beginners alike. Since no prior artistic expertise is required, the barrier to entry is minimal. All one needs is patience, a willingness to learn, and a fondness for glittering results.
Crafters can choose from myriad themes: vibrant landscapes, expressive animals, celestial designs, or even surreal abstract patterns. Seasonal kits and festival-themed projects also abound, allowing artisans to match their creations to their mood or the time of year.
What adds further to its universal appeal is the soothing, almost meditative rhythm of placing each gem. The repetitiveness brings calm and focus, often likened to a visual form of mindfulness.
For many, this simple act becomes a cherished ritual—a creative escape from the digital noise of everyday life. It encourages presence and intentionality, especially in an age of distractions. Plus, the gradual emergence of the final design brings a deep sense of satisfaction and pride, making diamond painting not just a craft, but an experience in slow, sparkling joy.
Personalization and Wall pics
In addition to pre-designed canvases, the rise of custom diamond paintings has added a deeply personal dimension to this craft. Through platforms like Wall pics, enthusiasts can commission bespoke kits featuring photos of loved ones, beloved pets, or cherished memories. These personalized creations blend technology and tradition, transforming everyday snapshots into radiant works of art.
Wall pics offer a seamless process that allows users to upload their images and receive a ready-to-craft kit that retains emotional resonance while delivering artistic satisfaction. Each rhinestone becomes a tribute to the memory it represents, adding sentimental depth to the already immersive experience.
Choosing Your Canvas – Diamond Painting Kits, Drill Types, and Design Inspirations
The glittering world of diamond painting continues to enchant hobbyists across the globe, offering both an escape and a sense of accomplishment. We delve into the diverse types of diamond painting kits, their components, and how to select the most inspiring themes. Whether you’re just discovering this craft or refining your technique, understanding the nuances of kit selection and artistic design can elevate your diamond art journey.
Anatomy of a Diamond Painting Kit Diamond painting kits come in a kaleidoscope of configurations, each designed to suit specific skill levels, preferences, and creative aspirations. However, all kits share a set of fundamental components that enable artists to bring a luminous image to life.
Core Components Include:
- A pre-printed, adhesive canvas: Imprinted with a coded chart that guides the placement of each rhinestone
-
Resin or crystal drills: Tiny, multi-faceted stones in various shapes and hues
-
An applicator pen: Used to pick up and place the drills with precision
-
Applicator gum: A sticky substance that enables the pen to grasp each drill
-
Sorting tray: Allows drills to be lined up, flat side down, for easy pickup
-
Tweezers: Handy for repositioning or removing misplaced drills
Some advanced kits may also include additional items such as roller tools for smoothing the canvas, magnifiers for accuracy, or a light pad that enhances symbol visibility from beneath the canvas.
Drill Shapes and Effects One of the most vital decisions in diamond painting lies in selecting the shape and style of your drills. Each variety produces a different texture, rhythm, and overall appearance.
Round Drills: Round-shaped drills are favored by newcomers for their forgiving nature. They are easier to pick up and place, and minor placement errors are often unnoticeable. They create a more beaded look with subtle spacing between drills that adds an airy, almost ethereal effect to the artwork.
Square Drills: Square drills interlock seamlessly like a jigsaw puzzle. When applied with accuracy, they form a tighter and more cohesive image. This option suits more experienced crafters who desire professional-level detail and a sleek finish. The uniformity of square drills contributes to a polished, mosaic-like appearance.
Special Shaped Drills: For those who want to infuse their artwork with whimsy or a multidimensional quality, special-shaped drills such as teardrops, stars, or faceted beads offer an extraordinary visual impact. These are typically used for embellishments in partial-drill canvases.
Partial vs. Full Drill Canvases Another key distinction when selecting a diamond painting kit is whether the canvas features a full or partial drill area.
Full Drill: The entire canvas is covered in diamonds, creating a dense, vivid, and uninterrupted artwork. This style is ideal for immersive projects that produce a museum-worthy finish.
Partial Drill: Only specific sections of the canvas are embellished, leaving some background visible. This method emphasizes the focal point and is faster to complete, making it a suitable option for beginners or those who prefer a quicker crafting experience.
Canvas Quality and Adhesive Canvas type plays a significant role in your project’s durability and ease of use. Higher-quality canvases are often made of soft, wrinkle-resistant materials like velvet-backed polyester. They come pre-coated with a premium poured glue or double-sided adhesive.
Poured Glue: This clear, tacky adhesive spreads evenly and cures slowly, offering a smooth working experience. It's more forgiving if diamonds need repositioning.
Double-Sided Adhesive: This method uses adhesive film and is known for its firm grip. However, improper handling may lead to air bubbles or creases. Regardless of type, always cover unused areas with protective film to maintain tackiness.
Themes to Spark Your Imagination One of the most delightful aspects of diamond painting is choosing a design that resonates with your soul. Themes range from serene landscapes to dramatic abstracts, allowing artists to express their personalities and moods.
Landscape Escapes: Rolling hills, blooming lavender fields, or mist-draped forests offer a calming outlet and are excellent choices for full-drill canvases. The gradation in color allows for intricate blending and transitions.
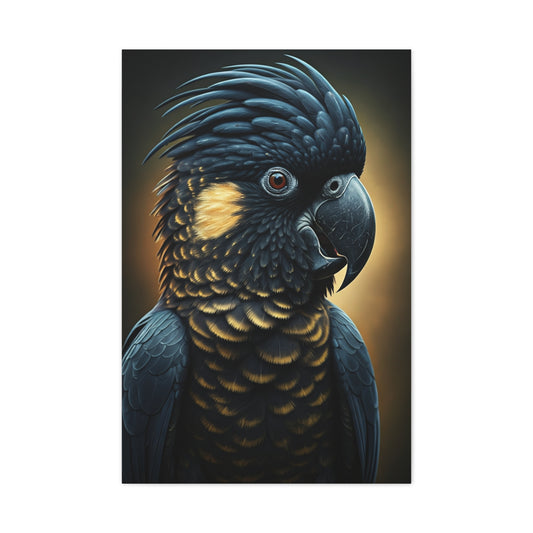
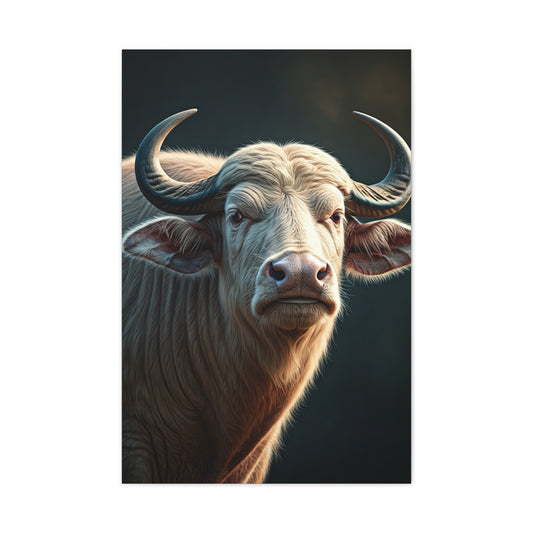
Animal Portraits: Whether it’s a regal lion, a fluttering hummingbird, or your beloved pet, animal-themed paintings breathe life into your canvas. These can be simple or complex depending on the level of detail.
Festival-Inspired Pieces: Holiday-centric themes such as snowy Christmas scenes, Diwali lamps, or cherry blossom festivals bring seasonal joy and cultural richness to your crafting.
Abstract Expressions: Perfect for those with avant-garde tastes, abstract designs emphasize shape, line, and unconventional color use. They often use special-shaped drills for extra flair.
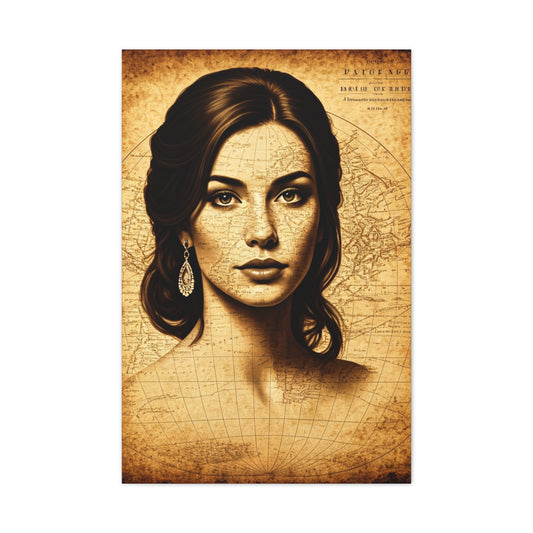
Custom Portraits: For a deeply personal piece, custom diamond paintings based on photographs are growing in popularity. Companies like Wall pics allow you to upload your own images, which are then transformed into sparkling masterpieces that carry sentimental value and decorative appeal.
Tips for Choosing Your First Kit
-
Start small: A smaller canvas with a simple design helps build confidence.
-
Go round: Round drills are more forgiving for beginners.
-
Prioritize themes: Choose an image that genuinely excites you; motivation keeps the process enjoyable.
-
Mind your lighting: Kits with dark color palettes are easier to work with under a light pad.
-
Check reviews: Ensure the supplier is reputable and offers quality adhesives and clear canvas symbols.
Combining Kits with Home Décor Completed diamond paintings are far more than a fleeting hobby; they become radiant elements of home décor. Once sealed and framed, they can grace walls with their jeweled elegance. Whether arranged as a series or displayed solo, these shimmering pieces elevate any room’s aesthetic.
You might consider complementing your diamond painting display with customized digital wall art from Wall pics. The harmonious combination of sparkle and sleek design brings an eclectic blend of tradition and tech into your living space.
Diamond Painting Techniques: Precision Tips and Expert Skills
Diamond painting is more than a vibrant pastime—it’s a nuanced art form that calls upon dexterity, patience, and a flair for visual storytelling. As hobbyists progress from beginner to proficient artisan, the transition often involves discovering refined techniques and applying advanced strategies that elevate their finished work from simple sparkle to polished brilliance. This segment delves into both the foundational and sophisticated methods that shape the artistry behind diamond painting, with a particular focus on precision, innovation, and expression.
The Evolution from Hobby to Artistic Mastery
What begins as a therapeutic outlet often evolves into a full-fledged artistic endeavor. The process of diamond painting offers more than just a relaxing escape—it becomes a gateway for personal growth and creative exploration. The learning curve varies for each individual, shaped by experience, patience, and an evolving understanding of the medium.
As a diamond painting enthusiast progresses, the initial approach of mechanically filling in spaces with pre-determined colors often shifts toward a more deliberate practice. The moment one moves from simply completing a kit to thoughtfully blending shades, adjusting placement, and even altering compositions marks a significant turning point in their artistic journey.
This transformation requires not only craft but also technique. It’s about understanding the finer details—how a single rhinestone can subtly influence the overall visual appeal, or how the interplay of light and color can elevate the depth and mood of a piece. Advanced crafters begin to experiment with gradients, exploring how different hues can seamlessly transition across a canvas to create lifelike effects or surreal interpretations. Patterns, too, become more fluid, with crafters intuitively recognizing opportunities to enhance their artwork by incorporating dynamic movements and visual focal points. As this growth unfolds, diamond painting morphs from a simple hobby into an expressive form of art, where each piece is a testament to the artist's vision and skill.
Laying the Foundation: Intermediate Techniques
Before diving into advanced artistry, let’s revisit the intermediate methods that form the backbone of skill development in diamond painting.
Working in a Grid System
Instead of placing diamonds randomly or purely color by color, experienced artists often divide the canvas into a grid. This could be mentally segmented or marked using release papers or washi tape. This meticulous approach promotes alignment and consistency, especially in larger artworks.
By breaking down the canvas into smaller sections, artists can focus on one area at a time, making the process more manageable and reducing the risk of mistakes. This technique not only ensures that each rhinestone is placed accurately but also helps with maintaining a smooth flow of colors and patterns, leading to a polished final piece.
Mastering Multi-Placer Tools
Though initially challenging, mastering the multi-placer tool can revolutionize your workflow. These tools, which allow for placing 3 to 10 drills simultaneously, are ideal for large blocks of a single color. The key lies in ensuring each drill is aligned in the tray so that they are evenly picked up, avoiding crooked placement or gaps.
Color-Blocking Versus Confetti Areas
Diamond paintings generally featured two types of areas: color-blocking zones with repetitive drills and confetti areas that demand rapid switching between colors. Color-blocking is ideal for multi-placers, while confetti sections challenge your precision and patience. Alternating between these two helps maintain both interest and focus.
Canvas Handling Best Practices
To maintain the adhesive quality and longevity of your diamond painting, it's important to only expose small sections of the adhesive canvas at a time. This helps preserve the stickiness and prevents dust or debris from settling. If any stray particles, such as dust or pet hair, do make their way onto the canvas, gently using a lint roller can effectively remove them without damaging the surface. Additionally, proper storage is crucial—keep the canvas flat or roll it around a foam core to avoid creases, folds, or warping that can compromise your finished artwork.
Advanced Techniques: Where Art Meets Innovation
Once you're fluent in the basics and comfortable with intermediate practices, it's time to refine your craft through advanced diamond painting methods that transform your artwork into something uniquely yours.
Gradient Blending and Color Transitions
Blending in diamond painting requires a certain level of creative thinking and experimentation, as most standard kits won’t come with pre-planned gradients or tonal shifts. Artists, however, have the opportunity to personalize their work by selecting drills from adjacent shades in their stash or swapping similar colors from other kits. This technique is particularly effective when working on backgrounds such as skies, water, or hair, where seamless transitions between colors can evoke natural movement and depth.
For example, when creating a sky or ocean scene, blending light blues into deeper shades of blue or teal can make the artwork appear more fluid, mimicking the way light and color shift in nature. In hair or fur, subtle transitions between shades of brown, blonde, or even black add realism and dimension, making the subject look more lifelike. Instead of relying on harsh lines or abrupt color changes, a smooth gradient gives the viewer’s eye a gentle path to follow, enhancing the overall visual impact.
Blending also opens up opportunities for using special finishes like AB (Aurora Borealis) diamonds, which can further enhance depth and light reflection in the painting. These diamonds catch the light in a magical way, offering a shimmering effect that can be strategically placed in areas of the painting that need extra sparkle, such as highlighting facial features, flowing water, or sunlit sections of a scene.
Freestyling and Custom Alterations
Some artists choose to reinterpret the original image. This might involve:
-
Swapping colors is a technique that allows artists to enhance the visual impact of their diamond painting. By replacing certain shades with more vibrant or contrasting colors, you can make specific areas pop or draw attention to focal points. This subtle adjustment adds depth and can transform an otherwise flat image into a striking masterpiece.
-
Adding AB (Aurora Borealis) diamonds enhances your diamond painting with a captivating shimmer. These special diamonds have a unique coating that reflects light, creating stunning highlights and making certain areas of your artwork sparkle even more.
-
Using glow-in-the-dark drills adds a magical touch to thematic pieces like fantasy or space designs. These drills illuminate in low light, enhancing the overall atmosphere and creating a mesmerizing effect.
The ability to freestyle elevates a project from following instructions to composing an original piece of art.
Embellishment with Special-Shaped Diamonds
Beyond the standard round and square drills, advanced diamond painters explore special shapes like teardrops, stars, or iridescent domes. These add texture and visual surprise, often used in focal areas like eyes, jewelry, stars, or magical effects.
The Checkerboard Method
This checkerboard technique is especially effective when working with square drills, as they have sharp edges that can easily create noticeable gaps if not placed correctly. By initially placing diamonds in alternating positions like a checkerboard pattern and then filling in the remaining spaces, you create a smooth and even surface.
This method not only ensures tighter alignment but also improves the overall cohesion of the design. The result is a more polished, professional appearance with minimal visible gaps, making the final piece visually satisfying and well-crafted, and also easier to work with.
Working with Custom Diamond Painting Kits
Custom kits are a hallmark of seasoned artists—allowing them to immortalize personal memories, portraits, or original digital designs using sparkling drills.
Wall pics, a leader in the world of custom art, offers bespoke diamond painting kits designed from your submitted photos or concepts. This service transforms emotional memories into tangible masterpieces. The quality of the print, clarity of the symbol chart, and adhesion of the canvas from Wallpapers ensures that your creative efforts are fully supported from start to finish.
Whether it's a cherished family moment, a beloved pet, or a favorite travel memory, these custom kits offer a bridge between digital life and handmade art.
Creating Depth: Visual Techniques Beyond Drill Placement
Advanced artistry in diamond painting involves visual psychology—guiding the viewer’s eye across the piece using light, shadow, and composition.
Contrast and Light Source Simulation
Strategically placing AB (Aurora Borealis) diamonds in areas where light naturally interacts with the scene creates an illusion of dynamic movement and highlights, giving the artwork a more realistic, lifelike appearance. These diamonds, with their shimmering, iridescent quality, catch light differently, simulating reflections on water, glass, or even metallic surfaces like jewelry. This technique is especially effective in water-themed pieces, where the natural reflection of light on the surface can create a mesmerizing, almost magical effect.
Additionally, surrounding the focal points of your piece with darker-colored diamonds creates a soft vignette or halo effect, which serves to highlight the main subjects of the artwork. The contrast between light and dark helps to emphasize depth, making certain elements appear to “pop” off the canvas.
This method not only enhances visual interest but also guides the viewer's eyes to the key areas of your painting, creating a sense of movement and focus while adding complexity and dimension to the overall composition.
Perspective and Layering
Mimicking the distinction between foreground and background can transform a flat canvas into a scene with a sense of spatial depth. This effect can be achieved by adjusting the density or size of the drills, with larger or more densely packed drills used in the foreground to create emphasis.
Additionally, incorporating different finishes, such as matte drills for the background and shiny drills for the foreground, can further enhance the perception of depth and make the artwork appear more dynamic.
Expert-Level Finishing Techniques
Even the final touches of a diamond painting can differentiate a seasoned artisan from a novice.
Sealing
-
Use a clear, non-yellowing sealant like mod podge for preservation. Be mindful to keep the shine by choosing gloss over matte.
Mounting and Framing
-
Rather than a generic frame, consider floating frames or shadow boxes that let the piece breathe.
-
Floating diamond art on black velvet or textured backgrounds can amplify its luminous qualities.
Layered Mixed Media
-
Some artists go even further by combining diamond painting with other art forms. For example, painting additional elements on the canvas background or incorporating subtle embroidery.
Troubleshooting Like a Pro
Even experts encounter challenges. Here are solutions to common advanced issues:
Problem: Gaps between square drills
-
Solution: Use the checkerboard technique or a roller to gently press down and shift drills.
Problem: Dull sparkle post-sealing
-
Solution: Only seal when necessary and always use a glossy, crystal-clear product.
Problem: Limited shades in custom kits
-
Solution: Mix and match drills from past projects to add nuance. Some artisans even purchase drills separately to expand their palette.
Pushing Creative Boundaries
In recent years, innovative artists have pushed diamond painting far beyond flat canvases—sculpting three-dimensional ornaments, crafting wearable art like encrusted denim patches and accessories, and even assembling multiple canvases into sprawling murals that transform entire walls. This genre‑crossing experimentation demonstrates that diamond painting isn’t confined to a single medium but serves as a gateway to limitless artistic exploration.
A Quiet Revolution in Creativity
Diamond painting continues to evolve, with online communities and social platforms sharing techniques, timelapses, and experiments. Enthusiasts find solace and stimulation within global groups, bonding over shared sparkle and slow craftsmanship.
Many also find purpose in gifting their creations or selling finished pieces in markets and online platforms. The blend of meditative process and tangible outcome makes it uniquely fulfilling.
Diamond Painting Framing & Display Guide
The creative journey of diamond painting doesn't end once your final rhinestone is placed. To elevate your completed artwork into a timeless keepsake, framing, preserving, and showcasing your piece properly is essential. In this final installment of our four-part exploration of diamond painting, we delve into the post-creation process—transforming a craft into a treasured masterpiece.
Sealing Your Diamond Painting: A Must for Longevity
After investing considerable time and energy into your sparkling masterpiece, it’s essential to lock those radiant gems in place. Sealing your diamond painting not only ensures its long‑term durability but also protects it from dust, accidental dislodging, and loss of luster.
You can choose from several sealing methods to suit your aesthetic preferences: brush‑on sealers—transparent glues and finishes that dry crystal clear, boosting sparkle while securely bonding the drills; acrylic spray sealants—quick and easy to apply, though they may slightly mute shine, ideal for a more subdued, non‑glossy effect; or Mod Podge and other craft glues, available in gloss, matte, or satin finishes for a tailored balance of sheen and protection.
Before you begin, press every drill firmly into place with a roller, then gently remove any dust or loose particles with a soft brush or cloth to avoid trapping debris under the sealant.
Framing Options to Flaunt Your Art
Framing your diamond art not only enhances its visual appeal but also plays an essential role in preserving its longevity. When choosing the right frame, consider the overall aesthetic of the piece and how the frame will complement the diamonds' natural sparkle. Glass frames are a traditional choice, offering protection from environmental factors like dust, moisture, and UV light.
However, glass may cause the artwork to lose some of its brilliant shine, so it’s worth considering how much you value the sparkle versus protection. On the other hand, frameless or open-frame options are perfect for those who want to highlight the diamonds' radiance, though extra care must be taken to prevent dust accumulation. Shadow box frames provide an added benefit for thicker canvases, creating a space that showcases the texture and depth of the diamonds.
These frames are also ideal for artwork with more dimensional elements, such as 3D pieces. Stretcher bar frames, offering a minimalist approach without glass, let the artwork’s sparkle shine unobstructed. For budget-conscious crafters, DIY options, like foam board and cardboard backings, offer a simple yet effective way to display your masterpiece in a standard photo frame, without compromising on quality.
Mounting and Hanging: Displaying with Elegance
With your artwork sealed and framed, the next phase is mounting. Placement is just as much an art as creation.
-
Ambient Lighting: Diamond art thrives under soft light. Display your work where natural or ambient lighting will highlight its reflective charm without washing it out.
-
Grouping by Theme: If you've created multiple artworks in similar motifs—florals, celestial scenes, animals—group them together for a curated gallery wall.
-
Floating Frames: These frames create the illusion that your art is suspended in the middle of the frame, adding dimension and focus to your piece.
-
Wall Arrangement Ideas: Try arranging artworks in geometric patterns—grids, spirals, or even organic, flowing layouts for added visual interest.
Caring for Your Diamond Artwork Over Time
Routine upkeep of your diamond artwork is simple yet essential to preserving its brilliance. Gently dust the surface with a soft microfiber cloth, taking care never to introduce water or chemical cleaners that could dull the rhinestones or weaken the adhesive.
Position framed pieces away from direct sunlight to prevent color fading and adhesive degradation, and, in humid environments, employ a dehumidifier to protect both canvas and glue from moisture damage.
If your masterpiece isn’t yet framed, store it flat inside clear portfolio sleeves or acid‑free art folders—this keeps the canvas pristine and tacky until you’re ready to display. With these few mindful steps, your diamond painting will continue to sparkle for years to come.
Innovative Ideas for Creative Display
Let your imagination expand beyond conventional wall hangings:
-
Decorative Trays: Insert diamond art into trays with a glass overlay for functional sparkle.
-
Notebook Covers: Customize notebooks or journals using sections of diamond paintings.
-
Tabletop Art: Prop smaller framed pieces on easels for shelves or desks.
-
Canvas Tote Bags: Transfer designs onto fabric for wearable art (using proper textile adhesive or stitching).
-
Festival Decorations: Utilize holiday-themed paintings as seasonal décor—hang them up or integrate them into wreaths and centerpieces.
Diamond Art as a Meaningful Gift
Diamond paintings can become heartfelt gifts. Whether it’s a dazzling custom portrait, a serene landscape, or a favorite animal depiction, presenting someone with a piece you've lovingly crafted by hand adds emotional value beyond measure. Add personal notes or include a certificate of creation date and theme.
Custom diamond kits from platforms like Wall pics make gifting even more special, offering options where you can upload personal photos for customized patterns. This creates opportunities to commemorate special occasions—weddings, anniversaries, memorials, or milestones—with radiant artistry.
Digital Archives and Sharing Your Work
In our digital era, your finished piece can extend beyond its physical presence. High-resolution photographs or scans of your completed art can be shared on creative forums or turned into digital prints. These can be:
-
Used as screensavers or wallpapers
-
Shared on crafting communities or social platforms
-
Turned into print-on-demand merchandise like mugs, pillows, or calendars
Joining Diamond Art Communities
Being part of online and local diamond painting communities can greatly enhance your crafting experience, offering not only technical support but also emotional encouragement. These communities serve as vibrant hubs where crafters of all skill levels come together to exchange ideas, inspire each other, and share their artistic journeys. Whether you're just starting with your first kit or you're a seasoned artist working on intricate pieces, connecting with others can elevate your experience.
One of the most rewarding aspects of these groups is the opportunity to receive constructive feedback. Experienced crafters often provide valuable insights into techniques, tool recommendations, and how to approach more challenging projects.
Additionally, many groups host events such as themed challenges or contests, which can serve as a fun and motivating way to push your skills further. The sense of friendly competition adds an extra layer of excitement and a chance to showcase your work to a wider audience.
Moreover, online and local communities are a great space for seeking help during creative blocks. Whether you’re unsure how to tackle a tricky section of your design or just need some inspiration, a quick post in a group can spark new ideas. The camaraderie found in these spaces can turn diamond painting from a solitary hobby into a shared, fulfilling experience.
Beyond the Hobby: Diamond Art as a Lifestyle
What starts as a hobby often becomes an integral part of life for enthusiasts. Many find that diamond painting fosters a deeper sense of mindfulness and improves mental health. Over time, crafters often develop more than just skill—they build a philosophy around creativity, patience, and joy.
There’s a ceremonial essence to it: preparing your space, organizing the drills, placing each one with care. It encourages mindfulness, the kind that anchors you in the moment and hushes the noise of the outside world.
Final Thoughts:
As our lives become increasingly digitized, the tactile serenity offered by diamond painting becomes ever more valuable. This craft isn’t merely about assembling sparkling beads—it’s a ritual, a gentle rebellion against the chaos of modernity. Whether you’re curating a gallery wall or simply seeking solace in shimmering details, diamond painting offers a resplendent path forward.
Choosing the right diamond painting kit is the first luminous step into a fulfilling creative journey. From selecting between round or square drills to finding a theme that resonates, this process sets the tone for both artistic satisfaction and personal growth. As we move forward in this series, we’ll explore the finer techniques of diamond placement, gradient creation, and speed-enhancing methods that transform crafters into artisans.
As we trace the journey from placing your first rhinestone to crafting immersive, glowing artworks, it’s clear that diamond painting is not just a hobby—it’s a symphony of patience, creativity, and deliberate artistry.
With premium custom kits from Wallpapers and a growing toolkit of advanced techniques, there’s no ceiling to what you can create. Whether you’re reimagining an old family photo or
Composing abstract constellations of color and light, your diamond painting can become a lasting testament to your evolving vision.
Now that you've explored the deeper techniques behind the shimmer, get ready for the final part in our series, where we’ll explore how diamond art is making waves as both décor and a heartfelt form of self-expression.
Diamond painting isn't just an art—it’s an experience. From the tactile sensation of placing each shimmering drill to the visual satisfaction of a complete mosaic masterpiece, this craft invites anyone—young or old, seasoned or novice—into its radiant fold.
Whether you’re framing a custom wallpaper portrait of your family, designing a landscape for your hallway, or gifting a festive piece to a loved one, diamond painting empowers you to create beauty and preserve emotion in crystalline form.
With the right techniques and thoughtful presentation, your diamond art can become a permanent, gleaming part of your space and story. Embrace the glow, and let your creativity sparkle beyond the canvas.