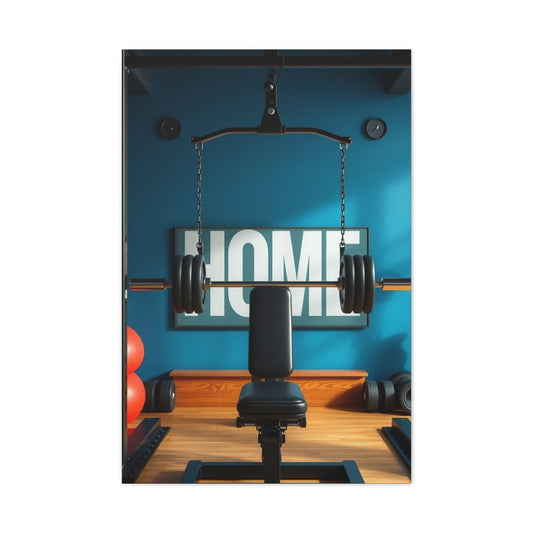
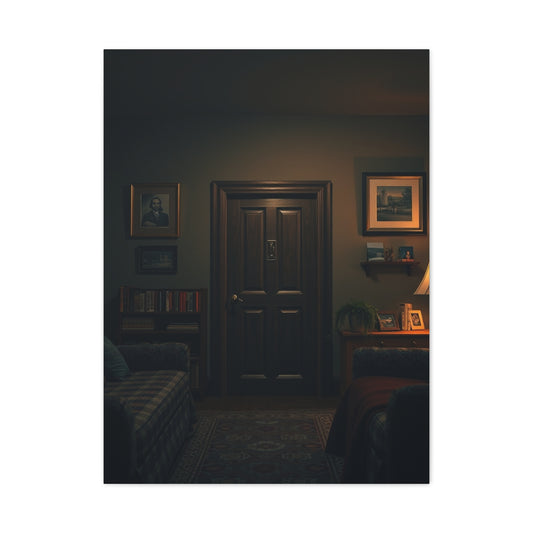
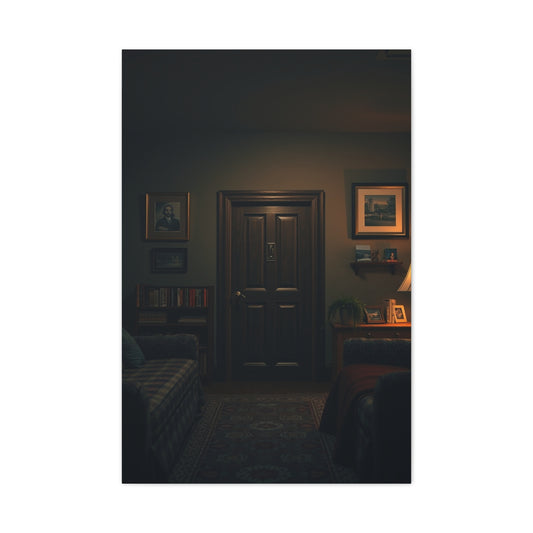
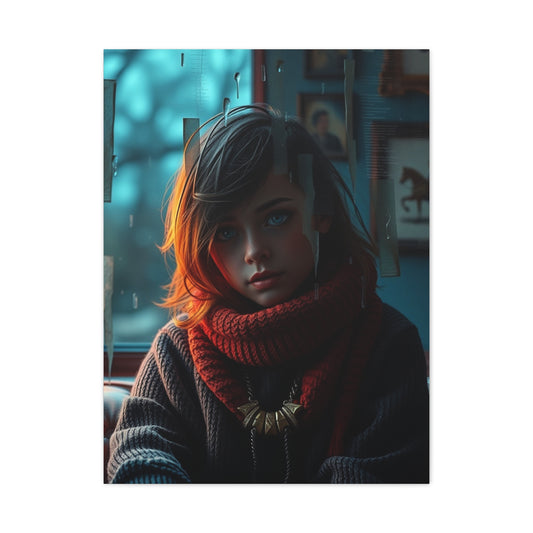
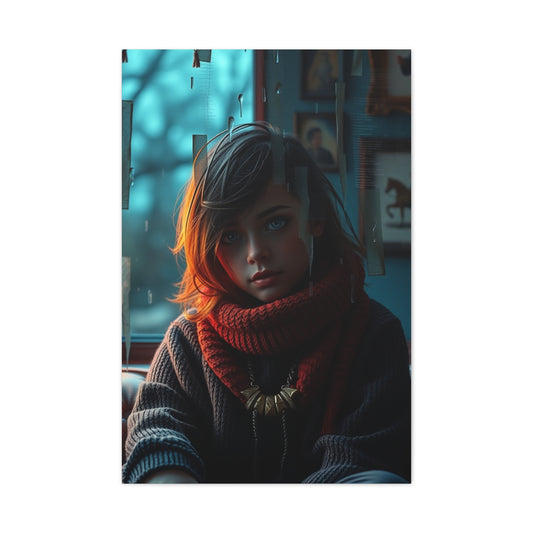
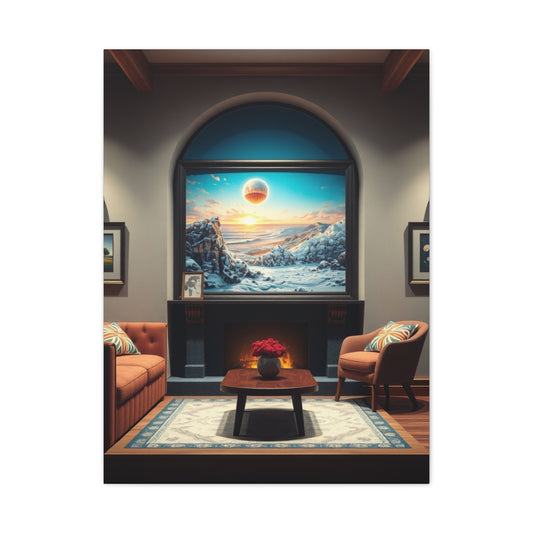
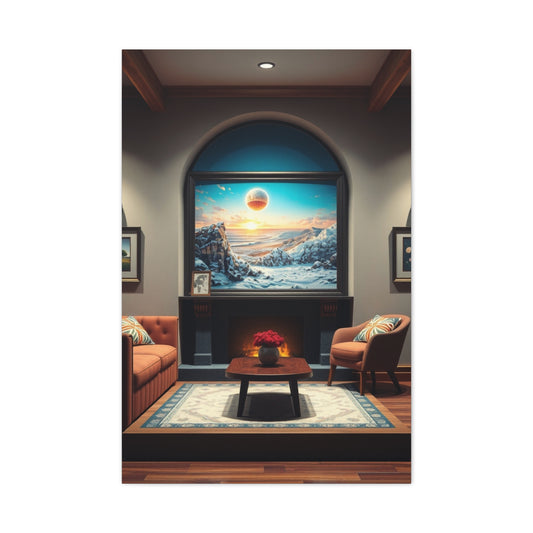
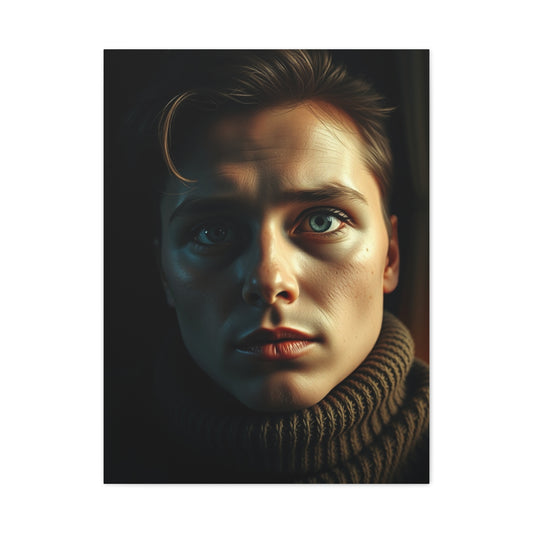
Your home is a reflection of your personality, and every detail contributes to the overall aesthetic. One of the most impactful ways to define your interior is through wall art. Whether you prefer bold, statement-making pieces or a collection of subtle prints, the way you hang your art can completely change the mood of a room. While decorating is ultimately a personal choice, there are proven techniques and principles that can make any space look cohesive and thoughtfully curated. Understanding the fundamentals of art placement is key to achieving a polished, professional appearance.
Choosing the right artwork begins with considering the scale and layout of your space. The size, shape, and arrangement of your wall art should complement your room’s dimensions and existing furniture. For instance, a single large canvas can serve as a focal point in a minimalist room, while multiple smaller pieces arranged in a grid or gallery style can add visual interest and texture to a larger wall. Multi-panel artwork, such as diptychs, triptychs, or even five-panel sets, has become increasingly popular for its ability to create movement and depth across a room. These arrangements can highlight architectural features or act as a centerpiece, drawing the eye naturally across the wall.
Once you have selected the type of art that suits your interior, planning the layout becomes essential. Start by visualizing how the pieces will interact with surrounding furniture and architectural elements. For vertical spaces, tall canvases can emphasize height, while horizontal compositions can create a sense of stability and balance. Symmetry is another important consideration; even if your goal is an eclectic or modern look, maintaining a subtle sense of balance helps prevent a chaotic or cluttered feel. Arrangements can be aligned along an invisible central axis, or they can follow a more dynamic composition, but each piece should feel intentionally placed rather than random.
|
Related Catagories: |
Before you start hammering nails into the wall, gather the right tools. Proper preparation ensures the process is smooth and the results are clean. At minimum, you’ll need a pencil to mark placement, a measuring tape or ruler to ensure proper alignment, and a level to maintain horizontal accuracy. For securing the artwork, nails or screws appropriate for your wall type are essential. Additionally, small adjustments can be made with household items like a piece of tape or even a small amount of putty to temporarily hold pieces in place while you refine their positions. The key is to approach the task with precision and patience; rushed placement can lead to crooked art or an unbalanced appearance.
One of the most common mistakes when hanging wall art is incorrect height. Artwork should generally be positioned at eye level to create a natural viewing experience. While eye level may vary depending on the height of the room and furniture, a good rule of thumb is to position the center of the artwork around 57 to 60 inches from the floor. Hanging art too high can make it seem disconnected from the rest of the room, while placing it too low can reduce its visual impact. In living rooms, where sofas or chairs are present, leave around six to eight inches of space between the top of the furniture and the bottom of the artwork. This spacing creates harmony and allows the furniture and art to complement each other without one overwhelming the other.
In addition to height, consider the spacing between multiple pieces of art. Proper spacing ensures that each work is distinguishable while still contributing to an overall cohesive display. Too much distance between pieces can make the arrangement feel disjointed, while pieces placed too close together can appear crowded. For pairs or small clusters, a separation of two to three inches is often ideal. In larger gallery walls, spacing can be increased proportionally, but it’s important to maintain a sense of rhythm so the collection feels unified. This principle also applies to multi-panel canvases; the gaps between panels should be consistent to create visual flow and prevent distraction.
Another factor that impacts how art is perceived is its relationship with surrounding walls and furniture. Allowing adequate negative space—or blank areas—around artwork prevents the room from feeling cluttered and draws attention to the piece itself. For instance, avoid placing artwork directly against corners or other visual distractions. Maintaining at least a foot of clearance from the edges of the wall can help the piece breathe and make it a focal point. This approach emphasizes simplicity and lets the art shine, rather than competing with its surroundings.
The type of wall and hanging hardware also plays a role in achieving a professional finish. Drywall, plaster, and brick all require different types of anchors or fasteners to ensure that the art remains secure over time. Lightweight prints may only need a simple nail or adhesive hook, while heavier canvases or multi-panel pieces require more robust supports such as screws with wall anchors. Using the appropriate hardware not only ensures safety but also prevents damage to both the wall and the artwork. Properly secured art maintains its intended position, allowing the room’s aesthetic to remain consistent over time.
When working with canvases, consider whether they are framed or unframed, as this can affect the hanging technique. Framed art typically includes built-in hardware such as D-rings or wire, while unframed canvases may rely on sawtooth hangers or other minimalist options. Each type has its advantages: framed pieces can enhance a traditional or classic look, while unframed canvases often lend themselves to a more modern or gallery-style feel. Selecting the right hanging method for your canvas ensures it sits flush against the wall and maintains a clean silhouette.
Lighting also enhances the appearance of wall art. While the placement and arrangement of the artwork are crucial, proper illumination brings out colors, textures, and details that might otherwise go unnoticed. Natural light can create dynamic effects throughout the day, while strategically positioned artificial lighting, such as picture lights or track lighting, can highlight specific features and create depth. Avoid harsh overhead lights that cast strong shadows, as these can distract from the artwork. Instead, opt for soft, even illumination that accentuates the piece and complements the room’s ambiance.
In addition to the technical aspects of hanging, consider the visual impact of your art. Artwork should relate to the mood or theme of the room, whether it’s a calming, serene bedroom or an energetic, lively living area. Colors, textures, and patterns all contribute to the room’s overall feel. For example, large abstract pieces can serve as bold statement pieces in minimalist interiors, while smaller, detailed prints may enhance cozy or traditional spaces. The scale of the artwork relative to furniture and wall space is critical; underwhelming sizes can get lost in large rooms, while overly large pieces can dominate a small area.
Once you understand the basic principles of positioning and visual balance, the next step is to focus on practical techniques that make hanging artwork a seamless process. Proper preparation, careful measurement, and attention to detail can turn an ordinary room into a gallery-worthy space. Even small adjustments in placement or alignment can significantly improve the overall appearance of your walls.
Planning Your Layout
Before putting anything on the wall, it’s essential to have a clear plan. Start by measuring the dimensions of the wall and identifying key features such as windows, doors, or furniture that could affect placement. Consider creating a paper template or mock-up of your artwork to visualize the arrangement. This can be done by cutting out pieces of paper or cardboard the same size as your canvases and temporarily taping them to the wall. Moving these “placeholders” around allows you to experiment with different positions without committing to nails or screws.
For rooms with large blank walls, it can be tempting to scatter smaller pieces randomly, but a deliberate arrangement creates a sense of cohesion. Start by centering the largest piece at the midpoint of the wall or the room’s focal point. Then, arrange smaller artworks around it in a way that feels balanced. Whether you prefer symmetrical layouts, linear arrangements, or more dynamic, staggered groupings, the key is to maintain a sense of rhythm. Repetition of shapes, colors, or frame styles can help unify a collection of varied pieces.
Correct Height and Spacing
A fundamental rule in hanging artwork is keeping it at eye level. While this standard is approximately 57–60 inches from the floor to the center of the artwork, adjustments can be made depending on ceiling height, furniture, or the purpose of the space. For artwork above a sofa or console table, leaving 6–8 inches of clearance between the furniture and the bottom of the artwork generally looks best.
For multi-piece arrangements, maintaining consistent spacing between pieces is essential. Too much distance can make the arrangement feel disjointed, while pieces that are too close together may look cramped. A separation of 2–3 inches between smaller pieces works well, while larger galleries may allow 4–6 inches for a more airy effect. In multi-panel art, such as triptychs or five-panel canvases, even spacing between panels ensures the piece reads as a cohesive work rather than fragmented sections.
Choosing the Right Hardware
The type of wall you’re working with—drywall, plaster, brick, or concrete—determines the hardware you should use. Lightweight frames and canvases can often be hung with nails or adhesive hooks, but heavier pieces require screws with wall anchors to ensure stability. Using the appropriate hardware prevents accidents and protects both the artwork and your walls.
For unframed canvases, sawtooth hangers are a simple and effective option. Framed pieces may include D-rings or wires, which allow for easy leveling and adjustment. For heavier or oversized canvases, consider using multiple anchors or a French cleat system, which distributes weight evenly and keeps the piece flush against the wall. Always check the weight rating of the hardware before hanging it to avoid potential damage.
Multi-Panel and Gallery Arrangements
Multi-panel artwork, including diptychs, triptychs, and larger sets, can add depth and visual movement to a room. The most critical consideration is maintaining consistent spacing between panels. Even small variations can disrupt the intended flow of the piece. Use a ruler or level to mark placement points on the wall before committing to hanging.
Gallery walls—collections of framed prints, photographs, or mixed media—require additional planning. Decide whether you want a symmetrical or asymmetric layout. Symmetry provides a formal, organized look, while asymmetric arrangements feel more dynamic and casual. Start by positioning the largest piece at the center and then build around it, filling in with smaller works. Using consistent spacing and aligning top or bottom edges can create a sense of order, even with varied shapes and sizes.
Preparing the Wall Surface
Before hanging artwork, ensure your walls are clean and smooth. Dust, grease, or uneven textures can interfere with adhesive hooks and affect the stability of nails or screws. For newly painted walls, allow sufficient time for the paint to cure, as hanging art too soon can leave marks or damage the surface. In spaces with textured walls, consider using specialized anchors or hooks designed for uneven surfaces.
Additionally, check for any obstacles such as moldings, radiators, or light switches that could interfere with placement. Accounting for these elements ensures that your artwork sits harmoniously within the room’s layout and avoids visual clutter.
Tools for Precision
Having the right tools makes the process of hanging wall art much easier. At a minimum, you should have a measuring tape, pencil, hammer or drill, and a level. A spirit level ensures that your artwork is perfectly horizontal, preventing the lopsided appearance that can make a space feel chaotic. For multi-panel arrangements, measuring spacing accurately is essential to achieve a professional finish.
Other useful items include painter’s tape for marking positions temporarily and a small piece of putty or adhesive for lightly holding pieces while you adjust alignment. By taking a methodical approach, you minimize errors and avoid unnecessary holes in the wall.
Canvas Care and Maintenance
The placement of your artwork is not only about aesthetics; it also affects longevity. Avoid hanging canvases in direct sunlight, which can cause fading over time. Similarly, high-humidity areas such as bathrooms can damage certain types of canvas or paper prints. Consider lighting conditions and environmental factors when deciding on the location of each piece.
For unframed canvases, make sure they remain flush against the wall. Gaps can collect dust and may lead to warping over time. Regular dusting with a soft cloth or brush helps maintain the vibrancy of colors and prevents dirt from accumulating on the surface. For framed pieces, inspect the frame and glass periodically to ensure everything remains secure and clean.
Harmonizing with Furniture and Decor
The relationship between wall art and surrounding furniture is critical to a cohesive design. Artwork should complement rather than compete with furnishings. Large statement pieces work well above sofas, beds, or consoles, while smaller pieces can fill empty corners or create accents around mirrors or shelving units.
When arranging multiple pieces, consider the visual weight of both the artwork and the furniture. Heavier-looking pieces should be balanced with substantial furniture below, while lighter prints can complement minimalistic or slender furnishings. The goal is to create harmony, where each element supports the others and contributes to the room’s overall atmosphere.
Layering and Depth
Creating a sense of depth can enhance the visual appeal of your walls. Layering art with other decorative elements, such as wall-mounted shelves, small sculptures, or plants, adds dimension and texture. This approach works particularly well in living areas or entryways, where adding interest can elevate the room without overwhelming it. Multi-panel canvases also create natural depth, as the spacing between panels encourages the eye to move across the wall and engage with the artwork fully.
Lighting Considerations
The way your artwork is lit can dramatically influence its impact. Natural light can enhance colors and highlight textures, but too much direct sunlight can cause fading. Artificial lighting, such as track lights or wall-mounted picture lights, can create dramatic effects and highlight specific pieces. Avoid harsh overhead lights that create shadows or glare, as these can detract from the artwork. Instead, aim for soft, diffused illumination that complements the room’s ambiance.
Experimentation and Flexibility
Even with careful planning, don’t hesitate to experiment. Moving pieces around, adjusting spacing, and testing different heights allows you to find the arrangement that feels right. Step back frequently to view the space from multiple angles, and don’t be afraid to make small adjustments. The process of hanging wall art is iterative, and minor tweaks can significantly enhance the overall aesthetic.
Personal Expression
Ultimately, wall art should reflect your personality and taste. While design principles provide guidance, your own preferences matter most. Bold choices, such as oversized prints, unconventional arrangements, or vibrant colors, can make a room feel unique and energizing. Balancing personal expression with proven design techniques ensures that the space is both aesthetically pleasing and authentically yours.
Once you have mastered the basics of hanging wall art and preparing your space, it’s time to explore more advanced techniques that can take your interiors from simple to sophisticated. These strategies focus on creative layouts, specialized wall types, and incorporating artwork seamlessly into the overall design of your home.
Understanding Wall Types and Their Challenges
Different wall materials require distinct approaches when hanging art. Drywall, the most common type of interior wall, is relatively easy to work with but requires proper anchors for heavier pieces. Using standard nails works well for lighter canvases, but medium to large frames benefit from screws with plastic or metal anchors. These distribute weight evenly and prevent the artwork from pulling out over time.
Plaster walls, often found in older homes, are more delicate and prone to cracking. Drilling should be done carefully, ideally with a masonry bit, and anchors designed specifically for plaster can provide secure support. For brick or concrete walls, masonry screws or specialized hooks are necessary. While these surfaces are tougher to work with, they allow for creative and durable installations, especially for larger pieces or multi-panel arrangements.
It’s also important to consider textured walls, such as those with stucco, paneling, or wood accents. These surfaces may prevent a canvas from sitting flush, so using spacers, French cleats, or custom mounts can help maintain a professional look. Regardless of wall type, taking the time to prepare the surface and use the correct hardware ensures that your artwork remains secure and visually appealing.
Creating Dynamic Arrangements
Beyond the basic grid or linear layouts, more creative approaches can add energy and interest to your walls. Consider asymmetrical arrangements, which allow you to mix different sizes and shapes of artwork while maintaining visual balance. Start with a central anchor piece and position other works around it, keeping consistent spacing to unify the composition. Asymmetry creates movement and prevents a wall from feeling rigid or predictable.
Layering artworks can also enhance depth. Overlapping smaller frames or canvases slightly can create a sense of dimension and interest, especially when paired with other wall décor such as shelves, mirrors, or decorative panels. This technique works particularly well in living rooms or hallways where the walls serve as focal points and can accommodate more dynamic displays.
Grouping artwork by theme, color, or subject matter can make multiple pieces feel cohesive. For instance, black-and-white photographs can be arranged together to create a striking monochromatic gallery, while pieces with complementary colors can enhance the room’s palette. Repetition of shapes or frames can further unify a collection, even when the artworks themselves vary in content or size.
Multi-Panel Canvases
Multi-panel artwork is a powerful way to create a sense of movement and sophistication in a room. When hanging diptychs, triptychs, or larger multi-panel sets, consistency in spacing and alignment is crucial. Panels should be equidistant, and the tops or bottoms should align precisely unless a staggered design is intentionally desired. Using a level and measuring tape is essential, as even minor inconsistencies can be visually distracting.
Consider the scale of your multi-panel artwork relative to the wall. Larger panels can dominate a room and become the focal point, while smaller panels are better suited for accent walls or sections of a room that need visual interest without overwhelming the space. Multi-panel arrangements also allow flexibility in design, enabling pieces to work across different rooms or wall sections while maintaining a unified theme.
Incorporating Furniture and Architectural Elements
Artwork should not exist in isolation. Its placement in relation to furniture and architectural elements significantly affects the perception of the room. Above beds, sofas, or consoles, the width of the artwork should generally be around two-thirds to three-quarters the width of the furniture. This proportionality creates balance and prevents the piece from appearing too small or too large.
For walls with windows, doors, or built-in shelving, consider how your artwork interacts with these elements. A piece placed too close to a window may compete with natural light, while a frame that overlaps molding can look awkward. Allowing breathing space around the artwork helps it integrate seamlessly into the environment. Additionally, artwork can be used to highlight architectural features. For example, a series of vertical prints can emphasize height in a room, while horizontal pieces can draw attention to expansive wall spaces.
Using Color and Contrast
Color plays a critical role in how wall art impacts a room. Bold or bright pieces can energize a neutral space, while subtle tones can complement and unify a room with an existing color palette. When hanging multiple pieces together, balance colors across the arrangement to prevent one section from feeling too heavy or dominant.
Contrast is also an important tool. Light-colored frames against a dark wall create emphasis, while darker frames on a light wall provide grounding. For unframed canvases, the contrast between the canvas edge and the wall can influence how the piece is perceived. Even small details, such as frame thickness or matting color, can make a significant difference in overall presentation.
Practical Tips for Perfect Alignment
Achieving precise alignment requires careful attention to detail. When hanging a single piece, use a level to ensure it is perfectly horizontal. For multiple pieces, measuring the distance between each piece consistently is crucial. Temporary markers, painter’s tape, or a laser level can simplify this process, allowing for adjustments before the final installation.
When working with larger pieces, enlisting a second person to help can be invaluable. One person can hold and adjust the artwork while the other measures and secures it. This teamwork ensures safety, accuracy, and prevents accidental damage to walls or the piece itself.
Enhancing Small Spaces
Even in small rooms, artwork can have a big impact. In compact areas, choose pieces that complement the scale of the room. Vertical compositions can make ceilings feel higher, while horizontal pieces can elongate a wall. For galleries of small prints, clustering them together can create a sense of fullness without overwhelming the space. Maintaining consistent spacing and alignment ensures the display feels intentional rather than cluttered.
Mirrors or reflective pieces can also be incorporated with artwork to visually expand a small room. When positioned strategically, mirrors can bounce light and make walls appear larger, while the surrounding artwork enhances style and interest.
Seasonal or Rotating Displays
For those who enjoy frequently changing their décor, rotating artwork seasonally or periodically can refresh a room’s appearance. Lightweight frames or canvases are ideal for this, as they can be easily moved or replaced without compromising wall integrity. This approach allows for experimentation with new styles, colors, or themes, keeping your interiors dynamic and engaging.
When planning rotating displays, consider creating a flexible gallery layout with consistent spacing and alignment. This ensures that new pieces fit harmoniously within the existing arrangement, maintaining balance and coherence.
Maintaining and Protecting Artwork
Proper care extends the life and appearance of your art. Avoid direct exposure to sunlight, as this can fade pigments over time. Keep canvases away from moisture-prone areas to prevent warping or mold. Dusting regularly with a soft, dry cloth helps preserve colors and textures. For framed artwork, ensure the glass or acrylic is clean and scratch-free, and periodically check that fasteners remain secure.
For multi-panel or frequently rotated displays, inspect the hardware and hanging systems to prevent sagging or misalignment. Small adjustments over time can maintain a polished, professional look and avoid damage to both the wall and artwork.
Combining Art with Other Decor Elements
Artwork does not need to stand alone. Combining it with other decorative elements can enhance the overall aesthetic. Floating shelves with small sculptures or plants can complement larger prints, while wall-mounted lighting can highlight textures and colors. Layering different types of decor creates depth and interest, making walls feel curated rather than bare or cluttered.
Consider integrating art with functional elements as well. For example, a series of prints can act as a backdrop for a reading nook, or a large canvas can anchor a dining area. The interaction between artwork and everyday objects ensures that the space feels intentional, stylish, and comfortable.
The Psychological Impact of Wall Art
Art affects the atmosphere and mood of a room. Bold, vibrant pieces can energize and inspire, while softer, muted works create calm and serenity. Thoughtful placement can influence how people perceive a space; artwork positioned at eye level encourages engagement, while large, central pieces draw attention and set the tone for the room.
In multi-room layouts, consider how art in adjacent spaces interacts. Consistent themes, colors, or styles can create a seamless transition between rooms, enhancing the overall flow of the home. Conversely, introducing varied styles in separate areas allows each room to express a distinct character, keeping the experience dynamic and interesting.
By integrating these advanced techniques—considering wall type, lighting, scale, alignment, and thematic cohesion—you can elevate the impact of your artwork dramatically. Careful planning, combined with a thoughtful approach to arrangement and maintenance, ensures that your walls become expressive, engaging, and reflective of your personal style.
After planning, measuring, and carefully hanging your artwork, the final steps are what truly elevate your walls from simple decoration to a curated, gallery-quality presentation. These finishing touches involve thoughtful adjustments, cohesive styling, and attention to detail, ensuring your space feels polished and intentional.
Achieving Balance and Harmony
One of the most important aspects of a well-designed wall is balance. Balance doesn’t necessarily mean symmetry—it can be achieved through visual weight and proportion. For instance, a large, colorful painting on one side of a room can be balanced by a collection of smaller neutral-toned pieces on the opposite wall. The goal is to distribute visual interest so that no area feels heavier or more crowded than another.
When hanging multiple pieces, consider both horizontal and vertical alignment. Aligning top edges, bottom edges, or centers can provide structure, even in asymmetrical arrangements. Similarly, consistent spacing between artworks prevents a disorganized appearance. Using small markers or painter’s tape to indicate placement during the hanging process can help maintain uniformity and avoid unnecessary holes in the wall.
Layering and Depth
Layering is a sophisticated technique that adds depth and dimension to your walls. This can include placing smaller artworks slightly in front of larger canvases, or combining frames with shelves, mirrors, or wall-mounted objects. The layering effect creates a dynamic visual flow that guides the eye naturally across the wall, making the display more engaging.
For multi-panel canvases, layering can enhance their impact. Panels slightly offset from each other, or spaced strategically with complementary elements like small sculptures or decorative lighting, give the artwork a sense of movement. This approach works particularly well in large living spaces or entryways, where walls are more expansive and allow for creative experimentation.
Integrating Wall Art with Furniture
Artwork should complement furniture rather than compete with it. Large canvases or framed prints above sofas, beds, or consoles should generally be two-thirds to three-quarters the width of the furniture beneath. This proportionality creates a natural connection between the artwork and the room’s functional elements, ensuring a harmonious appearance.
Consider the vertical spacing as well. In addition to the standard 6–8 inches above furniture, adjust based on ceiling height and room scale. Taller ceilings may allow for slightly higher placement without feeling disconnected, while lower ceilings benefit from art that sits closer to furniture to create a balanced visual plane.
Artwork can also enhance functional spaces. In dining areas, a bold piece can anchor the room and create a focal point for meals and conversation. In home offices, smaller prints or abstract pieces can energize the space without overwhelming the work environment. Carefully considering how art interacts with furniture ensures that the room feels cohesive and intentional.
Lighting Your Artwork
Proper lighting is critical to showcasing your wall art effectively. The right illumination highlights textures, colors, and details, transforming the viewing experience. Soft, diffused lighting is ideal for general display, while directional lighting such as track lights, wall-mounted picture lights, or recessed spotlights can accentuate specific pieces.
Avoid harsh overhead lighting that casts shadows or glare. Natural light is excellent for showcasing colors, but it should be monitored to prevent fading over time. For rooms with large windows, consider UV-protective coatings or positioning art away from direct sunlight. Adjustable lighting allows flexibility, enabling you to highlight different pieces at different times of day or during evening gatherings.
Creating a Cohesive Theme
A curated wall display benefits from a cohesive theme or style. This doesn’t mean all pieces must match perfectly, but common elements such as color palette, frame style, or subject matter help unify the collection. For example, a gallery wall of black-and-white photography can feel intentional and sophisticated, even with varied frame sizes. Similarly, grouping artworks with similar hues can tie together disparate pieces, enhancing visual harmony.
Thematic consistency can extend across multiple rooms. Coordinating colors, textures, or styles between living areas, hallways, and bedrooms creates a seamless flow throughout the home. Alternatively, distinct themes in each room can highlight the unique character of each space, offering variety while maintaining balance.
Incorporating Negative Space
Negative space—the empty area around artwork—is essential for achieving a polished look. Allowing each piece room to “breathe” prevents overcrowding and directs attention to individual works. A common mistake is filling every inch of a wall with art, which can overwhelm the viewer and diminish the impact of each piece.
For gallery walls or multi-panel arrangements, negative space ensures clarity and structure. Even spacing between panels, coupled with a margin around the edges of the wall, frames the artwork visually and enhances the overall composition. The result is a display that feels intentional, clean, and professional.
Adjusting for Eye-Level Viewing
While the standard eye-level guideline is approximately 57–60 inches from the floor to the center of the artwork, adjustments may be necessary based on room function and furniture placement. In rooms where seating is prominent, such as living rooms, artwork should align with the seated eye line. In hallways or staircases, consider the average standing height for optimal placement.
For multi-panel or gallery arrangements, ensure that the eye is naturally drawn along the intended visual path. Panels should guide the gaze without forcing awkward movements. Strategic placement allows each piece to be appreciated individually while contributing to the collective effect of the display.
Special Considerations for Multi-Panel Art
Multi-panel artworks, such as diptychs, triptychs, or five-panel sets, require extra attention to spacing and alignment. Panels should be equidistant and level to maintain cohesion. Slight deviations in placement can disrupt the intended visual flow, making the display appear uneven or unfinished.
Consider using a laser level for precise alignment, particularly for larger sets. This tool ensures that each panel maintains a consistent height and spacing, reducing the likelihood of misalignment. Multi-panel arrangements offer flexibility in design, allowing you to adjust panel spacing or stagger panels slightly to create movement while still maintaining a cohesive composition.
Rotating Art and Seasonal Updates
For dynamic interiors, consider rotating artwork periodically. Seasonal changes or personal preference shifts can inspire new displays. Lightweight canvases or frames make this process easier, allowing for quick updates without extensive wall modifications.
|
Related Catagories: |
Rotating art can refresh a room’s atmosphere, introducing new color palettes or thematic elements. Keeping a consistent spacing and alignment framework ensures that new pieces integrate seamlessly into existing arrangements. This approach allows homeowners to experiment with different styles, trends, or moods while maintaining a curated, professional look.
Maintaining Artwork Over Time
Proper care is essential to preserve the beauty and longevity of your wall art. Avoid placing canvases in areas with direct sunlight, high humidity, or extreme temperature fluctuations. Dust regularly with a soft cloth or brush to prevent buildup, and inspect frames and mounting hardware periodically to ensure stability.
For unframed canvases, check that they remain flush against the wall. Even minor gaps can affect appearance and may lead to warping over time. Framed pieces should be inspected for secure fittings and clean, undamaged glass or acrylic. Attention to these details ensures that your display remains polished and visually appealing for years to come.
Combining Art with Other Wall Elements
Integrating artwork with other wall décor can enhance both the art and the room itself. Floating shelves with decorative objects, mirrors, or wall-mounted lighting can complement and highlight art. Small accents, such as plants or sculptural pieces, create visual interest and prevent the wall from feeling static.
Consider balance and proportion when combining elements. Larger artworks pair well with minimal additional decor, while smaller pieces benefit from complementary accents that draw attention. The combination of artwork and other elements should feel intentional, contributing to the room’s overall aesthetic rather than competing for attention.
Personal Expression and Individuality
At the heart of wall art is personal expression. While following design principles ensures a polished appearance, the ultimate goal is to create a space that reflects your style, tastes, and personality. Bold choices, unconventional arrangements, or unique media can make a room feel distinctively yours.
Trusting your instincts and experimenting with placement, color, and scale allows you to develop a curated environment that feels authentic. The most compelling wall displays are those that balance creativity with thoughtful design, merging professional techniques with individual expression.
Final Steps for a Gallery-Worthy Finish
After hanging your artwork, take a step back and evaluate the space. Adjust spacing, height, and alignment as necessary. Check lighting angles and shadows, and consider how the display interacts with furniture and architectural features. Minor tweaks can significantly improve the overall look, creating a cohesive, professional effect.
Maintaining a consistent theme, spacing, and alignment ensures that your walls feel intentional and curated. Incorporating layered elements, strategic lighting, and thoughtful placement enhances depth and visual interest. With careful attention to these finishing touches, even a novice decorator can achieve a polished, gallery-inspired result.
The Impact of Well-Hung Artwork
Well-hung artwork transforms a room. It creates focal points, complements furnishings, and adds personality. Proper placement enhances the viewer’s experience, whether they are relaxing in a living room, dining with family, or moving through hallways. Multi-panel canvases, gallery walls, and individual statement pieces all contribute to a dynamic and engaging environment.
By combining practical techniques, advanced strategies, and finishing touches, homeowners can achieve a professional appearance without relying on external assistance. The result is a space that feels harmonious, inviting, and reflective of personal style. Attention to detail, thoughtful planning, and consideration of spatial relationships ensure that wall art elevates every room it inhabits.
Conclusion
Creating a well-curated wall display requires a blend of preparation, technical knowledge, and artistic intuition. From selecting the right size and layout to precise placement and alignment, every step contributes to the overall impact of your space. Considering wall type, lighting, furniture interaction, and negative space ensures a balanced and professional look. Multi-panel canvases, gallery walls, and layered arrangements add depth and interest, while careful maintenance preserves the integrity of your art over time.
With these strategies, any homeowner can transform blank walls into dynamic, expressive areas that showcase personality and style. The final touches—lighting, spacing, cohesion, and alignment—complete the presentation, resulting in a room that feels thoughtfully designed and visually captivating. Whether working with a single statement piece or an elaborate gallery wall, following these principles creates a space that is both functional and aesthetically pleasing.
Hanging wall art is more than a functional task; it’s an opportunity to transform a room and create a space that feels curated, inviting, and expressive. Beyond placement and technical alignment, understanding how to enhance visual appeal through scale, proportion, contrast, and thoughtful composition can elevate your walls from ordinary to extraordinary.
Understanding Visual Weight
Every piece of art carries visual weight, determined by its size, color, texture, and subject matter. Larger canvases, bold colors, or highly detailed prints tend to draw more attention, whereas smaller, subtler works carry lighter visual weight. Balancing these elements is crucial in creating harmony across a wall or room.
For example, a large, brightly colored canvas may be balanced by grouping several smaller, neutral-toned pieces nearby. Similarly, a collection of medium-sized works can create a balanced focal point when arranged in a grid or gallery formation. Understanding how visual weight interacts with the surrounding space ensures that no area feels overpowering or empty.
Proportions and Scale
Proportion is essential to maintaining a sense of cohesion. Artwork should be sized in relation to the wall, furniture, and room dimensions. A piece that is too small can appear lost, while one that is too large may dominate a room or overwhelm furniture below it.
When positioning art above furniture, aim for the artwork to span approximately two-thirds to three-quarters of the width of the piece below. This creates visual balance and ensures the artwork feels integrated into the room’s design. For walls without furniture, consider the overall dimensions of the space. Large expanses may require oversized pieces or multiple panels, while smaller areas are better suited for single prints or clusters of small frames.
Incorporating Contrast
Contrast is a powerful design tool that can emphasize your artwork and enhance visual interest. Color contrast between the wall and artwork helps pieces stand out, while contrast within the artwork itself can highlight key elements or details.
For light-colored walls, dark or vibrant frames and canvases create a striking focal point. Conversely, light or pastel tones on darker walls draw attention without overpowering the room. Additionally, texture and material contrast—such as combining matte paintings with glossy frames or unframed canvases—can add depth and dimension to your display.
Layering Elements
Layering is an advanced technique that adds depth and movement to your wall displays. This can involve overlapping smaller prints on larger canvases, adding decorative shelves with sculptural objects, or placing art alongside mirrors or lighting fixtures. The layering effect encourages the eye to move across the space, creating a dynamic and engaging visual experience.
For multi-panel canvases, layering is particularly effective. Panels slightly offset from one another, combined with complementary elements such as lighting or decorative accents, can create a sense of rhythm and flow. This approach works well in larger spaces like living rooms, dining areas, or hallways, where walls provide ample room for creative experimentation.
Gallery Walls and Cohesion
Gallery walls—collections of framed prints, photographs, or mixed-media pieces—offer endless opportunities for creativity. To achieve a cohesive look, maintain consistent spacing between pieces and align key elements such as tops, bottoms, or centers.
Grouping artworks by theme, color, or subject matter enhances cohesion. For instance, a black-and-white photography gallery provides uniformity, even with varied frame sizes. Alternatively, a collection of vibrant abstracts can unify a space through complementary color palettes. Using repetition of shapes, frames, or colors strengthens the visual connection between diverse pieces.
Multi-Panel Arrangements
Multi-panel art, such as diptychs, triptychs, or five-panel pieces, creates movement and sophistication on any wall. Consistency in spacing and alignment is critical; uneven gaps can disrupt the flow and diminish the intended impact. Using a level and precise measurements ensures a clean, professional result.
The scale of multi-panel art should be considered relative to the room. Larger panels dominate spaces and draw focus, while smaller panels work as accents in areas where subtlety is desired. Multi-panel pieces offer flexibility in design, allowing for creative variations in panel spacing, staggered layouts, or integration with other decorative elements.
Color Coordination and Mood
The color of your artwork influences the mood of a room. Bright, bold pieces energize a space, while soft, muted tones create calm and serenity. When arranging multiple works, balance colors across the display to avoid visual overload.
Consider the surrounding furniture and decor when selecting artwork colors. Harmonizing art with existing palettes creates a seamless, polished look, while deliberate contrast can draw attention to specific pieces. Coordinating colors across multiple rooms can also unify your home’s interior design, creating flow and continuity between spaces.
Lighting Techniques
Lighting is essential to highlight and complement wall art. Soft, diffused lighting is ideal for general illumination, while directional lighting, such as picture lights, track lighting, or spotlights, accentuates textures, colors, and details.
Avoid harsh overhead lights that cast shadows or glare. Position lights to illuminate the artwork evenly, enhancing its visual impact without creating distractions. Adjustable lighting allows you to highlight different pieces at different times, creating dynamic and engaging displays that adapt to your needs.
Using Negative Space
Negative space—the empty area surrounding artwork—is as important as the art itself. Adequate negative space allows pieces to breathe and prevents a cluttered, overwhelming look. It also directs attention to individual works, emphasizing their importance within the overall composition.
For gallery walls or multi-panel arrangements, negative space ensures clarity and structure. Even spacing between pieces and margins around the edges of the wall frame the artwork visually and enhance its overall presentation. By respecting negative space, you create a display that feels intentional, professional, and aesthetically pleasing.
Interaction with Furniture and Architectural Features
Art should interact harmoniously with furniture and architectural elements. Positioning artwork in relation to furniture helps integrate it into the room’s design. Large canvases above sofas, beds, or consoles should align proportionally to maintain visual balance.
Consider architectural features such as windows, doors, or built-in shelving. Art should be positioned to complement, rather than compete with, these elements. For example, vertical artwork can emphasize height, while horizontal pieces can balance long walls. Thoughtful integration ensures that artwork enhances the space rather than feeling disconnected.
Maintenance and Preservation
Proper care ensures the longevity of your artwork. Avoid placing pieces in direct sunlight, high-humidity areas, or locations with fluctuating temperatures. Regular dusting with a soft cloth or brush keeps colors vibrant and prevents dirt accumulation.
For framed pieces, check that fasteners remain secure and glass or acrylic surfaces are clean. For unframed canvases, ensure they sit flush against the wall to prevent warping or damage. Consistent maintenance preserves the integrity of your display and ensures your walls continue to look polished and professional over time.
Seasonal and Rotating Displays
Rotating artwork seasonally or periodically can refresh a room and introduce new styles, colors, or themes. Lightweight frames or canvases make it easy to change displays without compromising wall integrity.
When rotating art, maintain consistent spacing and alignment to ensure new pieces integrate seamlessly into existing arrangements. This flexibility allows for experimentation and adaptation, keeping your interior design dynamic and engaging.
Personal Expression and Creativity
The most compelling wall displays a balance of professional design principles with personal expression. Bold choices, unconventional arrangements, and unique media add individuality to a space. Trusting your instincts and experimenting with placement, color, and scale allows you to develop a curated environment that reflects your personality.
Creative freedom combined with strategic planning ensures a visually stunning and authentic space. Art becomes more than decoration; it becomes a reflection of your taste, style, and identity.
Final Adjustments and Review
After hanging artwork, take a step back to assess the overall composition. Adjust spacing, alignment, and height as needed. Evaluate lighting angles, shadows, and interaction with furniture and architectural features. Minor tweaks can make a significant difference, resulting in a display that feels deliberate and professional.
A well-curated wall display creates a sense of harmony, guides the viewer’s eye, and enhances the atmosphere of the room. By paying attention to visual weight, proportion, contrast, and cohesion, you can transform walls into focal points that elevate the entire space.
Achieving Professional-Level Displays
Professional-looking wall art arrangements are characterized by precision, balance, and intentionality. Whether creating a single statement piece, a multi-panel display, or a gallery wall, careful planning and execution are key.
Use tools like measuring tapes, levels, and templates to ensure accuracy. Plan layouts in advance and experiment with placement before committing to hardware. Incorporate lighting, negative space, and layering to enhance visual interest. By following these strategies, even novice decorators can achieve a polished, gallery-quality result.
Integrating Architectural Features
Wall art should harmonize with architectural elements rather than compete with them. Consider windows, doors, moldings, and built-in features when planning your display. Vertical artworks can emphasize ceiling height, while horizontal pieces can balance expansive walls. Multi-panel arrangements work particularly well above staircases, long hallways, or large sofas, creating rhythm and continuity.
In open-concept spaces, think about how art in one area relates to adjacent rooms. A cohesive approach—whether through color, theme, or style—ensures a unified visual flow throughout the home. At the same time, individual rooms can maintain their own character while adhering to overarching design principles.
Statement Pieces and Focal Points
Every room benefits from at least one statement piece, which serves as a focal point and anchors the space visually. Large canvases, bold prints, or intricate multi-panel arrangements can fulfill this role. Statement pieces draw attention and create a starting point for designing the rest of the display.
When incorporating a statement piece, ensure surrounding artwork or decor supports rather than competes with it. Maintain adequate negative space, consistent spacing, and complementary colors or textures. The statement piece should feel intentional, commanding attention without overwhelming the room.
Fine-Tuning Multi-Panel and Gallery Walls
Multi-panel artwork and gallery walls require precise alignment and consistent spacing for a polished finish. Use measuring tapes, levels, and templates to achieve accuracy. Even slight deviations can disrupt visual flow, especially in symmetrical or linear arrangements.
For gallery walls, consider the narrative or story created by the arrangement. Grouping pieces by subject, style, or color can convey a theme and strengthen cohesion. Asymmetric arrangements can also work, provided spacing and alignment are thoughtfully considered. The overall effect should feel curated and intentional, rather than random or chaotic.
Lighting Considerations
Proper lighting elevates wall art significantly. Use soft, diffused lighting for general illumination, and directional lighting, such as track lights or picture lights, to highlight key pieces. Avoid harsh overhead lights that cast shadows or create glare, as these can detract from the artwork.
Adjustable lighting allows flexibility, enabling you to emphasize different areas at different times. Highlighting textures, colors, and details enhances depth and engages viewers, transforming the wall into a visually stimulating feature. In rooms with natural light, be mindful of exposure, as prolonged sunlight can cause fading or damage over time.
Negative Space and Breathing Room
Negative space—the empty area surrounding artwork—is essential for creating a clean and professional display. Crowding pieces together reduces their impact and can create visual confusion. Leave ample space around each piece and maintain consistent spacing between artworks.
For multi-panel displays, even small gaps help panels read as individual components while contributing to a unified whole. The use of negative space balances visual weight, creates rhythm, and allows each artwork to be appreciated fully.
Seasonal and Rotational Displays
Rotating artwork seasonally or periodically keeps your interior fresh and engaging. Lightweight frames or canvases facilitate easy updates without compromising wall integrity. Seasonal rotations also provide an opportunity to explore new styles, colors, and themes, keeping the home dynamic and visually interesting.
Maintaining consistent spacing and alignment ensures new pieces fit seamlessly into existing arrangements. Rotational displays allow homeowners to experiment creatively while preserving a cohesive, polished look.
Maintenance and Longevity
Proper care extends the life and appearance of your wall art. Avoid hanging pieces in direct sunlight, high humidity, or areas with fluctuating temperatures. Dust regularly with a soft cloth or brush to maintain color and texture.
For framed artworks, check that fasteners are secure and glass or acrylic surfaces are clean. Unframed canvases should remain flush against the wall to prevent warping or damage. Periodic inspections of mounting hardware ensure stability, keeping your display safe and visually appealing over time.
Combining Art with Other Decor
Artworks can be integrated with other decorative elements to enhance the overall design. Shelves with plants or sculptural pieces, mirrors, or wall-mounted lighting can complement canvases or framed prints. Layering these elements creates depth, texture, and visual interest, making walls feel dynamic and curated rather than static or sparse.
When combining elements, consider scale, proportion, and balance. Larger artworks pair well with minimal additional decor, while smaller pieces benefit from complementary accents that draw the eye. The integration of art and decor should feel intentional, supporting the room’s overall design and atmosphere.
Personal Expression and Style
Wall art is an extension of personal expression. Bold arrangements, unique media, and unconventional placement reflect individual taste and creativity. While design principles provide guidance, your personal style determines the final impact.
Experimenting with placement, color, and scale allows homeowners to develop spaces that feel authentic and expressive. Combining personal expression with thoughtful planning ensures that wall art enhances both aesthetics and character, creating rooms that are visually striking and uniquely yours.
Creating a Cohesive Home Gallery
A cohesive home gallery is achieved by applying consistent principles across rooms and spaces. Coordinate colors, styles, and themes to establish flow and continuity. Even when rooms have distinct purposes, maintaining visual connections between spaces creates harmony.
Use recurring motifs, complementary color schemes, or similar frame styles to unify different areas. Multi-panel pieces, gallery walls, and statement artworks can serve as anchors that link spaces together. Thoughtful placement ensures that each room contributes to the overall narrative of the home, making every wall a purposeful part of a larger design story.
Encouraging Experimentation and Flexibility
While following design principles ensures cohesion and professionalism, flexibility and experimentation encourage creativity. Adjusting layouts, testing different heights, or combining various media can lead to striking results.
Flexible design allows rooms to evolve with changing tastes or trends, keeping interiors engaging and dynamic. Incorporating experimentation while respecting core principles ensures that the space remains polished, balanced, and visually appealing.
Psychological Impact of Art
Art influences the mood and atmosphere of a room. Bold, vibrant pieces energize a space, while muted or soft tones promote relaxation. Consider the function of each room when selecting and arranging artwork. Living areas benefit from dynamic, engaging pieces, while bedrooms or quiet spaces favor calming, serene art.
Gallery walls or multi-panel arrangements create a rhythm that guides the eye, contributing to a sense of order and sophistication. Thoughtful curation enhances the emotional impact of the space, making interiors not only visually pleasing but also psychologically engaging.
Final Adjustments and Evaluation
After hanging your artwork and arranging complementary elements, take a final evaluation. Step back and observe the wall from different perspectives and distances. Ensure alignment, spacing, lighting, and interaction with furniture and architecture are harmonious.
Make minor adjustments as needed. Even small changes in height or spacing can significantly enhance the overall visual impact. The goal is a polished, cohesive display where each piece is appreciated individually while contributing to the larger aesthetic.
Long-Term Strategies for Maintaining Cohesion
Maintaining a cohesive and visually appealing home gallery requires ongoing attention. Periodically assess the arrangement, lighting, and condition of artworks. Rotate pieces or adjust spacing as the interior evolves. This proactive approach preserves balance and ensures that the display continues to reflect both style and function over time.
A thoughtful strategy for long-term maintenance allows homeowners to enjoy a curated environment without compromising aesthetics. Consistency in placement, color coordination, and alignment keeps walls engaging and professional-looking, even as new elements are added or rotated.
Final Thoughts
Hanging wall art is both an art and a science. From selecting the right pieces to mastering placement, alignment, and lighting, every decision contributes to creating a space that feels balanced, intentional, and expressive. Whether working with single statement pieces, multi-panel canvases, or gallery walls, attention to proportion, visual weight, and cohesion ensures a professional and polished look.
The impact of wall art goes beyond aesthetics. It shapes the mood of a room, complements furniture and architectural elements, and reflects your personal style. Thoughtful layering, strategic use of negative space, and careful integration with surrounding décor elevate your walls from simple decoration to dynamic focal points.
Maintenance and long-term care are equally important. Regular inspections, proper handling, and mindful rotation of pieces keep your display fresh, vibrant, and visually cohesive over time. By following these principles, any homeowner can achieve a gallery-quality presentation that feels both intentional and uniquely personal.
Ultimately, the key to successful wall art lies in balancing creativity with structure. Allow your personal style to guide choices while applying proven design techniques to ensure harmony, balance, and visual interest. When executed thoughtfully, your walls can become more than just a backdrop—they become a statement, an experience, and a reflection of your individuality.
With careful planning, attention to detail, and a touch of creativity, every wall in your home has the potential to transform into a curated, inspiring space that delights everyone who enters.


