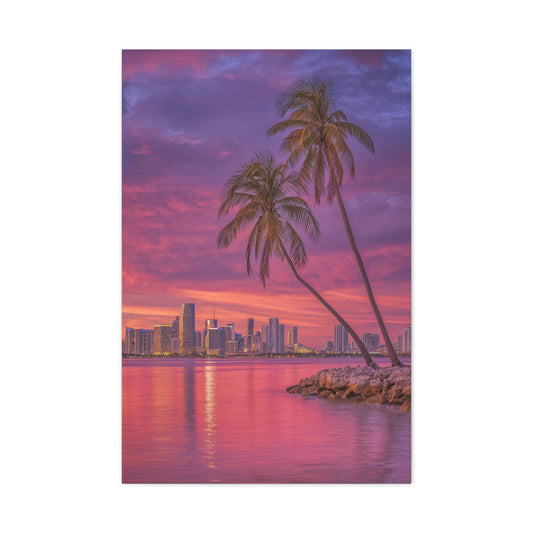
Twilight real estate photography is a captivating style that adds a touch of magic to property listings, transforming a simple building into an enchanting space. This genre of photography, which takes place during the brief moments before the night takes over, combines the natural fading light of the sky with the warm glow of artificial lighting from the property. The results are images that exude an almost dreamlike quality, pulling the viewer in with vibrant skies and welcoming lights. It’s no wonder that real estate professionals, architects, and photographers have come to rely on twilight shots to highlight properties in a visually striking way.
The power of twilight photography lies in its ability to make a home feel special. When done right, these images can elevate a property listing by showcasing not just the building, but the atmosphere surrounding it. The combination of natural and artificial lighting, the strategic use of shadows, and the perfect timing create a scene that tells a compelling visual story. However, achieving such breathtaking shots requires skill, patience, and the ability to work with the fleeting moments of twilight.
To capture these enchanting moments, it’s crucial to understand the science behind twilight photography. Timing plays a central role. Unlike regular daytime exterior photography, twilight photography has a narrower window of opportunity, typically lasting only around 20 to 30 minutes after sunset. This small time frame makes it imperative to arrive early, preferably an hour before sunset, to assess the property and set up the lighting accordingly. The sky’s light during this time slowly fades into darkness, so knowing when the colors are at their peak can make a significant difference in the final image.
Weather conditions also play a pivotal role in achieving striking twilight shots. While a clear sky can lead to a beautiful gradient of colors, scattered clouds can add depth, enhancing the overall atmosphere of the scene. Even if the sky is mostly cloudy, you can still capture dramatic and moody images, depending on the look you’re aiming for. Keeping a close eye on the weather forecast and planning your shoot around clear skies or partial clouds will increase the likelihood of getting that ideal twilight shot.
In addition to timing and weather, seasonality also impacts the availability of natural light. During the summer months, daylight lasts longer, providing more time for photographers to plan and execute their twilight shots. In contrast, winter months bring shorter days, requiring a more precise approach to timing. When planning your shoot, make sure to check sunset times for that day to help align your schedule with the changing light. This awareness is especially important for regions with significant variations in daylight hours throughout the year.
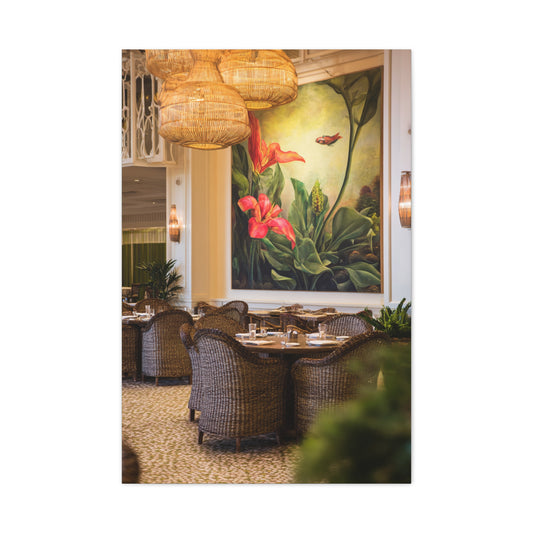
When preparing for twilight photography, lighting is the most important aspect to consider. To achieve a balanced and inviting look, ensure that all lights on the property are switched on. This includes interior lights, exterior lights, and any additional lighting in the garden or around features like the pool or driveway. Interior lights are crucial for creating warmth, especially through windows and doorways, adding a soft glow that contrasts beautifully with the fading natural light. Pay attention to the detailsadjust curtains or blinds to allow the light to spill outward, creating a welcoming ambiance.
For the exterior, focus on illuminating key architectural elements, such as the front door, porch, or any landscaping features. The goal is to use lighting in such a way that it enhances the atmosphere of twilight, rather than overpowering it. A well-lit property will appear inviting and cozy, while a poorly lit one might appear cold or lifeless. The contrast between the cool blue of the twilight sky and the warm hues of the artificial lights is what makes twilight photography so enchanting and eye-catching.
The Science of Twilight Photography: Timing, Lighting, and Preparation
The essence of twilight real estate photography is understanding the delicate balance between natural and artificial light. To truly capture the beauty of a property during twilight, careful planning is key. One of the first steps is timing. Unlike regular daytime exterior photography, twilight photography has a narrower window of opportunity, typically lasting only around 20 to 30 minutes after sunset. This small time frame makes it imperative to arrive early, preferably an hour before sunset, to assess the property and set up the lighting accordingly. The sky’s light during this time slowly fades into darkness, so knowing when the colors are at their peak can make a significant difference in the final image.
Weather conditions also play a pivotal role in achieving striking twilight shots. While a clear sky can lead to a beautiful gradient of colors, scattered clouds can add depth, enhancing the overall atmosphere of the scene. Even if the sky is mostly cloudy, you can still capture dramatic and moody images, depending on the look you’re aiming for. Keeping a close eye on the weather forecast and planning your shoot around clear skies or partial clouds will increase the likelihood of getting that ideal twilight shot.
In addition to timing and weather, seasonality also impacts the availability of natural light. During the summer months, daylight lasts longer, providing more time for photographers to plan and execute their twilight shots. In contrast, winter months bring shorter days, requiring a more precise approach to timing. When planning your shoot, make sure to check sunset times for that day to help align your schedule with the changing light. This awareness is especially important for regions with significant variations in daylight hours throughout the year.
When preparing for twilight photography, lighting is the most important aspect to consider. To achieve a balanced and inviting look, ensure that all lights on the property are switched on. This includes interior lights, exterior lights, and any additional lighting in the garden or around features like the pool or driveway. Interior lights are crucial for creating warmth, especially through windows and doorways, adding a soft glow that contrasts beautifully with the fading natural light. Pay attention to the detailsadjust curtains or blinds to allow the light to spill outward, creating a welcoming ambiance.
For the exterior, focus on illuminating key architectural elements, such as the front door, porch, or any landscaping features. The goal is to use lighting in such a way that it enhances the atmosphere of twilight, rather than overpowering it. A well-lit property will appear inviting and cozy, while a poorly lit one might appear cold or lifeless. The contrast between the cool blue of the twilight sky and the warm hues of the artificial lights is what makes twilight photography so enchanting and eye-catching.
The Tools and Techniques for Perfect Twilight Shots
The right tools can make all the difference when capturing twilight real estate images. One of the most essential tools for twilight photography is a tripod. Twilight photography often involves shooting in low light conditions, which means longer exposure times. Using a tripod ensures that the camera remains still during these longer exposures, preventing any blur or shake that could ruin the clarity of the image. Without a tripod, the slight movement of the camera can result in unsharp, unusable images, especially when capturing fine details.
Another advantage of using a tripod is the ability to experiment with different exposure settings. While increasing the ISO setting might seem like an easy way to compensate for low light, it can introduce unwanted noise into the image. Instead, using a slower shutter speed allows the camera to gather more light, producing a cleaner, more detailed photograph. This is especially important when you want to capture the subtle interplay between the artificial lights and the twilight sky.
Additionally, tripods enable you to take multiple exposures, a technique known as bracketing. By taking several shots with different exposure levels, you can later merge them in post-production to create a single image that captures the full range of light. This technique is particularly useful in twilight photography, where there is often a stark contrast between the bright sky and the dark property. HDR (High Dynamic Range) photography is a great way to handle such lighting extremes, allowing photographers to bring out details in both the shadows and highlights. By merging multiple exposures, you can create a balanced image that preserves the dynamic range of the scene.
Another important aspect of capturing twilight images is perspective. The best photos aren’t necessarily the ones that show the property in its entirety, but those that find the right balance between the house and its surroundings. This could mean capturing the reflection of the house in a pool or emphasizing the warmth of the lights through a well-placed tree. Twilight photography is about creating a mood, and finding the right perspective is key to evoking the desired emotional response from viewers. Take time to experiment with different angles and focal lengths, and be patient to find the composition that best represents the character of the property.
Once you have found your ideal perspective, wait for the perfect moment when the lighting is at its peak. Twilight photography is a slow dance with time, and patience is your best tool. While it’s tempting to rush and take as many shots as possible, the key is to focus on creating one "hero shot." This will be your masterpiece, the shot that truly captures the essence of the property. Once you've nailed that shot, you can take additional images from different angles or with different focal lengths, but always remember that quality trumps quantity.
Enhancing Twilight Images in the Digital Age
In today’s digital world, post-processing plays a crucial role in refining twilight images. Even with the perfect shot, the final photo can often be enhanced through software such as Lightroom or Photoshop. These tools allow photographers to adjust the contrast, sharpness, and colors, making the images even more captivating. One of the most effective post-processing techniques is enhancing the contrast between the warm artificial lights and the cool tones of the twilight sky, further emphasizing the enchanting atmosphere of the image.
HDR (High Dynamic Range) processing is particularly beneficial for twilight images. Since twilight often involves a wide range of light levels, combining multiple exposures allows photographers to capture all the details, from the brightest parts of the sky to the darkest shadows in the foreground. The merging process brings out the depth and richness in the image, making the scene look more balanced and visually appealing.
Another useful technique in post-processing is correcting for any lens distortion or slight color imbalances. Twilight photography can sometimes introduce subtle color shifts, so adjusting the white balance and saturation levels in post-production helps bring the image to its full potential. With a few simple tweaks, you can turn a great photograph into a stunning visual that will captivate potential buyers and make the property stand out in a crowded market.
Mastering Exposure: HDR and Layering Techniques for Balanced Shots
Twilight photography presents a unique challenge, particularly when it comes to exposure. As the natural light fades and artificial lighting begins to dominate the scene, the contrast between the highlights and shadows can become quite extreme. This difference in lighting makes it difficult to capture all the details, often leaving parts of the image either too bright or too dark. To tackle this issue effectively, many photographers turn to HDR (High Dynamic Range) techniques, which allow them to balance out the exposure across the entire frame.
HDR photography involves capturing several images of the same scene at varying exposure levels: one at the standard exposure, one underexposed to preserve the bright highlights, and one overexposed to retain details in the shadows. After capturing these images, they are merged together into a single photo using post-processing software. This process helps bring out all the intricate details, ensuring that both the bright and dark areas of the image are clearly visible without any of them losing their essence.
However, it's crucial to be cautious when applying HDR in post-processing, as it’s easy to push the effect too far and end up with an image that looks unnatural. The key is moderation. In Lightroom, you can fine-tune the HDR sliders, gently adjusting the highlights and shadows so that the details are enhanced but not exaggerated. You can also use the local adjustment brush to make specific tweaks to certain areas, like emphasizing the details in the architecture or landscaping elements, which could otherwise be obscured by the darkness.
For those who enjoy a more hands-on approach, Adobe Photoshop offers another option: stacking exposures as layers and using layer masks to blend them seamlessly. This method gives you more control over which parts of the image you wish to brighten or darken, offering the opportunity to recover shadowed areas while keeping the artificial lighting intact. By using this technique subtly, you can achieve a much more natural look, ensuring that the artificial lighting contributes to the overall warmth of the scene without overpowering the balance.
Enhancing Atmosphere: Sky Replacements for Impactful Twilight Photos
A captivating sky can be the difference between an average shot and a stunning one in real estate photography. While you cannot control the weather or the time of day, you do have the power to manipulate the sky in your twilight images. This is where the technique of sky replacement comes in, a powerful tool that allows photographers to swap out a dull or uninspiring sky for something more visually striking, like a vibrant sunset or dramatic clouds.
Sky replacement involves selecting the sky in your image and seamlessly integrating a new sky to complement the overall scene. The result is a more dynamic image that enhances the mood and visual appeal of the property. When choosing a replacement sky, consider the tone of your photo and match the lighting and color palette accordingly. The position of the light source in your image, such as the direction of the setting sun, should align with the sky's lighting to maintain consistency and realism.
While sky replacements are an effective tool, it's important not to overdo them. A sky that looks too artificially enhanced can quickly diminish the authenticity of the shot, especially in real estate photography where the goal is to represent the property in its best light without misleading the potential buyer. Instead, aim to use sky replacements sparingly and with subtlety. A well-executed sky replacement should enhance the atmosphere of the shot without drawing too much attention to itself. Remember, it’s all about adding to the mood of the scene, not overpowering it.
Color Correction: Creating Consistent Lighting Throughout Your Twilight Images
Another challenge in twilight real estate photography is managing the varying color temperatures of artificial lighting. The interior lights of a property can range from warm yellow tones to cool, blueish hues, depending on the type of light used. These differences in color temperature can create an imbalanced or unnatural feel if not addressed properly. A successful twilight shot requires a harmonious balance between the natural twilight sky and the artificial lights within the property.
One of the most effective ways to achieve this is through color correction. Using tools like Lightroom’s Local Adjustment Brush or Photoshop’s color grading features, you can adjust the color temperature of the different light sources in your image to ensure consistency. This technique is particularly useful for correcting color imbalances in interior lights or windows, ensuring that all light sources complement the twilight sky rather than clashing with it.
In addition to correcting interior lighting, color correction can also be applied to exterior elements, such as the landscaping and pathways. Sometimes, artificial lights can cast unwanted color tints that may make the scene feel too warm or too cool. By adjusting the tones in these areas, you can ensure that the lighting looks natural and consistent, highlighting the property’s best features without any color distractions.
Through thoughtful color correction, you can create a more cohesive and realistic image that feels inviting and professionally done. Proper color balance enhances the viewer's experience and helps convey the warmth and comfort of the home, which is essential when capturing the attention of prospective buyers.
Refining Your Twilight Photos with Subtle, Professional Touches
Twilight photography offers unique challenges, but with the right techniques, you can overcome them and produce truly captivating images. By using HDR and layering techniques to control exposure, enhancing the mood with sky replacements, and achieving consistent lighting through color correction, your twilight shots will stand out from the competition. These advanced strategies help create a seamless blend of natural and artificial light, ensuring that your real estate images are not only visually striking but also inviting and true to the property’s essence.
In a world where online property listings dominate, your photos are the first impression a potential buyer will have of a home. By applying these advanced techniques, you can ensure that your twilight images not only showcase the beauty of the property but also create an emotional connection with the viewer. The goal is to capture the essence of the home, bringing it to life through the lens, and creating a visually appealing narrative that speaks directly to the buyer’s imagination.
Ultimately, twilight real estate photography is about more than just getting the lighting right – it’s about crafting an image that tells a story, invites curiosity, and elicits a response. With these tips and techniques, you’re well on your way to perfecting your craft and creating breathtaking twilight photos that captivate, engage, and convert potential buyers.
The Critical Role of Patience in Capturing Twilight Shots
When it comes to twilight photography, one of the most essential qualities a photographer must possess is patience. As beautiful as twilight scenes can be, their fleeting nature presents a significant challenge. The perfect shot often requires waiting for the moment when the natural light is harmoniously balanced with the artificial lighting, a balance that can be disrupted in an instant.
Twilight is all about capturing that delicate moment between day and night, and this narrow window can be the difference between a good image and a breathtaking one. Rather than focusing on quantity, it's crucial to take your time and focus on quality. A successful twilight photograph isn’t rushed. It’s about waiting for the precise moment when the exterior lights of the property shine brightly enough to stand out, yet the sky still holds its rich hues and deep tones. During this phase, your tripod becomes your best friend as you carefully adjust your composition and settings. This careful patience allows you to respond to changing lighting conditions and make subtle refinements before clicking the shutter.
In many cases, this means waiting for several light shifts until the lighting reaches its peak, which can only last for a few minutes. Sometimes, you may need to take several shots to ensure you capture the exact moment when all elements align. Twilight photography is a dance with light, and the photographer must be as still as possible to capture its fleeting beauty.
Refining Your Editing: Striking the Right Balance
Editing plays a pivotal role in post-production, but there’s a fine line between enhancing a photograph and overdoing it. It's easy to get carried away with editing tools, trying to make your twilight images pop with extra saturation or HDR effects. However, the goal of post-processing should always be to enhance the natural beauty of the shot rather than artificially creating a new scene.
Twilight images are often characterized by a certain moodone that should remain intact even after editing. Overdoing adjustments like exposure, contrast, or color saturation can lead to unrealistic results that detract from the authenticity of the scene. A successful twilight shot should reflect the soft, ambient lighting of dusk and the warm glow of interior lights. Over-editing can make your photo appear artificial, which can undermine the natural charm of the property.
Instead of pushing sliders to extreme levels, focus on subtle edits. Lighten the shadows just enough to retain some detail, but don’t eliminate them entirelythese shadows contribute to the depth and drama of the image. In fact, leaving certain areas dark can add an element of mystery to the photograph, helping to draw the viewer’s eye to the more important aspects of the composition. Likewise, the highlights, such as the glow from windows or lights in the garden, should be carefully adjusted to maintain their natural feel while still standing out as focal points.
When editing, the key is moderation. A slight tweak here and there can reveal the richness in your shot, but heavy-handed adjustments will only detract from the integrity of your twilight scene. The natural beauty of the scene should always remain the star of the image, and your editing should be done in a way that keeps the mood and atmosphere of the twilight hour intact.
Mastering Lighting Techniques: Flash and HDR for the Perfect Shot
Twilight photography is as much about balancing light as it is about understanding how to enhance certain features with additional lighting when necessary. While the golden hour offers some of the most spectacular lighting conditions, there may be instances where additional illumination is needed to highlight certain areas of the property. Whether it’s a garden feature or a pathway leading up to the house, using a flash effectively can bring out key details without overpowering the natural mood of the scene.
One important thing to keep in mind when using flash in twilight photography is subtlety. The flash should complement, not overwhelm, the ambient light. Rather than using a strong, direct flash that could create harsh shadows and artificial highlights, consider experimenting with softer lighting or bouncing the flash off nearby surfaces to diffuse its impact. Using the flash from different angles during multiple exposures can also help you achieve a more balanced light distribution across the scene.
In some cases, if the flash isn’t strong enough to light up the entire area, consider using studio lights or a battery-powered strobe. These can help illuminate larger sections of the property or more intricate elements in the garden. For example, highlighting architectural details or sculptures can make the property stand out even more, adding an extra layer of depth to the composition.
Another essential tool in twilight photography is High Dynamic Range (HDR) imaging, which allows you to blend multiple exposures for a more balanced result. Twilight scenes often have a wide range of brightness, from the bright sky to the dark shadows on the ground. HDR enables you to capture details in both the highlights and the shadows, which is crucial for achieving a well-exposed and nuanced photograph. However, the key with HDR is subtlety. Too much blending can result in unnatural-looking images, so it’s essential to ensure that the final product still feels true to the original scene.
When working with HDR, it’s important to manually combine different exposures in post-production using software like Photoshop. Adjusting the mask and opacity of each layer will allow you to fine-tune which parts of the image you want to enhance, ensuring a more realistic and seamless transition between light and shadow. This approach is far more effective than relying on automated HDR presets, which can often produce overly exaggerated results.
By paying close attention to the interplay of light and shadow, and by using tools like HDR and flash carefully, you can enhance the depth and detail of your twilight images. A well-executed balance of light sources can make a property’s features stand out without losing the essence of the twilight atmosphere.
Elevating Composition: Focusing on Details
In twilight real estate photography, every detail matters. While you may have captured the perfect shot in terms of lighting and exposure, the finer elements of composition can either elevate or detract from the overall appeal of the image. As you frame your shot, pay close attention to the placement of objects, the alignment of architectural features, and any potential distractions in the background.
Before you take your shot, it’s helpful to do a quick walkthrough of the property to remove any clutter or distractions that could take away from the beauty of the composition. For example, ensure that any outdoor furniture is aligned properly and that the garden lights are positioned to highlight the key features of the property, such as pathways or architectural lines. Taking a few moments to check for these details will make a world of difference when it comes time to edit.
Once the shot is taken, focus on fine-tuning these details during the post-production process. For example, cleaning up any unnecessary elements in the background, enhancing the sharpness of the building’s edges, or subtly adjusting the lighting around key features will help direct the viewer’s attention where it’s needed most. Small tweaks like these can ensure that the photograph not only showcases the property in the best light but also creates an inviting, visually appealing atmosphere.
The magic of twilight photography lies in the balance between light, composition, and the emotional impact of the scene. With the right amount of patience, careful editing, and a keen eye for detail, you can create real estate images that are not just beautiful, but compelling enough to captivate potential buyers or anyone admiring the photos.
Mastering the Art of Twilight Real Estate Photography
As we reach the final chapter of our four-part series on twilight real estate photography, we’ll explore the advanced techniques that can elevate your skills from good to exceptional. By now, you’re familiar with the basics of planning, capturing, and editing twilight shots. But to truly perfect your technique, it's essential to focus on the finer details that set your work apart from others. This section will help you refine your craft, avoid common mistakes, and master those finishing touches that can transform an ordinary twilight shot into a visual masterpiece.
Understanding the Client's Vision and Enhancing the Property’s Appeal
When capturing twilight real estate photos, understanding your client’s perspective is crucial. While the artistry of your shots plays an important role in your portfolio, the primary goal of real estate photography is to produce images that serve both aesthetic and informative purposes for potential buyers. Twilight photography, in particular, should highlight the property’s best features while creating a mood that resonates with the target audience.
As a photographer, your task is not just to capture a pretty scene, but to understand what your client wants to communicate through the images. Different properties will require different approaches. For example, a luxury home with expansive gardens or a beautiful pool area may benefit from a twilight shot that showcases the lush greenery, the inviting poolside, and the soft glow from the surrounding lighting. These elements will convey a sense of tranquility and elegance. Meanwhile, urban properties might call for more dynamic twilight shots, with a focus on architectural details and the interplay between artificial lighting and the urban cityscape.
The key is to ensure that the mood of your twilight shots aligns with the client’s vision and the lifestyle they aim to sell. Whether it’s the inviting warmth of a countryside retreat or the sleek sophistication of an inner-city penthouse, you should use your skills to convey these feelings through careful composition, lighting choices, and mood setting.
The Power of Post-Processing: Subtlety is Key
Once you've captured the perfect twilight shot, post-processing becomes the critical stage where your images come to life. However, when editing, it’s vital to exercise restraint. There’s a natural temptation to push colors, contrast, and saturation to extreme levels, especially when working with dramatic twilight lighting. Overdoing these adjustments can lead to unrealistic, artificial images that detract from the property’s true appeal. Instead, focus on achieving a balanced edit that enhances the natural beauty of the scene without over-processing.
One of the essential elements of editing twilight shots is fine-tuning the white balance. The color temperature during twilight can vary widely, so subtle adjustments are necessary to ensure a harmonious color palette across the image. You want to maintain the soft, warm hues of the fading daylight without allowing the image to feel too cool or too warm. This balance is essential for creating a cohesive and inviting atmosphere.
Additionally, while HDR (High Dynamic Range) techniques and exposure blending can help to manage the stark contrast between light and shadow, it's important not to lose the natural mood of the scene. For example, lightly enhancing the glow from lights around the property, or the shimmering surface of a pool, can create an inviting effect without making these elements appear too exaggerated.
When it comes to architectural details or landscaping features, corrections for lens distortion caused by wide-angle lenses should be handled with care. These distortions can make the image feel unprofessional, so adjusting them in post-processing is crucial to maintaining clarity and sharpness. Similarly, adding selective sharpening to key focal points, such as the house’s exterior or architectural details, can improve clarity while maintaining the dreamy quality of twilight lighting.
Remember, the key to post-processing is restraint. Subtle adjustments will ensure the image feels natural, inviting, and professional.
Perfecting Your Twilight Photography: Avoiding Common Pitfalls
Twilight photography offers a unique set of challenges. The rapidly changing light conditions, combined with the interplay of natural and artificial light, can make it easy to make mistakes that can ruin an otherwise beautiful shot. Understanding and avoiding the most common pitfalls will help you create photographs that stand out for all the right reasons.
One of the most frequent mistakes photographers make is overexposing the highlights. With the varying light intensities in twilight scenesranging from bright artificial lights to the soft fading daylightit can be tempting to focus on exposing the bright light sources like windows, lamps, or pool lights. However, this can result in loss of detail in those areas. To prevent this, use manual exposure settings and find the right balance between the bright light sources and the surrounding areas. If needed, bracket your exposures to ensure you capture the full range of light in your shot.
Another common error is underexposing the shadows. Twilight shots thrive on contrasts, and it’s easy to lose detail in the darker areas of the image when trying to emphasize the bright lights. Don’t be tempted to let the shadows dominate; instead, make sure to bring out some shadow detail in your post-processing. HDR techniques or exposure blending can help recover some of this hidden detail, adding depth and dimension to the final image.
The horizon line is another aspect of composition that photographers often overlook in twilight shots. A slanted or uneven horizon can make your images appear unprofessional, which is especially noticeable in twilight photography where the horizon is often a key feature. Always double-check the alignment of the horizon in your camera viewfinder and make necessary adjustments during the editing process to maintain a professional, stable look.
Perhaps one of the most important things to remember is not to miss the "blue hour." The twilight period is characterized by rich, vibrant blues in the sky before it darkens entirely into night. This period offers an ideal balance between natural light and artificial lighting. If you wait too long, the sky will become too dark, and the colors will lose their vibrancy. Timing your shoot to capture the blue hour ensures you get the best possible range of colors and light in your photographs.
Elevating Your Composition and Final Touches
Twilight photography is not just about capturing a sceneit’s about telling a story. The composition of your shot plays a pivotal role in how that story unfolds. Effective composition in twilight real estate photography requires attention to detail and an understanding of how light, space, and shadows interact.
Start by framing the property in a way that highlights the most important features, such as the house, garden, or pool area. Pay attention to natural leading lines, like paths or driveways, which can guide the viewer’s eye toward the focal point of the photo. The goal is to create a sense of flow and movement within the image, so the viewer’s eye is naturally drawn to the key elements.
In twilight shots, balancing the light sources is especially crucial. The interplay between the fading daylight and the artificial lighting of the property is what creates the magic of twilight photography. Make sure not to let one overpower the other. The key is to achieve a harmonious balance where the house's lighting complements the soft glow from the sky, and vice versa.
Creating a sense of depth is another important aspect of twilight composition. Use foreground elements such as plants, water features, or illuminated pathways to lead the viewer’s eye deeper into the frame. This creates a three-dimensional feel and adds a layer of intrigue to your photos.
Subtle movement can also enhance your twilight shots. A gentle ripple on the surface of a pool or a tree swaying slightly in the breeze can add life to an otherwise serene scene. These subtle movements create a dynamic quality without disturbing the peaceful ambiance of the twilight hour.
In your final touches, don’t be afraid to experiment with techniques like sky replacement if the original sky doesn’t offer the right ambiance. A vibrant, dramatic sky can enhance the overall mood of your image and provide a stunning backdrop for the property. However, consistency is important, so make sure all your images from the same shoot feel cohesive.
If reflections play a role in your twilight shots, such as in windows or pool surfaces, take extra care to ensure they are captured clearly and adjusted for maximum impact. Reflections can elevate an image, adding visual interest and depth.
Lastly, consider shooting vertically if the property is particularly tall or has a grand, sweeping view. The twilight lighting will amplify the drama and scale, creating a sense of grandeur and elegance that horizontal shots may not capture.
Conclusion
Twilight real estate photography presents a unique opportunity to create visually captivating images that can make a lasting impression on potential buyers. By mastering the technical aspects of capturing light, understanding your client’s needs, and employing subtle yet effective post-processing techniques, you can take your twilight photography to the next level. The key lies in preparation, patience, and an eye for detail. Keep refining your skills, embrace the beauty of the twilight hour, and you’ll soon be creating high-impact images that not only showcase the property’s features but also tell a compelling story that resonates with your audience. Happy shooting!