Double exposure photography allows artists to blend two distinct images into a single composition, producing surreal and imaginative visuals. This method is not just technical but a form of storytelling, where layers convey mood, emotion, and hidden meaning. Photographers who master double exposure often create images that linger in viewers’ minds, prompting reflection and interpretation.
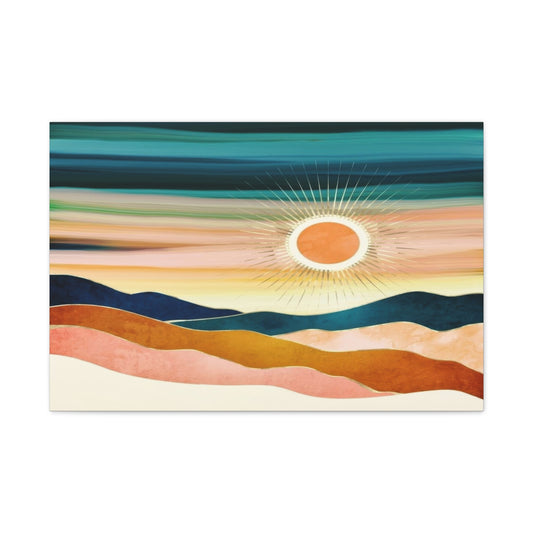
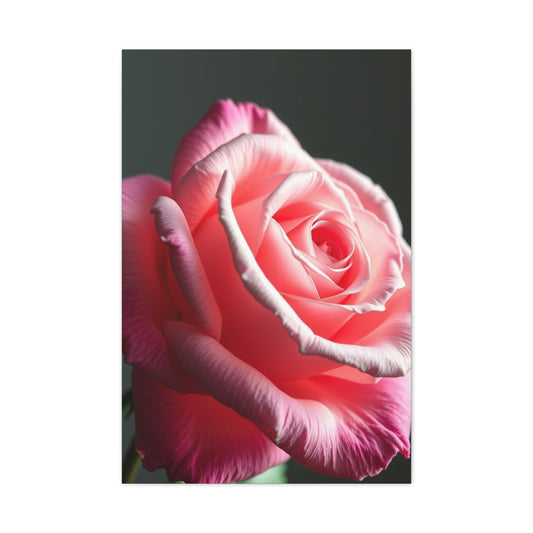
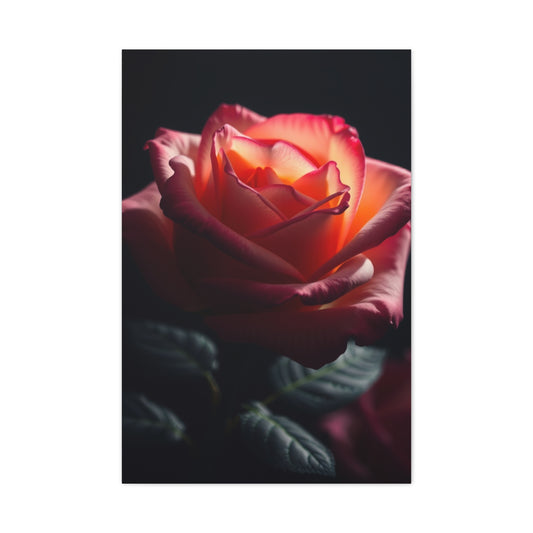
The technique combines lighting, composition, and subject choice in ways that challenge conventional photography norms. Some photographers take inspiration from home aesthetics, incorporating subtle influences from décor and environment to enhance their creative vision. For example, displaying inspirational motivational prints for creativity can help maintain a mindset focused on imagination and experimentation.
Choosing Subjects for Layering
Choosing the right subjects is crucial in double exposure photography. Contrasting textures or forms often produce the most striking results. Portraits overlaid with natural landscapes, urban environments layered with abstract shapes, or silhouettes combined with intricate patterns all contribute to visual intrigue. Understanding the relationship between foreground and background is essential for depth and coherence. Observing how light interacts with surfaces before shooting can improve the quality of your final composition. Many photographers take cues from historical or culturally inspired art to refine their approach. A resource highlighting vintage decor trends for creative inspiration provides examples of how classic aesthetics can influence photographic style.
Another consideration is the emotional resonance of your chosen subjects. A thoughtful selection communicates narrative and evokes empathy, curiosity, or wonder. Experimenting with unexpected combinations often yields images that surprise both the artist and viewer. By studying thematic cohesion, photographers can ensure that their layering communicates intention rather than randomness.
Layering Techniques in Digital Editing
After capturing base images, digital editing allows precise control over the final composition. Tools like Photoshop and Lightroom provide options to blend images, adjust opacity, and mask layers seamlessly. Beginners often start with simple overlays, gradually incorporating multiple layers with varying transparency. Adjusting color, contrast, and tone helps unify disparate elements into a coherent visual story. Photographers can also use selective editing to emphasize focal points while keeping background layers subtle. Learning these techniques requires patience but unlocks immense creative potential. For insights into layered design and color influence, exploring classic art techniques for modern composition can offer valuable lessons.
Experimentation in digital editing allows endless iterations. Photographers may explore multiple versions of a single concept, refining each layer until it aligns with the intended mood and narrative. This process encourages discovery and enhances technical skill simultaneously.
The Role of Silhouettes in Composition
Silhouettes are fundamental in crafting compelling double exposure images. They provide a defined shape or structure, guiding the viewer’s eye and anchoring complex compositions. Whether photographing human subjects, animals, or architectural elements, silhouettes create clarity within layered imagery. The interplay between light and shadow further enhances the dramatic effect. Using silhouettes as a canvas allows photographers to experiment with abstract overlays, from textures to environmental elements.
For inspiration in narrative composition, studying dynamic character and scene design references can inform creative choices. These references highlight how story, form, and contrast interact, mirroring the challenges of balancing multiple layers in photography.
Exploring Color and Mood
Color profoundly affects how double exposure images are perceived. Manipulating tones and saturation can evoke emotion, reinforce theme, and guide viewer attention. Warm colors often convey nostalgia or warmth, while cooler tones can create tension or mystery. By adjusting color relationships between layers, photographers can unify otherwise unrelated elements. Incorporating complementary color schemes strengthens visual appeal. Learning from classical examples is useful; artworks like Cezanne inspired color harmony techniques teach how colors interact in layered compositions and how subtle contrasts can guide emotional perception.
Layered photography encourages visual experimentation, letting photographers explore contrasts and harmony between elements. The digital age has made it easier to experiment while learning, giving creators immediate feedback and allowing them to iterate endlessly. Merging abstract forms, cityscapes, or natural textures creates opportunities to tell stories in a multidimensional way. Photography can also bridge ephemeral moments with lasting memories, ensuring each captured scene retains significance. Platforms that discuss turning digital memories into meaningful displays emphasize how everyday captures can be elevated into timeless imagery.
Additionally, mood can be influenced by layer transparency, texture blending, and light manipulation. Understanding these tools helps photographers communicate intention rather than simply overlaying images.
Inspiration from Everyday Life
Double exposure photography thrives on real-world observation. Urban streets, natural landscapes, and ordinary objects provide infinite material for experimentation. Paying attention to light, texture, and perspective encourages creativity and opens up novel visual interpretations. Photographers often document seemingly mundane moments, later transforming them into layered narratives that reveal beauty and meaning. Everyday experiences can spark ideas for abstract or symbolic compositions. Bringing creativity into daily life, whether through study or personal environment, reinforces visual storytelling. Collections like Italian cuisine themed design ideas show how cultural and sensory experiences can inspire photographic choices and layering concepts.
Repetition and mindfulness in observation help photographers anticipate patterns, colors, and moments suitable for double exposure projects.
Balancing Simplicity and Complexity
The most compelling double exposure images strike a balance between simplicity and complexity. Overcomplicating layers can overwhelm viewers, while overly minimal compositions might lack impact. Consider shapes, textures, and light distribution carefully. Negative space can be as powerful as the subject itself, emphasizing key elements and enhancing readability. Planning ahead ensures that each layer contributes meaningfully to the composition rather than creating visual noise. Guidance on spatial balance in creative projects, such as modern renovation and design strategies, provides transferable lessons in proportion, focus, and harmony.
Experimenting with a range of styles, from minimalist to intricate, enables photographers to refine their personal aesthetic and strengthen compositional judgment.
Learning from Professional Programs
Formal education can accelerate mastery in double exposure techniques. Photography programs provide technical instruction, historical context, and mentorship opportunities. Exposure to different approaches and critiques helps students develop a unique vision while understanding the principles of layering and storytelling. Photography curricula often emphasize narrative development alongside technical skill, fostering originality and creativity. For insights into top educational opportunities, exploring leading photography universities and courses highlights programs that integrate conceptual training with technical rigor.
Education also encourages experimentation with advanced tools and fosters awareness of emerging trends in creative photography.
Pushing the Boundaries with Abstract Concepts
Abstract double exposure allows photographers to break free from literal representation. By blending textures, shapes, and conceptual ideas, artists can create visually compelling and thought-provoking works. Abstraction invites viewer interpretation, prompting emotional and intellectual engagement. It’s an avenue for risk-taking and innovation, challenging traditional definitions of photography. Inspiration can come from vibrant, unconventional designs, as seen in lemon lime color composition inspiration, where playful patterns and bold tones demonstrate how experimentation enhances creative storytelling.
Experimenting with abstract layering sharpens intuition and nurtures a deeper understanding of how elements interact visually.
Showcasing Your Work
Presenting double exposure photography effectively maximizes its impact. Thoughtful curation, framing, and context influence how images are perceived. Online platforms, physical exhibitions, or even immersive displays can amplify the emotional and narrative quality of layered images. Connecting creative output with audience perception requires intentional design and presentation strategy. Contemporary examples, such as luxury inspired visual design collections, demonstrate how sophisticated presentation enhances audience engagement and reinforces artistic vision.
Sharing works regularly also promotes growth, allowing photographers to refine techniques based on feedback while cultivating a distinct style.
Expanding Creative Vision with Double Exposure
Double exposure photography is a gateway to exploring the imagination, allowing photographers to merge unrelated images into coherent visual narratives. The process requires not only technical skill but also a deep understanding of storytelling, composition, and mood. Every layer added to an image contributes to its narrative weight, creating a rich tapestry of emotion and meaning. Inspiration often comes from artists who combine multiple disciplines, blending textures, lighting, and cultural references. For instance, studying collections like James Wiens inspired photography themes can provide ideas on how minimalism and striking composition coexist, influencing your approach to layering and subject choice.
Exploring your creative vision also involves experimenting with scale, perspective, and context. Small details in one layer can complement larger shapes in another, producing a harmonious balance. Photographers who embrace risk-taking in their projects often discover unexpected visual relationships that elevate their work beyond simple overlaying techniques. The key is learning to see the world through multiple lenses simultaneously, merging imagination with observation.
Selecting Emotionally Resonant Subjects
Double exposure photography excels when the chosen subjects evoke a strong emotional response. Portraits combined with evocative landscapes, abstract textures, or symbolic motifs can transform ordinary scenes into deeply moving compositions. Thoughtful layering communicates stories, memories, or even philosophical ideas. Capturing personal moments digitally and translating them into tangible creations enhances this emotional impact. Platforms discussing transforming moments into family masterpieces highlight how intimate experiences can be elevated into meaningful visual statements, serving as inspiration for photographers seeking narrative depth in their images.
Choosing subjects also involves considering texture, light, and contrast. High-contrast elements often provide strong focal points, while subtle textures add layers of intrigue. Combining human emotion with natural or abstract elements allows a photograph to tell multi-layered stories that resonate with viewers on a personal level.
Mastering Layering and Composition
Layering is the backbone of double exposure photography. Digital tools allow photographers to blend images seamlessly, controlling opacity, masking, and blending modes to create cohesive compositions. The interplay between foreground and background layers dictates the overall mood, guiding the viewer’s eye through the narrative journey. For photographers seeking inspiration in color, tone, and balance, references such as bold and beautiful black inspirations demonstrate how contrasting elements can create striking visual tension and harmony.
Experimentation is key. Combining unexpected textures or experimenting with unusual pairings—like organic patterns over urban silhouettes—can produce compelling effects. Learning from abstract or minimalist designs helps artists understand how to convey meaning without overcrowding the frame, balancing visual complexity with clarity.
The Power of Color and Symbolism
Color plays a pivotal role in shaping the emotional resonance of a double exposure image. Warm tones evoke nostalgia and intimacy, while cool or muted tones suggest mystery, serenity, or melancholy. Subtle adjustments in saturation, hue, and contrast can unify layers that would otherwise appear disconnected. Studying modern color inspirations in art can provide insight into how different tones communicate emotion and mood effectively. For example, lavender herb inspired color ideas offer guidance on balancing soft pastels with deeper accent shades, a useful skill when blending layers in photography.
Symbolism also enhances the storytelling potential of double exposures. Integrating metaphoric elements, such as natural forms, architectural structures, or cultural motifs, adds meaning beyond the literal interpretation. When executed thoughtfully, the resulting image can provoke reflection and discussion, turning ordinary photographs into lasting impressions.
Integrating Cultural Influences
Cultural elements add richness to double exposure compositions, providing texture, context, and depth. Photographers can draw from historical art, architecture, or regional traditions to inform subject choice, color palettes, and composition. For example, traveling through Italy and documenting its landscapes, architecture, and daily life can inspire layered imagery that evokes place and heritage. Photographers often translate such experiences into compelling narratives by blending portraits, scenery, and abstract textures. References like Italy inspired travel imagery showcase how cultural inspiration can be integrated seamlessly into artistic projects.
Exploring cultural symbols, patterns, and motifs allows artists to create layers that resonate universally while maintaining personal significance. This approach also encourages storytelling that connects viewers across geographic and experiential boundaries.
Utilizing Light and Shadow for Drama
The manipulation of light and shadow is crucial in double exposure photography. Layered compositions gain dimensionality and mood through careful attention to contrast and illumination. Photographers can experiment with natural light, artificial light, or even mixed lighting sources to create subtle or dramatic effects. Integrating reflective surfaces, silhouettes, or shadow patterns adds depth, enhancing the narrative power of each image. For those designing visual environments, consulting guides like stunning dining ceiling lighting ideas can inspire innovative lighting strategies and inform how shadow interacts with composition.
The interplay of light and shadow also serves to unify multiple layers, ensuring that each element contributes cohesively to the overall story while maintaining clarity and contrast.
Experimenting with Abstract Layers
Abstract layers expand creative potential, pushing the boundaries of traditional photography. By blending shapes, textures, and unexpected patterns, photographers can create images that challenge perception and provoke thought. Abstraction encourages innovation, allowing the artist to communicate ideas symbolically rather than literally. Studying works with bold, unconventional designs can guide creative exploration. For instance, chic pink and color combinations offer insight into layering contrasting yet harmonious tones, helping photographers make confident compositional choices when blending abstract forms.
Abstract experimentation also trains the eye to detect subtle relationships between elements, fostering intuition that strengthens both technical and artistic skill.
Incorporating Nature and Urban Environments
Blending natural and urban subjects creates compelling juxtapositions in double exposure photography. The organic textures of forests, water, or clouds contrast effectively with architectural lines, city streets, or geometric structures. This interplay produces dynamic compositions that capture attention and stimulate thought. Photographers often layer landscapes over human silhouettes to create narratives that explore humanity’s relationship with the environment. Visual inspiration can come from bright and vibrant designs, such as panoramas inspired nature designs, demonstrating how expansive scenery can interact with foreground subjects to produce cinematic depth.
By carefully selecting complementary elements, photographers can balance complexity and clarity, ensuring the resulting image communicates both narrative and emotion.
Capturing Wildlife and Symbolic Imagery
Incorporating wildlife or symbolic imagery introduces narrative richness and metaphorical depth to double exposure compositions. Birds, pandas, or other animals serve as focal points, often representing emotion, freedom, or innocence. Selecting appropriate symbolic imagery helps photographers convey layered meaning that resonates with viewers on multiple levels. For inspiration, works like panda inspired wildlife photography provide ideas for integrating animal subjects into layered storytelling, showing how symbolism can coexist with aesthetic beauty.
Wildlife also encourages experimentation with natural textures, light, and perspective, enhancing the photographer’s technical skill while reinforcing narrative coherence.
Presenting and Sharing Double Exposures
The impact of double exposure photography is amplified by thoughtful presentation. Curating images in online portfolios, galleries, or digital exhibitions ensures that the narrative and aesthetic qualities are communicated effectively. Consideration of framing, spacing, and context guides viewers through the story embedded in the layers. Innovative display strategies, whether through immersive installations or thematic collections, reinforce both artistic intention and audience engagement. Studying examples of luxury inspired color combinations demonstrates how presentation can elevate layered compositions, emphasizing narrative cohesion and visual impact.
Sharing work also encourages dialogue, feedback, and growth, allowing photographers to refine their techniques while building an audience attuned to their creative vision.
Exploring Landscapes in Double Exposure
Landscapes are a powerful component in double exposure photography, providing texture, depth, and context. Whether you use rolling hills, coastal cliffs, or urban skylines, integrating these elements adds narrative weight to your images. Photographers often experiment with layering landscapes over human silhouettes, abstract shapes, or architectural details to create emotionally rich visuals. By observing natural patterns and the interaction of light and shadow, artists can design layered compositions that evoke mood and intrigue. For inspiration in scenic imagery, Ireland inspired landscape compositions provide examples of harmonious color palettes and sweeping visual narratives that translate beautifully into layered photographic projects.
Using landscapes effectively requires understanding scale, perspective, and contrast. Subtle textures in distant horizons can balance bold foreground elements, creating a cohesive and dynamic composition. The interplay between natural forms and human subjects often tells a story of coexistence and contrast, reflecting broader themes in visual storytelling.
Simplifying Complex Scenes
Double exposure photography sometimes risks overwhelming viewers if multiple layers are not thoughtfully balanced. Simplifying complex scenes ensures that the narrative remains clear and engaging. Artists can achieve this by selectively masking certain areas, reducing opacity, or isolating elements that enhance the story. Minimalist approaches often emphasize the emotional impact of each layer without overcrowding the composition. Learning to pare down details while maintaining depth strengthens the photographer’s ability to guide the viewer’s attention. Resources like budget friendly quick room design ideas highlight how thoughtful simplicity can enhance aesthetics, a lesson that translates seamlessly into photographic layering.
Experimenting with negative space, muted backgrounds, or selective focus allows photographers to simplify visual information while keeping compositions visually engaging. Simplification also enables the artist to convey more complex ideas with subtlety, leaving room for interpretation.
Incorporating Storytelling Elements
Storytelling is at the heart of compelling double exposure images. Each layer should contribute to the narrative, whether by symbolizing emotion, illustrating a theme, or suggesting a journey. Photographers can blend imagery from personal experience, culture, or imagination to craft unique visual stories. For instance, food photography layered with abstract motifs can explore cultural identity and sensory experience. Techniques highlighted in from followers to food inspired visual storytelling illustrate how everyday subjects can become narrative vehicles when combined creatively with other imagery.
Understanding pacing and flow is essential for narrative layering. Just as writers structure sentences and paragraphs, photographers arrange layers to guide the viewer’s eye and deliver the intended emotional impact. Strategic use of contrast, color, and positioning ensures that the story is compelling and comprehensible.
Mastering Cityscapes
Urban environments offer rich possibilities for double exposure photography. Skylines, streets, and architectural landmarks can be layered with abstract textures, portraits, or natural forms to create dynamic compositions. These elements provide structure, contrast, and symbolic meaning. Photographers often experiment with night scenes, neon lighting, or reflections to enhance the visual drama of cityscapes. For example, examining NYC skyline inspired city compositions demonstrates how urban forms can act as both narrative and aesthetic elements, guiding the eye while enriching the visual story.
Cityscapes also offer opportunities for thematic exploration, including concepts of growth, movement, or human experience within urban spaces. Combining these with abstract or natural elements produces layered images that are visually compelling and conceptually rich.
Blending Portraits with Abstract Art
Portraits are a natural partner for double exposure. Overlaying abstract shapes, textures, or cultural motifs allows photographers to transform straightforward portraits into expressive visual narratives. Abstract layering adds emotional depth, highlighting personality, mood, or symbolic meaning. Observing works such as Lauryn Hill inspired portrait compositions provides insight into balancing facial expression with abstract elements, ensuring that each layer complements the subject rather than overwhelming it.
Experimentation with lighting, shadow, and color further enhances the abstract effect, allowing photographers to create portraits that are simultaneously personal and universal, inviting viewers to interpret multiple layers of meaning.
Harnessing Light and Shadow
Light and shadow are fundamental tools in double exposure photography. Properly executed, they enhance depth, mood, and spatial relationships between layers. Photographers can manipulate shadows digitally or in-camera to highlight key areas, draw focus, and create dramatic effects. Learning techniques for realistic shadow creation, as shown in creating realistic shadows in Photoshop, empowers artists to produce seamless and professional compositions where every layer feels intentional and integrated.
The interplay of light and shadow also reinforces narrative structure. Subtle variations in illumination can guide the viewer’s eye across layers, emphasizing emotional beats and enhancing storytelling.
Optimizing Indoor Photography
Indoor photography presents unique challenges for double exposure work, including lighting limitations and spatial constraints. Mastering indoor techniques ensures that layered images retain clarity, vibrancy, and balance. Photographers must consider natural light, artificial light sources, and reflective surfaces to maximize compositional potential. Guides on essential indoor photography techniques offer practical advice for capturing sharp, well-lit images that can later be blended with secondary layers seamlessly.
Using these techniques, photographers can transform ordinary interiors into compelling photographic elements, integrating them naturally with portraits, textures, or cityscapes for sophisticated double exposures.
Integrating Numeric and Symbolic Layers
Numbers, symbols, and abstract forms introduce conceptual depth to double exposure images. Overlaying numeric elements can convey time, sequence, or structure, while symbols can reinforce thematic resonance. The key is integrating these elements without cluttering the composition. Observing examples such as numbers inspired conceptual layering demonstrates how symbols can enhance meaning, guiding interpretation while enriching visual aesthetics.
This approach encourages experimentation with typographic elements, geometric forms, and symbolic motifs to add layers of narrative and intrigue that complement primary imagery.
Layering Multiple Skylines
Photographers often experiment with layering multiple cityscapes to create dynamic and multidimensional compositions. Combining skylines from different cities, perspectives, or times of day introduces contrast and visual interest, enriching the narrative. Techniques for aligning perspective, balancing scale, and harmonizing color are critical to successful skyline layering. Inspirations like NYC skyline inspired layered city imagery provide examples of how to merge urban structures cohesively while maintaining narrative clarity.
The layering of multiple skylines encourages creative exploration and teaches photographers to manipulate scale and perspective to achieve cinematic results.
Creating Inspirational Visual Narratives
Double exposure photography becomes most impactful when it inspires reflection and evokes emotion. Using layered imagery to tell stories that resonate universally elevates the work beyond aesthetic beauty. Photographers can combine landscapes, portraits, abstract elements, or symbolic imagery to communicate ideas, feelings, and experiences. Studying collections such as inspirational themed photography ideas helps artists understand how to balance motivation, narrative, and visual interest while crafting layered images that linger in the mind.
Presentation and curation of these narratives further enhance their impact, whether through digital galleries, social media platforms, or immersive exhibitions, creating a dialogue between artist and viewer.
Embracing Vibrant Artistic Techniques
Double exposure photography thrives on artistic experimentation, and vibrant techniques often yield the most compelling images. Using bold colors, contrasting textures, and layered forms enhances visual storytelling. Photographers can draw inspiration from expressive painters who use color to convey emotion and narrative. Observing collections such as Iris Scott inspired color compositions provides insights into how color intensity, layering, and brush-like textures can translate into photographic techniques, helping artists blend abstract and figurative elements effectively. By experimenting with vibrant palettes and creative overlays, photographers can push the boundaries of traditional composition while maintaining narrative coherence.
Understanding how to balance color vibrancy with clarity is critical. Over-saturation can overwhelm the image, while underutilization may diminish emotional impact. Learning from dynamic visual art ensures each layer contributes meaningfully to the overall story.
Incorporating Wellness and Mindful Themes
Photography, particularly double exposure, offers a medium to explore wellness and human experience. Layered compositions can capture moments of reflection, relaxation, or emotional growth. Photographers can integrate imagery of natural environments, contemplative portraits, or symbolic motifs to evoke mindfulness and introspection. Research into modern wellness trends offers inspiration for thematic exploration. For example, reading about sleep technology transforming wellness demonstrates how technology and daily routines influence human emotion, which can be expressed visually through thoughtful layered photography.
Incorporating wellness concepts also encourages deliberate composition and thoughtful subject selection, ensuring that each layer communicates meaning and evokes a desired emotional response. Subtle nuances of light, texture, and shadow enhance the calming or reflective quality of the images.
Exploring Social Causes Through Photography
Double exposure photography can also be a tool for social commentary, allowing artists to highlight causes, provoke thought, and engage audiences. Layers can juxtapose symbols, faces, and narratives to convey complex societal issues. Charity work, public health initiatives, or cultural movements often inspire such imagery. Learning from philanthropic campaigns can guide artists in crafting meaningful narratives. A relevant example is the impact of charity donations supporting research societies, demonstrating how photography can intersect with social responsibility and create work that resonates beyond aesthetics.
Artists exploring social causes benefit from carefully considering narrative coherence. The combination of visual symbolism, human expression, and context ensures that layered compositions communicate their message clearly and powerfully.
Celebrating Iconic Figures and Music
Integrating iconic figures or musical references adds cultural richness to double exposure photography. Overlaying portraits with thematic textures, cityscapes, or abstract elements creates visual stories that honor legacy and influence. Artists can experiment with rhythm, movement, and emotion to mirror the subject’s impact. Studying works like Notorious Big inspired cultural compositions provides guidance on layering iconic imagery while maintaining both aesthetic balance and narrative depth, demonstrating how photography can evoke the energy and essence of legendary figures.
Cultural references often enhance engagement, connecting audiences with shared experiences and emotional touchpoints, while providing a framework for exploring personal interpretation and creative vision.
Numeric and Conceptual Imagery
Incorporating numbers and symbolic elements adds an abstract layer of meaning to double exposure images. Numbers can represent time, sequence, or concept, while symbols evoke deeper emotional or philosophical reflections. Integrating these elements requires careful attention to balance, scale, and visual flow. Resources that showcase numbers inspired abstract compositions offer insight into how numeric symbolism can be creatively merged with photographic layers, enhancing the intellectual and conceptual appeal of a composition.
This approach encourages photographers to think beyond literal representation, exploring how abstract forms communicate narrative, emotion, and structure within layered imagery.
Including Animal and Pet Themes
Animals, pets, and wildlife are natural subjects for double exposure photography, adding both symbolic and aesthetic value. Blending animal imagery with abstract textures, natural environments, or human silhouettes creates layered narratives that explore empathy, freedom, or companionship. For inspiration, Jack Russell Terrier inspired creative designs demonstrates how pets and animal motifs can serve as focal points in compositions, offering both emotional resonance and visual appeal. These layered images highlight the connection between humans and animals while exploring artistic abstraction.
Animals also encourage experimentation with texture, lighting, and motion, as their natural forms interact dynamically with other visual elements, enriching layered compositions.
Transforming Digital Creations
Photographers increasingly merge digital creations with real-world images, expanding creative possibilities. By integrating digitally rendered textures, abstract patterns, or 3D elements into double exposure photography, artists can push boundaries and explore new narratives. Techniques for translating digital artwork into physical or layered visual formats can elevate the storytelling potential. Guides like turning digital creations into stunning compositions provide strategies for blending digital and photographic layers seamlessly, inspiring photographers to combine technology with traditional techniques for unique artistic outcomes.
Digital integration also allows experimentation with infinite layering, color manipulation, and scale adjustment, offering photographers unprecedented control over narrative and visual impact.
Mastering Color Saturation Techniques
Color saturation profoundly influences the mood and readability of double exposure images. Properly managed, it enhances depth, draws attention, and reinforces narrative intention. Photographers can adjust saturation selectively across layers to unify disparate elements while highlighting focal points. Resources such as understanding color saturation in photography illustrate strategies for balancing intensity and subtlety, ensuring that layered imagery communicates emotion without overwhelming viewers.
Strategic saturation manipulation also allows artists to guide perception, create hierarchy, and emphasize specific narrative or emotional beats within the composition.
Incorporating Panoramic Views
Panoramic imagery provides expansive visual narratives ideal for double exposure projects. Wide-angle landscapes, cityscapes, or abstract panoramic textures offer dramatic backdrops for layered storytelling. Photographers can blend panoramas with close-up details, portraits, or symbolic textures to achieve cinematic effects. Studying references like panoramas inspired wide compositions demonstrates how expansive backgrounds can enhance depth, scale, and perspective in multi-layered imagery, contributing to visually compelling and immersive photographs.
Panoramas also encourage exploration of perspective, composition, and balance, teaching photographers how to navigate scale, horizon lines, and visual flow effectively.
Integrating Symbolic Wildlife Elements
Wildlife imagery adds layers of meaning, narrative symbolism, and aesthetic interest. Pandas, birds, or other animals can represent themes of peace, innocence, or resilience within double exposure compositions. Thoughtful integration ensures that wildlife complements rather than competes with other layers. Observing works such as panda inspired creative photography demonstrates how to merge animal symbolism with abstract or narrative layers, creating images that are both visually appealing and intellectually engaging.
Using symbolic wildlife elements also encourages experimentation with scale, contrast, and texture, enabling photographers to develop nuanced compositions with multiple interpretive layers.
Exploring Wildlife in Double Exposure
Wildlife can create captivating subjects for double exposure photography, adding both symbolism and aesthetic depth. Animals like big cats or birds introduce narrative layers, suggesting themes of strength, freedom, or mystery. Photographers often combine portraits of humans or landscapes with wildlife textures to craft emotionally compelling compositions. For example, studying Jaguar inspired dynamic wildlife imagery provides insight into integrating animal forms with abstract or environmental layers while maintaining visual balance.
Incorporating wildlife also encourages experimentation with movement, perspective, and contrast, challenging photographers to harmonize multiple elements within a single frame.
Elevating Photos Through Presentation
Presentation plays a crucial role in amplifying the impact of double exposure photography. Transforming digital captures into tangible or well-curated formats enhances narrative engagement and visual appeal. Thoughtful framing, color selection, and thematic consistency ensure that layered images communicate effectively. Resources such as elevate your photos with timeless impact provide strategies for turning everyday photography into compelling visual statements that linger in the viewer’s mind.
Careful presentation also guides perception, highlighting emotional beats within the layered composition and reinforcing artistic intention.
Understanding Composition Principles
Mastering composition is vital for coherent double exposure images. Techniques like the golden ratio, rule of thirds, and symmetry help photographers structure layers, balance elements, and draw focus to key subjects. Understanding these principles allows for intentional visual flow, preventing chaotic layering that can confuse viewers. Tutorials such as golden ratio and rule of thirds photography illustrate how classic compositional guidelines can be applied to multi-layered digital photography for greater clarity and impact.
A solid grasp of composition ensures that all layers serve a narrative purpose, enhancing readability and emotional resonance.
Layering with Marine Life
Marine life introduces fluid forms and dynamic textures perfect for abstract or narrative double exposures. Creatures such as sea cucumbers or tropical fish can be merged with natural landscapes or abstract patterns to create visually intriguing compositions. Examining references like Pepino de Mar inspired marine imagery highlights how subtle textures and flowing shapes can be integrated into layered photography, creating depth and visual interest while maintaining harmony across the composition.
Using marine life encourages experimentation with transparency, color gradients, and movement, adding a sense of rhythm to layered images.
Using Animal Symbolism
Animals often carry symbolic meaning in photography, adding narrative depth. Penguins, for example, evoke themes of unity, resilience, and adaptability. When layered with abstract textures or contrasting subjects, symbolic animal imagery strengthens emotional storytelling. Observing examples like Penguin inspired symbolic compositions teaches photographers how to blend narrative and aesthetic elements seamlessly, creating multi-dimensional storytelling that resonates with viewers.
Integrating symbolism allows artists to communicate themes subtly, enhancing the interpretive potential of each composition.
Celebrating Peace and Social Themes
Double exposure photography can explore social and cultural themes, such as peace, community, and human values. Layering symbolic objects, environmental elements, or human silhouettes allows photographers to convey powerful messages beyond aesthetics. Studying works such as Peace Sign inspired thematic images demonstrates how abstract symbols can guide viewer interpretation, create emotional resonance, and enrich narrative complexity in multi-layered images.
This approach empowers photographers to merge artistry with purpose, transforming personal expression into societal dialogue.
Drawing Inspiration from Contemporary Artists
Contemporary visual artists inspire innovative double exposure approaches through experimentation with texture, color, and composition. Observing their work allows photographers to adapt techniques while maintaining originality. Collections like Jamison Gish inspired modern techniques provide insight into blending abstract and figurative elements, exploring color theory, and creating depth in layered photography, guiding photographers toward unique and compelling compositions.
Learning from contemporary practices encourages risk-taking and experimentation, cultivating a distinctive visual style.
Developing Photo Series
Creating a photo series is a strategic way to explore themes and techniques over multiple images. A series allows photographers to develop narrative depth, experiment with repetition, and explore variations in composition, light, and subject. Guides like creative ideas for photography series illustrate how to structure multi-image projects, maintain thematic cohesion, and tell compelling visual stories across multiple frames.
Photo series also offer opportunities to explore concept development, narrative progression, and evolving artistic style over time.
Learning from Stock Photography Trends
Stock photography reveals popular visual styles, compositions, and subjects that resonate with audiences worldwide. Studying these trends helps photographers understand market preferences while inspiring creative adaptation. Analyzing examples such as best-selling stock photos in 2025 provides insight into composition, subject selection, and layering techniques, allowing double exposure artists to combine technical precision with narrative impact.
Following trends while maintaining originality ensures that photographers produce work that is both relevant and innovative.
Presenting Large-Scale Works
Large-scale double exposure compositions can transform spaces and immerse viewers in layered narratives. Expansive canvases or digital displays emphasize texture, color, and depth, drawing audiences into the artistic experience. For guidance on creating impactful large images, resources like large photography inspired dramatic compositions demonstrate how scale, detail, and visual hierarchy interact to enhance storytelling in multi-layered projects.
Presenting work at scale also encourages artists to refine detail, layering technique, and thematic clarity, ensuring maximum engagement and impact.
Conclusion
Double exposure photography is a mesmerizing technique that allows photographers to tell two stories within a single frame. By combining two separate images into one, it creates a dreamlike, surreal effect that can evoke emotion, mystery, and artistic depth. Once considered a purely analog process, double exposure has seamlessly transitioned into the digital age, opening new creative possibilities for both amateur and professional photographers.
At its core, double exposure is about layering. Traditionally, photographers would expose the same piece of film twice, carefully planning how the two images would interact. In the digital era, this layering is achieved through in-camera settings or post-processing software like Adobe Photoshop or Lightroom. The key is to ensure that each layer complements the other, enhancing the overall story rather than creating visual confusion. This requires a strong sense of composition, contrast, and balance.
The first step in mastering double exposure is choosing your subjects wisely. Often, one image serves as a silhouette or outline, while the second fills that shape with texture, pattern, or a secondary scene. For example, a portrait of a person overlaid with a forest landscape can symbolize introspection, growth, or connection to nature. Urban scenes can be combined with abstract patterns or reflections to create a futuristic or chaotic feel. The possibilities are limited only by imagination, but careful planning ensures the final image communicates a clear emotional or conceptual message.
Lighting and contrast play a crucial role in double exposure. High-contrast images tend to produce more striking results because the differences between light and dark areas help each layer stand out. Soft, low-contrast photos can work too, but they often require subtle adjustments in post-processing to maintain clarity. Photographers also need to consider alignment and perspective. Misaligned elements can either disrupt the composition or, if done intentionally, add a sense of surrealism and movement.
Experimentation is the heart of mastering double exposure. Many photographers start by shooting multiple frames with varying subjects, textures, and angles. They then mix and match combinations to see which evoke the strongest emotions or tell the most compelling story. In addition to technical experimentation, artistic intuition plays a huge role. Sometimes the most unexpected pairings—like a city skyline intertwined with flowing water—produce the most visually arresting results.
Finally, storytelling is what sets double exposure apart from simple photo editing. Each image layer should contribute to a cohesive narrative or thematic concept. By layering two worlds into a single frame, photographers can invite viewers to explore new dimensions, discover hidden details, and feel a connection that transcends the ordinary. When done well, double exposure photography is more than just a visual trick—it is a poetic medium that captures complexity, emotion, and imagination in a single, unforgettable frame.
In essence, double exposure transforms ordinary photography into a realm of limitless creativity. By understanding layering, contrast, subject choice, and narrative, photographers can craft images that are not only visually stunning but also rich with meaning. Each photograph becomes “twice the story,” a window into multiple perspectives that captivates and inspires.


