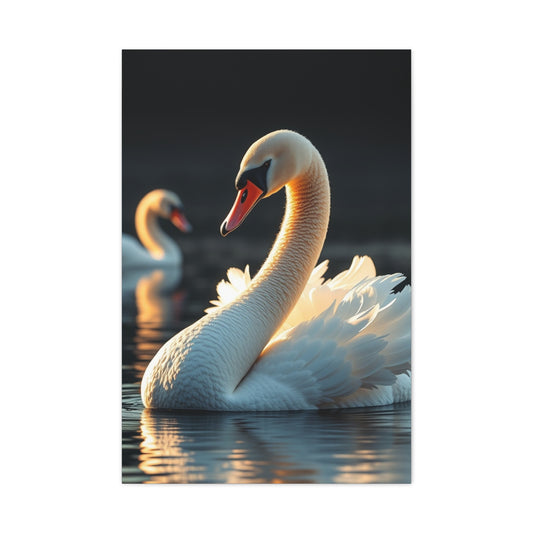
When starting in photography, one of the most common terms you will encounter is F/stop. It appears everywhere, from camera settings to photography tutorials. But what exactly is an F/stop? How does it affect your photos, and how can you control it to your advantage? Understanding F/stops is essential for creating well-exposed images and achieving the desired depth of field in your photographs. In this guide, we will break down the concept step by step and explore its practical applications.
The Concept of Aperture
At the heart of the F/stop is the aperture. The aperture is a hole inside the lens of your camera through which light passes to reach the camera sensor or film. The amount of light that passes through the aperture directly affects the exposure of your photograph. A larger aperture allows more light to enter, resulting in a brighter image, while a smaller aperture allows less light to enter, resulting in a darker image. The aperture is controlled by a set of small metal blades called the diaphragm, which expand and contract to change the size of the opening.
The size of the aperture is measured using the F/stop scale. Each F/stop number represents a specific ratio of the lens’s focal length to the diameter of the aperture. This scale is standardized in photography, making it easier to understand how different settings affect the amount of light entering the lens.
What the F in F/Stop Means
The 'F' in F/stop stands for focal. It relates to the lens’s focal length and how the aperture size interacts with it. The F/stop not only controls the brightness of your image but also influences how much of the photograph will be in focus. This is known as the depth of field, which is a critical creative tool in photography. By adjusting the F/stop, photographers can determine whether the background is blurred or sharply in focus alongside the subject.
How F/Stops Are Measured
F/stops are calculated by dividing the focal length of the lens by the diameter of the aperture. For example, if you have a 100mm lens and the aperture diameter is set at 25mm, the resulting F/stop is F/4 (100 divided by 25 equals 4). While it is not necessary to perform this calculation manually when shooting, understanding the principle helps photographers grasp what is happening inside the lens when adjusting the F/stop.
Over the decades, a standard set of F/stops has been widely used. These are known as full F/stops. Advances in camera technology have allowed for smaller incremental adjustments to the aperture, resulting in half and third F/stops. For beginners, it is best to familiarize yourself with the full F/stop scale first before exploring these smaller increments.
The Full F/Stop Scale
The traditional full F/stop scale is arranged as follows:
F/1.4, F/2, F/2.8, F/4, F/5.6, F/8, F/11, F/16, F/22, F/32
It is important to understand that smaller F/stop numbers correspond to larger apertures, allowing more light to reach the sensor. For instance, F/1.4 lets in significantly more light than F/16. Conversely, larger F/stop numbers represent smaller apertures, which allow less light into the camera. Each step on this scale doubles or halves the amount of light entering the lens. This means that moving from F/4 to F/5.6 reduces the light by half, while moving from F/4 to F/2.8 doubles the light.
In modern cameras, you may encounter additional F/stops between these full stops, such as F/1.8, F/3.5, F/6.3, and so on. These half and third stops allow for more precise exposure adjustments, typically resulting in changes of 30 to 50 percent in light intensity. However, full F/stops remain the foundation for understanding exposure and controlling light in photography.
Maximum Aperture of Lenses
Every lens has a maximum aperture size, which is the largest opening it can achieve at a given focal length. Lenses are often advertised with this specification, such as a 50mm lens with a maximum aperture of F/1.8. Most lenses also have a minimum aperture, typically around F/22. Zoom lenses often have variable maximum apertures because the F/stop depends on both the focal length and aperture diameter. For example, an 18-55mm lens might have a maximum aperture of F/3.5 at 18mm and F/5.6 at 55mm. Understanding your lens’s aperture range helps you make better decisions when adjusting F/stops in different shooting conditions.
How F/Stops Affect Exposure
The primary role of F/stops is controlling exposure. Small F/stop numbers, corresponding to wide apertures, allow more light to hit the sensor, creating brighter images. This is particularly useful in low-light situations, such as indoor or night photography. Conversely, larger F/stop numbers reduce the amount of light entering the camera, which is helpful when shooting in bright daylight to avoid overexposure. Your eyes naturally similarly adjust to light; pupils dilate in darkness to let in more light and contract in bright conditions to limit light. The F/stop in a camera serves the same purpose, regulating how much light reaches the sensor to achieve a balanced exposure.
Exposure can also be guided using your camera’s internal light meter. Most cameras, including digital SLRs and mirrorless models, have an exposure scale that ranges from -2 to +2. This scale helps photographers adjust the F/stop to achieve optimal exposure. If the indicator points to zero, it means the camera has determined that the current F/stop setting produces a balanced exposure. If it reads negative, the photo is underexposed, and opening the aperture to a smaller F/stop will allow more light in. If the scale reads positive, the photo is overexposed, and increasing the F/stop will reduce the light.
F/Stops and Depth of Field
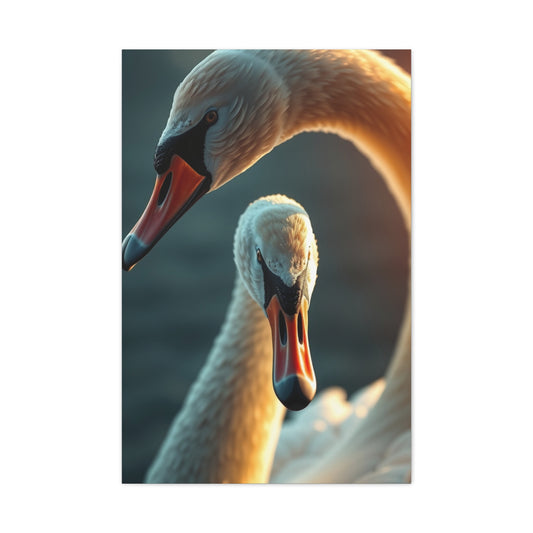
While controlling light is essential, F/stops also influence depth of field (DoF), which determines how much of the scene is in focus. Smaller F/stop numbers create a shallow depth of field, where only a small portion of the image is in sharp focus while the background is blurred. This is ideal for portraits or close-up photography, where isolating the subject from the background is desired. Larger F/stop numbers result in a deeper depth of field, keeping more of the scene in focus, which is beneficial for landscape photography or group shots.
A shallow depth of field is visually striking because it separates the subject from the background. Conversely, a deep depth of field ensures that both the foreground and background remain clear and detailed. Photographers often balance F/stop with other factors, such as the distance between the camera, subject, and background, to achieve the desired depth of field effect without compromising exposure.
Controlling Depth of Field with Distance
Depth of field is not determined solely by F/stop; it also depends on the distance between the camera, subject, and background. Increasing the distance between the subject and the background enhances background blur, while moving closer to the subject can also create more pronounced separation. Understanding this relationship allows photographers to manipulate both exposure and depth of field creatively, giving greater control over the final image.
While precise calculations for depth of field are possible using formulas or applications, it is often more practical to experiment and observe the results. Many photographers use depth of field apps to quickly estimate how changes in F/stop, focal length, and subject distance will affect focus. These tools simplify the process for beginners, allowing them to concentrate on capturing the desired composition and effect.
Tips for Working with F/Stops
Mastering F/stops requires practice and observation. Some key points to remember include that smaller F/stop numbers produce brighter images, changes in full F/stops double or halve the light, half and third stops allow finer adjustments, and the depth of field changes with every F/stop adjustment. Using the exposure scale as a guide helps avoid underexposure or overexposure, and adjusting subject distance can help control background blur without changing the F/stop.
Photographers often experiment with different F/stops in varied lighting conditions to develop an intuitive understanding of how they impact exposure and depth of field. Over time, this knowledge becomes second nature, enabling photographers to make precise adjustments quickly and confidently.
Practical Applications of F-Stops in Photography
Understanding the theory of F/stops is only the first step toward mastering exposure and depth of field in your photography. The real skill lies in applying this knowledge in practical scenarios. The F/stop not only regulates light but also helps define the mood, focus, and clarity of an image. Photographers use it to influence every aspect of a photo, from sharpness to background blur and from low-light conditions to bright outdoor environments. This section explores the practical applications of F/stops and how you can use them creatively.
Controlling Exposure with F-Stops
Exposure is one of the most important elements in photography. A correctly exposed image has balanced brightness, highlights, and shadows. The F/stop is central to controlling exposure because it dictates how much light enters the lens. In low-light conditions, using a smaller F/stop, such as F/1.4 or F/2, allows maximum light to reach the sensor, preventing dark or underexposed images. This is particularly useful for indoor photography, night scenes, or when shooting in dimly lit environments. Wide apertures also make it possible to use faster shutter speeds, reducing the risk of motion blur when capturing moving subjects.
Conversely, in bright outdoor conditions, a larger F/stop, such as F/16 or F/22, restricts the amount of light entering the lens, preventing overexposed or washed-out images. This adjustment ensures that the image retains detail in both the highlights and shadows, producing a balanced exposure. Photographers often need to switch rapidly between different F/stops as lighting conditions change, requiring familiarity and practice with the aperture dial on the camera.
Combining F-Stops with ISO and Shutter Speed
Exposure is not controlled by F/stops alone. Shutter speed and ISO are equally important, and the three settings work together in what is commonly referred to as the exposure triangle. The F/stop determines the amount of light entering the lens, shutter speed determines how long the sensor is exposed to that light, and ISO determines the sensor’s sensitivity. By understanding the interplay of these three elements, photographers can achieve optimal exposure in any environment.
For example, if you want to capture a moving subject in low light, a small F/stop alone might not be sufficient. You would also need to increase the ISO or reduce the shutter speed to allow more light in. However, each adjustment has trade-offs. Higher ISO increases noise, slower shutter speeds can cause motion blur, and larger apertures reduce depth of field. By mastering F/stops, you gain more control over these trade-offs and can make creative decisions based on the visual effect you want to achieve.
Using F-Stops to Control Depth of Field
Depth of field is one of the most powerful creative tools in photography. The F/stop directly affects how much of your scene is in focus. Smaller F/stop numbers create a shallow depth of field, isolating the subject from the background. This is ideal for portraits, macro photography, or any situation where you want the subject to stand out. Shallow depth of field creates a soft, blurred background that draws the viewer’s attention to the main subject and adds a sense of depth to the image.
Larger F/stop numbers produce a deeper depth of field, keeping more of the scene in focus. This is particularly useful for landscape photography, architecture, or group shots where you want everything from the foreground to the background to be sharp. By carefully selecting the F/stop, photographers can control not just exposure but also the spatial arrangement and visual impact of their images.
Balancing Depth of Field and Exposure
One of the challenges of using F/stops is balancing depth of field with exposure. A wide aperture lets in more light, which is perfect for low-light conditions but results in a shallow depth of field. In situations where you want a deep depth of field, you may need to use a smaller aperture. However, this reduces the light entering the lens, potentially underexposing your image. To compensate, you can adjust shutter speed or ISO, but each adjustment must be considered carefully to avoid motion blur or excessive noise.
For example, when photographing a landscape at sunrise, you may want a small F/stop to capture the entire scene in focus. Since light may be limited, you might need to use a slower shutter speed and a tripod to stabilize the camera, or increase ISO while managing noise levels. This balancing act is a fundamental part of photography, and mastering it requires understanding how F/stops interact with other exposure settings.
Creative Uses of F-Stops
Beyond technical considerations, F/stops are a powerful creative tool. A shallow depth of field can create dreamy portraits, isolate subjects in street photography, or emphasize texture in close-up shots. Large F/stops can capture detailed landscapes, architectural interiors, or dynamic scenes with multiple elements in sharp focus. By experimenting with F/stops, photographers can create unique visual styles and tell stories more effectively through their images.
F/stops also affect the way light interacts with the lens. Wide apertures can create interesting bokeh, where out-of-focus light sources appear as soft, circular patterns. Photographers use bokeh to enhance the aesthetic appeal of a photo, adding atmosphere and a sense of depth. Narrow apertures, on the other hand, can produce starburst effects when photographing bright points of light, such as street lamps or sunlight peeking through trees. These effects depend entirely on your choice of F/stop and demonstrate the creative potential of aperture control.
Understanding Lens Limitations
Every lens has physical limitations that influence how you can use F/stops. Maximum and minimum apertures vary by lens type, and zoom lenses often have variable maximum apertures. For example, a 24-70mm zoom lens might offer a maximum aperture of F/2.8 at 24mm but only F/4 at 70mm. Knowing your lens’s capabilities allows you to plan shots and understand the compromises between aperture, focal length, and exposure. Prime lenses typically offer wider maximum apertures, making them ideal for low-light photography and creating a shallow depth of field.
Lens choice also affects the visual characteristics of a photo at different F/stops. Wide-angle lenses tend to exaggerate depth of field, while telephoto lenses compress it, making shallow depth of field more pronounced. Understanding these characteristics helps photographers choose the right combination of lens and F/stop to achieve the desired effect.
Managing Light in Different Environments
Photography often involves adapting to changing light conditions. F/stops are essential for managing these variations. In controlled studio settings, photographers can set the F/stop to achieve consistent exposure and depth of field. Outdoors, natural light fluctuates due to weather, time of day, and location. By adjusting F/stops, photographers can maintain proper exposure while creatively controlling how much of the scene is in focus.
For example, in overcast conditions, a smaller F/stop may be necessary to compensate for low light. On a bright sunny day, a larger F/stop can prevent overexposure and allow for a detailed, sharp image. Understanding these adjustments allows photographers to respond quickly to environmental changes and capture high-quality images under diverse lighting conditions.
Using F-Stops with Composition
F/stops are not only technical tools but also compositional aids. By selecting the appropriate F/stop, photographers can guide viewers’ attention and create a sense of depth. A shallow depth of field can isolate the subject, emphasizing its importance in the frame. A larger depth of field can show the relationship between foreground and background, providing context and narrative to the image. The choice of F/stop influences the viewer’s perception and interpretation of the photo, making it a crucial aspect of visual storytelling.
In portrait photography, for example, using a small F/stop like F/2 can make the subject stand out against a blurred background. In landscape photography, an F/stop of F/11 or F/16 ensures that both near and distant elements remain in focus, preserving the integrity of the scene. By understanding how F/stops affect composition, photographers can make deliberate choices that enhance the overall impact of their images.
F-Stops and Lens Effects
F/stops also influence lens-specific effects. Wide apertures can introduce vignetting, where the corners of the image appear darker than the center. Some photographers use this effect creatively to draw attention to the central subject. Narrow apertures can increase diffraction, slightly softening details across the frame. Recognizing these lens behaviors allows photographers to anticipate and compensate for potential issues, ensuring the final image meets their creative intent.
Additionally, F/stops interact with lens bokeh patterns. Circular diaphragm blades produce smooth, rounded bokeh, while more angular blades create geometric shapes in out-of-focus areas. Photographers can select F/stops to manipulate these effects, adding artistic elements to their work.
Experimenting with F-Stops
The best way to master F/stops is through experimentation. Practice shooting the same scene at different F/stops to observe how exposure, depth of field, and background blur change. Experiment with low-light environments, bright sunlight, portraits, landscapes, and close-up shots to gain a practical understanding of how F/stops influence every aspect of a photograph. Keeping notes on which settings produced the desired results helps build an intuitive sense of F/stop adjustments.
Photography is a creative pursuit, and learning to manipulate F/stops empowers photographers to express themselves visually. By combining technical understanding with artistic exploration, photographers can capture images that are not only correctly exposed but also visually compelling.
The Role of Distance and F-Stops
The distance between the camera, subject, and background plays a critical role in how F/stops affect depth of field. Even with a fixed F/stop, altering the distance can create significant differences in background blur. Moving the camera closer to the subject while keeping the background distant increases blur, while increasing the distance between the camera and subject deepens focus. This interaction between distance and F/stop allows for precise control over the image’s visual hierarchy, ensuring the main subject remains the focal point.
By experimenting with distance in combination with F/stop adjustments, photographers can achieve complex effects without compromising exposure. This flexibility is particularly useful for environmental portraits, macro photography, and creative compositions that require selective focus.
Advanced Understanding of F-Stops
Once you have mastered the basics of F/stops and their effect on exposure and depth of field, the next step is to explore advanced applications. F/stops are not just technical settings; they are a powerful creative tool that can define the mood, sharpness, and overall aesthetic of your images. By understanding advanced concepts such as diffraction, hyperfocal distance, and the interplay between F/stops and lens characteristics, photographers can take full control of their creative vision.
Diffraction and Its Effects
While smaller F/stop numbers (wide apertures) allow more light into the camera and produce shallow depth of field, very large F/stop numbers (small apertures) can introduce a phenomenon called diffraction. Diffraction occurs when light waves bend around the edges of the aperture blades, causing a slight softening of the image. This effect becomes noticeable at very small apertures, such as F/22 or F/32, and can reduce overall sharpness. Photographers need to be aware of diffraction when attempting to achieve a deep depth of field, particularly in landscape or architectural photography.
The key is to find a balance between depth of field and image sharpness. Many lenses perform optimally around two to three stops smaller than their maximum aperture, which is often referred to as the lens’s “sweet spot.” Understanding diffraction helps photographers make informed decisions when selecting F/stops for detailed, high-resolution images without sacrificing clarity.
Hyperfocal Distance and F-Stops
Hyperfocal distance is a critical concept in landscape photography and any scenario where maximizing depth of field is important. It refers to the distance at which a lens should be focused to ensure that everything from half that distance to infinity remains acceptably sharp. The hyperfocal distance depends on the focal length, F/stop, and circle of confusion (a measure of acceptable sharpness).
By using the hyperfocal distance, photographers can select an F/stop that provides maximum depth of field without closing the aperture to the point where diffraction reduces sharpness. For example, when photographing a wide landscape, focusing at the hyperfocal distance with an F/stop around F/8 to F/11 often ensures both foreground and background remain in sharp focus while avoiding diffraction.
F-Stops in Portrait Photography
In portrait photography, F/stops are essential for controlling background blur and isolating the subject. Shallow depth of field, achieved with small F/stop numbers such as F/1.4 or F/2, creates a soft, aesthetically pleasing background that draws attention to the subject’s face or expression. This effect is often complemented by careful lighting and composition to enhance the portrait’s visual impact.
The choice of F/stop in portraiture also affects how facial features and textures are rendered. Wide apertures create a gentle, flattering blur for skin and background, while slightly smaller F/stops, such as F/2.8 or F/4, maintain sharpness across the eyes and face while still softening the background. Mastering this balance is crucial for producing professional-quality portraits with depth and character.
F-Stops in Landscape Photography
Landscape photography generally requires a deep depth of field to ensure that both foreground and background elements are sharp. F/stops in the range of F/8 to F/16 are commonly used, depending on the lens and lighting conditions. Wide-angle lenses are particularly effective in landscape photography because they naturally provide greater depth of field, allowing photographers to use moderate F/stops without sacrificing sharpness.
In addition to controlling depth of field, F/stops in landscape photography help manage exposure in varying lighting conditions. Photographers often shoot during sunrise or sunset when light changes rapidly, requiring quick adjustments to F/stops to maintain balanced exposure. Using a tripod is common in these scenarios to stabilize the camera when slower shutter speeds are necessary due to smaller apertures.
Creative Use of F-Stops
F/stops are not only technical tools but also a means of creative expression. A shallow depth of field can transform ordinary scenes into striking compositions by isolating subjects and creating a sense of intimacy. A wide depth of field can emphasize patterns, structures, or landscapes, enhancing the viewer’s understanding of the scene. Photographers can experiment with different F/stops to achieve artistic effects, such as dramatic bokeh, layered compositions, or surreal perspectives.
For example, using a wide aperture in street photography can separate a subject from a busy background, emphasizing human emotion or movement. In macro photography, selecting a small F/stop can isolate intricate details, such as the texture of a flower petal or the compound eyes of an insect, producing a visually engaging image that draws the viewer’s attention.
Bokeh and F-Stops
Bokeh is the quality of the out-of-focus areas in a photograph, particularly how light sources appear as blurred shapes. F/stops play a crucial role in determining the intensity and appearance of bokeh. Wide apertures, such as F/1.4 or F/2, produce prominent bokeh, creating smooth, rounded highlights in the background. Smaller apertures reduce the effect, making the background more defined and less blurred.
Bokeh can be used creatively to enhance a photograph’s aesthetic appeal. Photographers often use wide apertures to render background lights as soft, circular patterns, adding atmosphere, depth, and visual interest. Understanding how F/stops influence bokeh allows photographers to achieve the desired mood and style in their images.
F-Stops and Motion
Although F/stops primarily control light and depth of field, they also indirectly affect motion capture. Wide apertures allow faster shutter speeds because more light reaches the sensor, which is beneficial when photographing moving subjects. This is essential in sports, wildlife, or street photography, where freezing motion is critical. Conversely, smaller F/stops require longer exposures to maintain correct exposure, which can introduce motion blur if the subject or camera moves during the shot.
Photographers must balance F/stop selection with shutter speed to achieve the intended creative effect. For example, in a low-light concert, a wide aperture can allow faster shutter speeds, capturing sharp images of performers while maintaining ambient lighting. In contrast, long-exposure photography of waterfalls or rivers may require smaller apertures to achieve the desired motion blur while keeping the overall scene properly exposed.
Low-Light Photography and F-Stops
Low-light photography challenges photographers to maximize light intake without compromising image quality. Wide apertures with small F/stop numbers are essential in these scenarios. By allowing more light to reach the sensor, photographers can maintain acceptable shutter speeds and lower ISO settings, reducing noise and preserving detail. Low-light photography often combines wide apertures with careful composition, steady support, and creative lighting to achieve striking results.
Examples include night cityscapes, candlelit portraits, and indoor events. Photographers may also use prime lenses with large maximum apertures for low-light situations because they allow greater flexibility in controlling exposure and depth of field. Mastering F/stops in low-light conditions is crucial for producing high-quality images without sacrificing creative intent.
High-Contrast Scenes and F-Stops
Scenes with high contrast, such as bright sunlight and deep shadows, require careful F/stop management. Choosing the correct F/stop can prevent blown-out highlights and preserve detail in shadowed areas. Photographers often combine F/stop adjustments with exposure compensation, neutral density filters, or graduated filters to balance light across the frame.
For example, when photographing a sunlit landscape, using a smaller F/stop such as F/16 reduces light intake, maintaining detail in bright areas while keeping the scene in focus. Conversely, using a wide aperture in low-light shadows can draw attention to the subject while letting background details fade into darkness, creating dramatic visual effects.
F-Stops and Lens Characteristics
Every lens has unique characteristics that interact with F/stops, including sharpness, chromatic aberration, and vignetting. Wide apertures often produce softer edges, lens flare, and pronounced bokeh, while narrower apertures improve overall sharpness but can introduce diffraction. Understanding these behaviors helps photographers select the right F/stop for their creative goals while maintaining technical quality.
Prime lenses are generally preferred for wide-aperture photography because they offer larger maximum apertures and fewer optical compromises. Zoom lenses provide flexibility across focal lengths but may have variable maximum apertures, requiring careful management of F/stops to maintain desired exposure and depth of field.
Experimenting with F-Stops for Creative Effects
Experimentation is key to mastering F/stops. Photographers should try shooting the same scene at different apertures to observe how exposure, depth of field, bokeh, and sharpness change. Practicing with various lighting conditions, lenses, and subjects helps develop an intuitive understanding of how F/stops influence the final image. Over time, this knowledge becomes second nature, allowing photographers to adjust settings quickly and confidently to achieve their creative vision.
By exploring F/stops creatively, photographers can achieve unique effects such as selective focus, layered compositions, starburst patterns from narrow apertures, and dreamy bokeh from wide apertures. Combining technical knowledge with artistic exploration enables the creation of visually compelling and technically precise images.
Distance, F-Stops, and Perspective
The distance between the camera, subject, and background plays a crucial role in how F/stops affect depth of field. Even at the same F/stop, moving closer to a subject increases background blur, while increasing the distance between the camera and subject expands depth of field. This principle allows photographers to manipulate focus and composition without altering the aperture.
Understanding this relationship is particularly valuable in portrait, macro, and landscape photography. By adjusting camera position in combination with F/stops, photographers can achieve the desired separation between subject and background, maintain sharpness where needed, and enhance the overall visual impact of their images.
Practical Exercises for Mastering F-Stops
Understanding the theory and advanced applications of F/stops is essential, but practical experience is what truly cements this knowledge. Practicing with different apertures in controlled and varied environments helps photographers develop an intuitive sense of how F/stops affect exposure, depth of field, and creative effects. Structured exercises are a valuable way to explore F/stops, experiment with lighting conditions, and understand how distance, subject, and background interact with aperture settings.
Exercise in Low-Light Conditions
Low-light photography is an ideal exercise for mastering wide apertures. Select an indoor environment with minimal lighting or go outside at dusk. Begin by setting the camera to aperture priority mode and using a wide F/stop, such as F/1.4 or F/2, to allow maximum light to enter the lens. Observe how exposure changes when moving the subject closer to or further from light sources. Adjust the ISO and shutter speed minimally to isolate the effect of the F/stop.
This exercise teaches photographers to maintain proper exposure while maximizing creative control over depth of field. Notice the shallow focus created by wide apertures and how background elements blur. By experimenting with different F/stops in low-light conditions, you develop a deeper understanding of how aperture influences image brightness and artistic emphasis.
Exercise in Bright Outdoor Environments
Bright daylight conditions present the opposite challenge: controlling light to avoid overexposure. Head outdoors on a sunny day and select a subject with both foreground and background elements. Start with a moderate F/stop, such as F/8, and adjust to smaller apertures like F/16 or F/22. Observe how the exposure changes and how the depth of field expands, bringing both the subject and background into sharp focus.
Pay attention to shadows, highlights, and overall contrast. Experiment with different focal lengths, distances to the subject, and camera angles. This exercise demonstrates how F/stops can be used to achieve a balanced exposure and ensure maximum detail across the entire frame. Understanding these adjustments is crucial for landscape photography and high-contrast scenes.
Exercise in Portrait Photography
Portrait photography allows photographers to practice controlling depth of field through F/stops. Select a subject and vary the F/stop across a range, from wide apertures such as F/1.4 to narrower ones like F/8. Observe how the background blur changes and how the subject’s features remain in focus. Experiment with positioning the subject at varying distances from the background to further understand the interaction between distance and aperture.
This exercise helps develop an intuitive sense of how F/stops can isolate subjects and create aesthetically pleasing compositions. It also highlights the balance between exposure and depth of field, teaching photographers to choose apertures that complement lighting conditions while achieving creative effects.
Macro Photography and F-Stops
Macro photography presents unique challenges for F/stops due to the extremely shallow depth of field at close distances. Practice shooting small objects, flowers, or insects, and experiment with wide apertures like F/2.8 and narrower ones like F/11. Notice how small adjustments to F/stops dramatically alter which parts of the subject remain in focus.
Macro exercises teach photographers to control both exposure and focus precision. Using a tripod and consistent lighting can help manage challenges caused by narrow depth of field, allowing for creative exploration of textures, details, and selective focus in close-up images.
Combining F-Stops with Motion
Photographers should also practice using F/stops in conjunction with motion. Select a moving subject, such as a pet, a cyclist, or flowing water, and experiment with wide and narrow apertures. Observe how wide apertures allow faster shutter speeds, freezing motion, while narrow apertures may require slower shutter speeds, creating intentional motion blur.
This exercise develops an understanding of how F/stops interact with shutter speed and motion, providing the flexibility to capture dynamic scenes effectively. It also encourages experimentation with creative techniques, such as combining selective focus with motion blur for artistic effects.
Using F-Stops in Landscapes
Landscape photography is an excellent way to practice deep depth of field using smaller F/stops. Select a scene with multiple layers of interest, such as foreground rocks, middle-ground trees, and a distant horizon. Start with an F/stop around F/8 and gradually close the aperture to F/16 or F/22. Observe how increasing the F/stop sharpens elements across the frame and enhances detail.
Use a tripod to stabilize the camera at slower shutter speeds required for narrow apertures. Adjust focal length and distance to the nearest objects to explore hyperfocal distance and ensure maximum depth of field. This exercise helps photographers develop technical proficiency while producing visually compelling, detailed landscape images.
Experimenting with Bokeh and Background Blur
To fully understand the creative potential of F/stops, experiment specifically with bokeh and background blur. Select small points of light in a scene, such as fairy lights, street lamps, or sunlight filtering through leaves. Use wide apertures like F/1.4 or F/2 to observe the shape and smoothness of out-of-focus highlights. Adjust F/stops incrementally to see how bokeh changes in intensity, shape, and distribution.
This exercise teaches photographers how to use F/stops to influence mood, focus, and artistic expression. Combining bokeh experimentation with subject isolation enhances portrait, macro, and low-light photography, helping photographers produce images that are visually rich and engaging.
Troubleshooting Exposure Issues
Practical exercises also involve troubleshooting common exposure problems. Underexposed images may require wider F/stops or higher ISO, while overexposed photos may need smaller apertures or shutter speed adjustments. Use the exposure scale on your camera to guide adjustments and test different F/stops to achieve balanced exposure.
Understanding how to troubleshoot allows photographers to respond quickly to challenging conditions, ensuring consistent results across diverse environments. Practice adjusting F/stops under various lighting scenarios to build confidence and technical skill.
F-Stops and Lens Comparison
Different lenses behave uniquely at various F/stops. Experiment with multiple lenses to observe sharpness, chromatic aberration, vignetting, and bokeh quality. Prime lenses with wide maximum apertures excel in low-light and shallow depth of field situations, while zoom lenses provide flexibility across focal lengths but may have smaller maximum apertures. Comparing lenses helps photographers understand how aperture interacts with lens characteristics and informs creative and technical choices.
F-Stops and Composition
Practice using F/stops deliberately for composition. A shallow depth of field can emphasize a single subject and create separation from a distracting background. Deep depth of field can reveal intricate details and relationships within a scene. Experiment with combining F/stop selection and subject placement to create balanced, visually compelling images. Observe how different F/stops influence the viewer’s perception and emotional response to the photograph.
Working in Mixed Lighting
Mixed lighting conditions, such as shooting indoors with windows or in partially shaded outdoor areas, present challenges for F/stops. Practice adjusting apertures to balance exposure between bright and dark areas. Experiment with wide and narrow F/stops to see how selective focus can guide the viewer’s eye and emphasize important elements. This exercise builds adaptability, allowing photographers to handle complex lighting scenarios with confidence.
F-Stops for Creative Storytelling
Using F/stops for storytelling involves more than technical skill. Consider how shallow depth of field can isolate a subject, emphasizing emotion or action, while deep depth of field can contextualize a scene, showing relationships between elements. Experiment with sequences of images at different apertures to tell visual stories, combining selective focus, lighting, and composition. This practice highlights the narrative potential of F/stops beyond their technical function.
Combining F-Stops with Filters
Filters, such as neutral density or polarizing filters, interact with F/stops and expand creative possibilities. Neutral density filters reduce light, allowing for longer exposures with narrow apertures, which is useful for capturing motion blur in water, clouds, or moving subjects. Polarizing filters reduce reflections and enhance color saturation, often requiring adjustments to F/stops to maintain proper exposure. Experimenting with filters in combination with aperture control allows photographers to push creative boundaries while maintaining technical precision.
Using F-Stops in Different Genres
Each genre of photography benefits from specific F/stop applications. In street photography, wide apertures help isolate subjects in busy environments. In wildlife photography, combining moderate apertures with fast shutter speeds freezes motion while keeping key elements sharp. In product photography, precise F/stop selection controls focus and lighting balance to highlight details. Practice shooting across genres to develop a versatile understanding of F/stops and their impact on various types of images.
Developing an Intuitive Sense of F-Stops
The most advanced skill in mastering F/stops is developing an intuitive sense of how to select apertures quickly and effectively. By practicing in diverse conditions, analyzing results, and reviewing technical and creative outcomes, photographers develop an instinct for the right F/stop in any scenario. This intuition allows for faster decision-making in dynamic environments and enables photographers to focus on composition, storytelling, and artistic expression.
Recording and Reviewing Results
An effective method for mastering F/stops is documenting exercises and reviewing results. Take notes on aperture settings, lighting conditions, subject distance, and lens choice for each image. Compare the effects of different F/stops on exposure, depth of field, bokeh, and overall composition. Over time, this record provides a reference for future shoots and reinforces practical knowledge, helping photographers refine their approach and improve consistently.
Advanced Practical Exercises with F-Stops
Once you have a solid understanding of how F/stops affect exposure, depth of field, and creative effects, practical exercises become essential to cement your knowledge. Hands-on practice allows photographers to explore the interplay between light, subject, lens, and F/stop settings. These exercises are designed to challenge your understanding of apertures in different scenarios, helping you develop intuition for precise adjustments.
Low-Light Photography
Practicing F/stops in low-light conditions is crucial for understanding how wide apertures affect exposure and depth of field. Find a dimly lit room, a candlelit environment, or a location during dusk or dawn. Set your camera to aperture priority mode and select a wide aperture such as F/1.4 or F/2. Observe how the image brightness changes as you adjust the F/stop. Compare results with varying ISO settings to understand how aperture, sensitivity, and noise interact.
Notice how the shallow depth of field isolates subjects from their backgrounds, creating a natural emphasis. Experiment with focusing on foreground objects while allowing background elements to fade into a soft blur. Repeat this exercise with different light sources and angles to see how wide apertures capture available light and enhance the visual mood of your images.
Bright Outdoor Conditions
Bright outdoor environments provide a contrasting challenge where managing excess light becomes important. Select a scene with both foreground and background elements and start with a mid-range F/stop such as F/8. Observe how smaller apertures like F/16 or F/22 affect both exposure and depth of field. The goal is to bring distant elements into focus while preventing overexposure.
Practice adjusting camera angles, subject distance, and F/stop combinations to achieve balanced exposure. Notice how shadows and highlights change with aperture adjustments. This exercise helps develop the skill of controlling light in high-contrast situations and improves your understanding of how F/stops can affect the visual hierarchy in outdoor photography.
Portrait Photography and Depth of Field
Portraits are ideal for exploring the artistic potential of F/stops. Begin by selecting a subject and experimenting with wide apertures such as F/1.4 or F/2. Observe how the background becomes softly blurred, drawing attention to facial features and expressions. Adjust the distance between the subject and the background to see how shallow depth of field interacts with spatial relationships.
Next, try slightly smaller F/stops like F/2.8 or F/4 to see how more of the subject remains in focus while still maintaining some background separation. Use this exercise to understand how F/stops control both aesthetic and technical qualities in portrait photography, including skin texture, eye sharpness, and subject isolation. Experiment with different lighting angles to observe how aperture interacts with light intensity and direction.
Macro Photography Techniques
Macro photography presents unique challenges due to the extremely shallow depth of field at close distances. Choose small objects such as flowers, insects, or textured surfaces and experiment with wide apertures like F/2.8, then move toward narrower apertures like F/11. Notice how small changes in F/stop drastically affect which portions of the subject remain in sharp focus.
Use a tripod and consistent lighting to stabilize your camera for detailed close-up shots. Explore how combining aperture adjustments with slight repositioning of the camera or subject enhances control over focus. This exercise strengthens your understanding of depth of field and precision focusing, which are critical for capturing intricate details in macro photography.
Motion and F-Stops
Photographers should practice combining F/stops with motion capture. Select a moving subject such as a cyclist, pet, or flowing water. Wide apertures allow faster shutter speeds, freezing motion, while smaller apertures may require longer exposures, introducing motion blur.
Experiment with creative techniques, such as using shallow depth of field to isolate a moving subject or employing a narrow aperture to capture dynamic motion trails while keeping background elements in focus. Observing how F/stops interact with shutter speed in these exercises develops the ability to manage movement and exposure simultaneously for artistic effect.
Landscape Photography
Landscape photography is ideal for exploring F/stops that produce a deep depth of field. Find a scene with multiple layers, including foreground objects, middle-ground subjects, and distant elements. Start with F/8 and gradually move to smaller apertures like F/16 or F/22. Observe how the focus extends across the frame, maintaining sharpness throughout.
Use a tripod for stability during longer exposures, which are often necessary with narrow apertures. Experiment with focal length variations to understand how wide-angle lenses, in particular, influence depth of field at different F/stops. Practice combining hyperfocal distance focusing with aperture adjustments to maximize sharpness from foreground to background.
Bokeh and Creative Background Blur
Experimenting with bokeh allows photographers to explore the aesthetic effects of wide apertures. Choose a scene with small points of light, such as fairy lights, street lamps, or sun filtering through leaves. Use wide apertures like F/1.4 or F/2 and observe how out-of-focus areas produce smooth, rounded highlights. Adjust F/stops incrementally to see how bokeh changes in intensity and shape.
Practicing bokeh techniques helps in portrait, macro, and low-light photography. By controlling background blur creatively, photographers can emphasize their subject while adding atmosphere and mood to the scene. Understanding how F/stops affect bokeh quality provides a powerful tool for visual storytelling.
Troubleshooting Exposure
Learning to troubleshoot exposure issues is an essential part of mastering F/stops. If images are underexposed, widening the aperture allows more light into the camera. If overexposed, reducing the aperture or adjusting shutter speed and ISO compensates for excess light. Practice using the exposure scale in your camera to guide adjustments and achieve a balanced exposure.
Work under varying lighting conditions, including backlit, mixed, and high-contrast scenarios. Experiment with incremental F/stop adjustments and observe how small changes affect the overall image. Over time, this practice develops technical confidence and helps photographers react effectively to changing conditions.
Lens Comparison and F-Stop Behavior
Different lenses interact uniquely with F/stops. Prime lenses generally allow wider maximum apertures and produce higher-quality bokeh and sharpness, while zoom lenses provide flexibility but may have smaller maximum apertures. Compare lenses by photographing the same scene with identical F/stops and analyzing sharpness, chromatic aberration, vignetting, and bokeh quality.
This exercise teaches photographers how F/stops interact with lens characteristics, helping make informed decisions on aperture selection for technical accuracy and creative expression. Observing lens behavior across F/stops builds a deeper understanding of optical limitations and strengths.
Composition and F-Stops
Using F/stops intentionally for composition allows photographers to direct viewers' attention. Shallow depth of field isolates a subject from a distracting background, while deep depth of field reveals detailed relationships across a scene. Practice adjusting F/stops alongside framing and camera angle to enhance visual storytelling and composition.
Experiment with foreground elements, leading lines, and perspective changes to see how aperture affects the spatial relationship between subject and environment. Understanding this interplay strengthens both creative and technical skills.
Mixed Lighting Conditions
Mixed lighting conditions, such as shooting near windows, in partial shade, or in scenes with both natural and artificial light, require careful F/stop selection. Practice adjusting apertures to balance exposure and maintain the desired depth of field. Combine this with ISO and shutter speed adjustments to control overall image brightness while preserving visual emphasis on subjects.
These exercises develop adaptability, enabling photographers to respond to complex lighting scenarios and achieve consistent results in diverse environments. Repetition under varied conditions is essential to mastering these techniques.
Storytelling with F-Stops
F/stops influence how a scene communicates a story. Shallow depth of field isolates a subject, creating intimacy or focus, while deep depth of field shows context and relationships within the environment. Practice capturing sequences of images with different F/stops to observe how selective focus affects the viewer's interpretation. Experiment with combining shallow and deep focus within a series to narrate a visual story effectively.
Understanding the narrative power of F/stops enhances creative control. Photographers can manipulate focus to emphasize emotional impact, highlight key elements, and guide the viewer’s eye, making technical knowledge a tool for storytelling.
Filters and F-Stops
Using filters, such as neutral density or polarizing filters, expands creative possibilities with F/stops. Neutral density filters reduce light, allowing longer exposures with narrow apertures, useful for capturing motion blur in water, clouds, or moving subjects. Polarizing filters reduce reflections and enhance color saturation, often requiring F/stop adjustments to maintain correct exposure.
Experimenting with filters alongside aperture settings teaches photographers how to combine technical tools creatively. Understanding these interactions ensures consistent results while exploring innovative photographic effects.
Genre-Specific Applications
Different genres of photography rely on specific F/stop strategies. In street photography, wide apertures isolate subjects amid distractions. Wildlife photography often requires moderate apertures to freeze action while maintaining depth of field. Product photography uses precise apertures to emphasize details and balance light. Practicing across genres develops versatility and strengthens intuitive F/stop selection skills, preparing photographers for diverse shooting scenarios.
Developing Intuition with F-Stops
The most advanced skill in mastering F/stops is developing an instinctive sense of which aperture to use. Repetition, observation, and review of results allow photographers to anticipate the effect of F/stops in any scenario. This intuition enables rapid decision-making in dynamic environments, freeing attention for composition, lighting, and storytelling. Practicing regularly under varied conditions builds confidence and mastery.
Recording and Reviewing Work
Maintaining a log of F/stop experiments, lighting conditions, lens selection, and composition choices helps consolidate learning. Reviewing images critically allows you to identify patterns, understand the impact of each F/stop, and refine creative decision-making. Over time, this process creates a personal reference for future shoots, enabling more deliberate and effective photographic choices.
Advanced Troubleshooting with F-Stops
Mastering F/stops goes beyond understanding aperture basics. Advanced troubleshooting is essential for photographers who frequently work in challenging lighting conditions or with complex compositions. Even experienced photographers encounter issues like inconsistent exposure, unwanted depth of field, or difficulty isolating subjects. By understanding how F/stops interact with other camera settings and environmental factors, you can quickly diagnose and correct problems.
Exposure issues are the most common challenge. Overexposed images often occur when wide apertures are used in bright light without compensating with shutter speed or ISO adjustments. Underexposed images happen when narrow apertures are used in low-light conditions without sufficient exposure compensation. Reviewing the exposure scale on your camera and learning to interpret its readings are essential skills for resolving these issues efficiently. Practice adjusting F/stops incrementally while observing the effect on exposure to develop a keen sense of control.
Balancing Aperture, Shutter Speed, and ISO
F/stops cannot be considered in isolation. Each adjustment affects the balance between exposure, motion blur, and image noise. For example, opening the aperture to F/2.8 in a bright environment may require a faster shutter speed or a lower ISO to prevent overexposure. Conversely, narrowing the aperture to F/16 in low light may require a slower shutter speed or higher ISO, potentially introducing noise or motion blur.
Photographers must experiment with these three elements in combination to achieve the desired outcome. Start by selecting your F/stop for creative effect, then adjust shutter speed to control motion and ISO to manage light sensitivity. Practicing this balancing act under varied lighting conditions helps build intuition for real-world shooting scenarios, enabling faster and more confident adjustments.
Using Extreme F-Stops
Extreme F/stops, such as F/1.2 or F/32, can produce dramatic effects but also present technical challenges. Wide apertures like F/1.2 allow exceptional light capture and create a very shallow depth of field, perfect for subject isolation and artistic bokeh. However, achieving sharp focus can be difficult, especially in close-up or macro photography. Careful attention to focus, subject placement, and camera stability is essential.
Narrow apertures like F/32 produce a deep depth of field, making them ideal for landscapes or architectural photography. However, diffraction can reduce image sharpness, particularly with smaller sensor cameras. Understanding the limitations of your lens and sensor at extreme F/stops allows photographers to choose settings that maximize both technical quality and creative intent.
Hyperfocal Distance and F-Stops
Hyperfocal distance is a powerful concept for landscape and architectural photography, allowing maximum depth of field while maintaining sharpness. The hyperfocal distance is the point at which you focus the lens so that everything from half that distance to infinity appears acceptably sharp. F/stops play a critical role in achieving this effect. Narrow apertures increase depth of field and extend the hyperfocal distance, ensuring both foreground and background elements remain in focus.
Practicing hyperfocal distance calculations helps photographers plan compositions and optimize aperture settings for technical precision. Use a small F/stop such as F/11 or F/16 and focus at the calculated hyperfocal distance. Over time, familiarity with common focal lengths and distances allows for intuitive use of this technique without extensive calculations, enhancing efficiency in outdoor and architectural photography.
F-Stops and Creative Effects
F/stops are not just technical tools; they are creative instruments that shape the mood, focus, and storytelling potential of an image. Shallow depth of field created by wide apertures can evoke intimacy, draw attention to specific elements, or create a dreamlike atmosphere. Deep depth of field achieved with narrow apertures can emphasize scale, context, and environmental relationships.
Experiment with combining F/stops with different lenses, perspectives, and lighting conditions to explore a range of creative effects. For example, wide apertures combined with telephoto lenses exaggerate background compression and isolate subjects, while narrow apertures with wide-angle lenses enhance spatial depth and emphasize expansive landscapes. Deliberate use of F/stops as a creative tool empowers photographers to convey emotion and narrative visually.
Mixed Lighting and F-Stop Adjustments
Challenging lighting conditions, such as shooting at golden hour or under mixed artificial and natural light, require advanced aperture management. Wide apertures allow more light into the camera but may overexpose areas illuminated by direct light. Narrow apertures reduce light intake but can risk underexposing shadowed areas.
Balancing F/stops with shutter speed and ISO is essential in these situations. Photographers should practice evaluating the scene, deciding which areas of the frame should be emphasized, and adjusting apertures to maintain both creative intent and technical accuracy. Bracketing exposures by taking multiple shots at different F/stops can also help capture high dynamic range scenes and ensure optimal results.
F-Stops and Depth of Field Manipulation
Advanced photographers manipulate depth of field intentionally to control visual storytelling. Shallow depth of field draws attention to a single subject, minimizes distractions, and enhances aesthetic appeal. Deep depth of field ensures clarity across a scene, providing context and detail.
Exercises in controlling depth of field include varying the subject-to-background distance, adjusting camera-to-subject distance, and changing focal length. Each factor interacts with F/stops to influence focus distribution. Practicing these adjustments in combination helps photographers understand the subtleties of depth perception and focus control, allowing precise manipulation of visual emphasis.
F-Stops for Motion Effects
Motion photography benefits from deliberate F/stop selection. Wide apertures permit faster shutter speeds, freezing movement in sports, wildlife, or action scenes. Narrow apertures enable longer exposures, creating motion blur for artistic or documentary effect, such as silky waterfalls or moving clouds.
Experiment with different combinations of F/stops and shutter speeds to achieve desired motion effects. Observe how depth of field and exposure interact with movement to produce dynamic images. Understanding these relationships allows photographers to capture both technical accuracy and expressive motion.
F-Stops in Macro Photography
Macro photography requires specialized F/stop control due to the extreme shallow depth of field at close distances. Small adjustments to the aperture can drastically alter focus on fine details such as flower petals, textures, or insect anatomy. Practicing with wide and narrow F/stops in macro setups helps develop control over selective focus, ensuring critical elements remain sharp while maintaining pleasing background blur.
Use tripods, manual focus, and consistent lighting to maximize precision. Combining F/stops with careful composition and subject positioning creates visually compelling macro images that highlight minute details and textures effectively.
Creative Storytelling with Aperture
Advanced photographers use F/stops deliberately to tell stories visually. A shallow depth of field can convey isolation, intimacy, or mystery, while a deep depth of field emphasizes relationships, scale, and environmental context. Practicing narrative techniques involves experimenting with multiple shots at varying apertures to observe how focus and background treatment affect perception.
Consider the emotional impact of F/stop choices and integrate them with composition, lighting, and subject placement. Understanding the storytelling potential of aperture allows photographers to communicate more effectively through their images.
Combining F-Stops with Filters and Lenses
Filters and lenses offer additional creative and technical opportunities when paired with F/stops. Neutral density filters reduce light, allowing for longer exposures with narrow apertures, which is useful for landscapes, water motion, and cloud movement. Polarizing filters reduce glare, enhance color saturation, and may require aperture adjustments for optimal exposure.
Experimenting with different lens types, focal lengths, and filter combinations in conjunction with F/stops allows photographers to push creative boundaries. Understanding these interactions ensures precise control over technical quality and artistic outcomes.
F-Stops Across Genres
Different genres of photography utilize specific F/stop strategies. Street photographers often use wide apertures to isolate subjects in crowded environments. Wildlife photographers balance aperture with shutter speed to capture moving animals sharply while maintaining depth of field. Landscape photographers employ narrow apertures to achieve maximum clarity and detail. Product photographers rely on precise aperture control to highlight textures and maintain consistent lighting. Practicing F/stops across genres develops versatility and enhances technical intuition.
Building Intuition and Confidence
Intuition is the ultimate skill for F/stop mastery. Through repeated practice, analysis, and experimentation, photographers develop an instinctive sense of which aperture to use in any scenario. This allows rapid decision-making in dynamic environments and frees attention for creative composition, lighting, and storytelling. Consistent practice and reflection reinforce confidence and mastery.
Reviewing and Learning from Results
Recording settings, lighting conditions, and outcomes is vital for refining F/stop control. Reviewing images critically allows you to identify patterns, understand aperture effects, and improve future shots. Keeping a journal of F/stop experiments provides a reference for quick decision-making and enhances technical proficiency. Over time, this process consolidates learning and builds a robust foundation for creative expression.
Integrating F-Stops with Lighting Techniques
Understanding F/stops is only one component of photography; mastering how they interact with lighting elevates your work to a professional level. Light is the foundation of photography, and F/stops control how much of it reaches your sensor. By adjusting the aperture, you can shape exposure, mood, and depth of field to complement the lighting in any scene. Natural light, artificial light, or mixed light sources all demand different approaches.
Start by observing the quality, direction, and intensity of light in a scene. Wide apertures like F/1.4 are ideal for low-light situations, capturing as much ambient light as possible. In contrast, narrow apertures like F/16 or F/22 are useful in bright sunlight to prevent overexposure while achieving maximum depth of field. Experiment with side lighting, backlighting, and diffused light to see how aperture affects shadows, highlights, and overall image tone. This practice develops an intuitive sense of combining F/stops and lighting for artistic and technical results.
Cinematic Effects Using F-Stops
F/stops are essential tools in creating cinematic effects. A shallow depth of field can direct attention to a subject while rendering the background out of focus, adding dramatic emphasis. Wide apertures enhance bokeh, creating a visually pleasing separation between subject and environment.
In contrast, a deep depth of field allows all elements in a frame to remain in focus, which is crucial for narrative storytelling in landscapes or establishing shots. Practice shooting sequences with varying apertures to simulate cinematic depth and mood. Experiment with foreground objects and background layers to understand how aperture choice affects narrative and visual hierarchy. Integrating F/stops with cinematic framing and composition ensures compelling and immersive images.
HDR Photography and F-Stops
High Dynamic Range (HDR) photography benefits significantly from precise F/stop control. Shooting multiple exposures at different aperture settings allows photographers to capture the full range of highlights and shadows in a scene. Narrow apertures can prevent blown-out highlights, while wide apertures in low-light areas maintain detail and clarity.
Combine these exposures in post-processing to achieve balanced, realistic, or even artistic results. Understanding how F/stops influence exposure in each bracketed shot ensures consistency and technical accuracy. Regular practice with HDR scenarios strengthens the ability to anticipate aperture effects and create visually rich images under challenging lighting conditions.
Night Photography and F-Stops
Night photography presents unique challenges that require expert F/stop control. Wide apertures allow more light to reach the sensor, which is essential for capturing stars, street scenes, or low-light urban environments. However, wide apertures at night reduce depth of field, making precise focusing critical. Narrower apertures increase depth of field but may necessitate longer exposures or higher ISO, introducing noise or motion blur.
Experiment with different aperture and shutter speed combinations to balance exposure and sharpness. Use tripods and remote triggers to stabilize the camera during longer exposures. Practicing these techniques allows photographers to capture clear, vibrant images at night while controlling creative elements like star trails, reflections, and ambient lighting.
F-Stops in Architectural Photography
Architectural photography requires careful F/stop selection to maintain sharpness across complex structures. Narrow apertures such as F/11 to F/22 are typically used to ensure the entire building or interior is in focus. Combining this with hyperfocal distance techniques maximizes depth of field, keeping both foreground and background elements crisp.
Observe how light interacts with surfaces and textures, adjusting apertures to control exposure and emphasize architectural details. Experiment with different lenses, angles, and distances to understand how F/stops affect perspective, depth, and overall composition. Mastery of aperture in architectural contexts enables photographers to produce images that are technically precise and aesthetically compelling.
Combining Aperture with Composition
Advanced photographers use F/stops strategically to enhance composition. Shallow depth of field allows subjects to stand out against blurred backgrounds, creating a sense of intimacy or focus. Deep depth of field ensures every element in the frame is visible, which is ideal for complex or layered compositions.
Practice combining aperture adjustments with compositional techniques such as leading lines, framing, and symmetry. Observe how different F/stops alter spatial relationships and guide the viewer’s eye through the image. Understanding this interplay strengthens both creative and technical skills, allowing photographers to make deliberate choices that enhance visual storytelling.
Integrating F-Stops with Lenses and Focal Lengths
Different lenses interact uniquely with F/stops. Prime lenses generally offer wider maximum apertures, providing greater flexibility in low light and more pronounced depth of field effects. Zoom lenses may have variable maximum apertures, requiring careful adjustments to maintain exposure and creative intent.
Practice using multiple lenses at various focal lengths and apertures to understand how each combination affects depth of field, background blur, and overall image quality. This hands-on experience helps photographers select the best lens and aperture settings for specific scenarios, maximizing both technical precision and artistic impact.
Advanced Portrait Techniques with F-Stops
Professional portrait photographers rely heavily on F/stops to control background blur, isolate subjects, and emphasize facial features. Wide apertures such as F/1.4 or F/2 create a shallow depth of field, enhancing subject prominence and softening distracting elements. Slightly narrower apertures like F/4 or F/5.6 balance subject sharpness with contextual background visibility.
Experiment with varying subject-to-camera distances, background distances, and focal lengths to see how F/stops interact with these variables. Adjusting apertures while maintaining consistent lighting ensures expressive and technically accurate portraits. Repetition and experimentation develop the photographer’s ability to manipulate focus and depth creatively.
Advanced Landscape Techniques
In landscape photography, F/stops are used to achieve maximum clarity and depth. Narrow apertures like F/11, F/16, or F/22 allow photographers to keep foreground, middle-ground, and background elements sharply focused. Combining these apertures with hyperfocal distance calculations ensures efficient use of depth of field.
Experiment with foreground objects, wide-angle lenses, and varying light conditions to understand how aperture affects scene sharpness, contrast, and exposure. Incorporate filters like neutral density or polarizing filters to extend creative possibilities while managing light intensity. Mastery of F/stops in landscapes allows photographers to capture expansive scenes with technical precision and visual impact.
Motion and Long Exposure Photography
Motion and long exposure photography rely on precise aperture control to achieve desired effects. Wide apertures facilitate fast shutter speeds for freezing motion, while narrow apertures enable slower exposures for creating motion blur in water, clouds, or traffic trails.
Experiment with different aperture and shutter speed combinations to understand their effect on moving subjects. Tripods, remote triggers, and neutral density filters allow greater flexibility in exposure and depth of field management. Practicing these techniques helps photographers capture dynamic scenes with both clarity and artistic expression.
Macro Photography Mastery
Macro photography challenges photographers with an extremely shallow depth of field. Wide apertures allow more light in, but precise focusing is essential to ensure critical areas remain sharp. Narrow apertures increase depth of field, but may require longer exposures or higher ISO, risking noise or motion blur.
Practice combining aperture adjustments with careful positioning, manual focus, and tripod use to achieve detailed, crisp macro images. Understanding the relationship between F/stops, subject distance, and background blur is crucial for producing visually striking close-up photography.
F-Stops and Creative Experimentation
Creative experimentation with F/stops allows photographers to explore artistic possibilities beyond technical accuracy. A shallow depth of field can create dreamy, abstract images, while a deep depth of field reveals intricate environmental details. Experiment with unusual perspectives, extreme lighting conditions, and mixed apertures to discover unique effects.
Recording results and analyzing the impact of each aperture choice fosters creative growth. Over time, this process enhances the photographer’s ability to balance technical precision with artistic expression, producing images that are both technically sound and visually compelling.
F-Stops in Studio Photography
Studio photography offers controlled environments to explore F/stops in depth. Experiment with wide apertures to achieve selective focus and narrow apertures for complete scene clarity. Combining aperture control with studio lighting setups, such as softboxes, strobes, or reflectors, allows precise management of exposure and depth of field.
Practice adjusting light intensity, direction, and distance in tandem with aperture changes. This integrated approach ensures consistent, high-quality images and strengthens the photographer’s ability to manipulate both technical and creative elements in controlled conditions.
Reviewing Results and Continuous Learning
Continuous review of images is essential for refining F/stop mastery. Analyze how different apertures affect exposure, depth of field, bokeh quality, and overall composition. Identify patterns in successful images and areas for improvement. Keeping a detailed record of aperture settings, lighting conditions, lenses, and composition decisions provides a valuable reference for future shoots.
Regular practice and reflection help photographers develop an intuitive understanding of F/stops, enabling rapid, confident decisions in diverse shooting environments. This process consolidates learning and supports continuous growth in technical and creative skills.
Professional Applications of F-Stops
Expert use of F/stops is crucial in professional photography across genres. In commercial photography, precise aperture control ensures consistent exposure, sharpness, and visual impact. In documentary or photojournalistic work, F/stops allow rapid adaptation to changing lighting conditions while maintaining subject focus. In fine art or experimental photography, aperture manipulation creates mood, depth, and narrative emphasis.
Mastering F/stops equips photographers with the ability to execute technical requirements while expressing artistic vision, ensuring professional-level results in every context.
Conclusion
F/stops are a fundamental tool in photography, controlling exposure, depth of field, and creative expression. Mastery involves understanding their interaction with light, motion, lenses, filters, and composition. By practicing advanced techniques in portrait, landscape, macro, motion, studio, and cinematic photography, photographers develop both technical precision and artistic intuition. Continuous experimentation, review, and application across genres enable mastery of aperture as a versatile creative instrument. Understanding and manipulating F/stops empowers photographers to achieve consistent, high-quality images, balancing technical accuracy with artistic storytelling and elevating their work to professional levels.