Your iPhone is not merely a device for texting or scrolling—it’s a finely engineered instrument capable of producing exceptional photographs. Beneath its minimalist exterior lies a suite of advanced imaging features that rival many entry-level DSLR cameras. Yet, to harness its full creative potential, you must look beyond the automatic point-and-shoot habits and dive into the nuanced tools embedded in the iPhone camera system.
Whether you're documenting everyday wonders, crafting visual stories, or capturing decisive moments, these often-overlooked features can elevate your mobile photography to professional-caliber levels. Let's delve into twelve powerful yet subtly hidden iPhone camera tools that can transform how you photograph the world.
12. Capture Fleeting Motion with Live Photos
Photography, at its core, is a pursuit of preserving transient beauty—capturing moments before they vanish into memory. With the Live Photos feature on your iPhone, this preservation transcends the static. Instead of freezing a single second in time, Live Photos delicately encase an entire micro-moment, blending movement, ambient sound, and atmosphere into a visual memory capsule.
The brilliance of this feature lies in its subtlety. When enabled, Live Photos record 1.5 seconds before and after the instant you press the shutter. This means you’re not merely photographing a smile—you’re capturing the exact nuance of it forming, the sparkle in the eyes, the flicker of light passing through wind-tossed hair. It transforms the image from a singular frame into a living snippet, a tiny, looping story that reveals the emotional and environmental context often lost in stills.
To activate Live Photos, simply open the native Camera app and locate the concentric circle icon at the top of your screen. When this icon is highlighted, your iPhone will begin storing those fleeting moments around the main shot. This function operates seamlessly in the background, requiring no additional input once it's toggled on. It's especially powerful when photographing candid scenes, pets in motion, children's spontaneous expressions, or any moment when life refuses to stand still.
After you've captured your Live Photo, its magic truly begins in the post-processing stage. Navigate to the Photos app and find your image. Press and hold the frame gently—on compatible models, a long press activates the dynamic playback. Suddenly, the moment breathes again. You don’t just remember the event; you relive it. The laughter echoes, the wind whispers, the movement unfurls in real-time. This immersive sensation infuses each image with a vitality that traditional stills can rarely convey.
The creative possibilities of Live Photos extend far beyond playback. By swiping up on the image, you unlock an intuitive interface revealing several evocative effects. Loop turns your Live Photo into an endlessly repeating cycle, perfect for dynamic scenes like flowing dresses, dancing lights, or birds in flight. Bounce adds a playful reversal—your image flows forward and then back again—emulating a seamless boomerang. This whimsical feature is ideal for water splashes, hair flips, or any sudden burst of motion that begs for repetition.
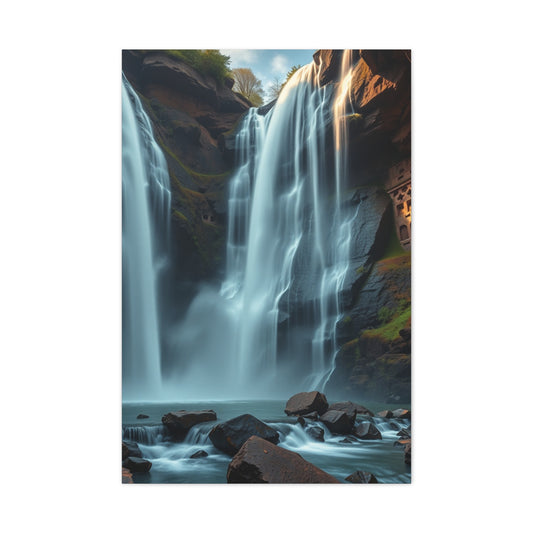
Perhaps the most artistically compelling option is Long Exposure. When selected, this effect merges all frames from the Live Photo into one ethereal blur. The result is a photograph that mimics the look of long-exposure DSLR photography, rendering waterfalls into silky streams, city lights into luminous trails, and bustling streets into ghostly impressions of movement. This tool opens a gateway into expressive, almost impressionistic visual storytelling—once reserved for advanced camera setups and time-intensive edits.
|
Related Catagories: |
Live Photos are particularly effective during golden hour—the magical window of soft, angled sunlight around sunrise or sunset. The shifting hues and subtle breeze become vivid when recorded as Live Photos, allowing you to freeze not just the subject, but the emotional texture of the moment. For instance, a silhouette against a setting sun doesn’t merely remain a static shadow—it sways, glows, and lives.
Another nuanced benefit of Live Photos is the ability to extract alternate keyframes. Perhaps the original still captured mid-blink or just before the subject smiled. Within the editing interface, you can scrub through the timeline and choose a more flattering or expressive frame to serve as the main still. This function alone can rescue countless images from digital oblivion, ensuring the best possible version of each memory is preserved.
From an editorial perspective, Live Photos provide an extraordinary foundation for storytelling. For travel bloggers, lifestyle creators, or content strategists aiming to forge deeper emotional connections, these mini-movies offer enhanced engagement. Instead of merely posting static snapshots, integrating Live Photos—or converted GIFs derived from them—into digital platforms can enchant your audience and elevate your visual narrative to a more immersive level.
It's worth noting that while Live Photos deliver artistic vibrancy, they do come with considerations. Each image occupies more storage space than a standard photo, as it contains multiple frames and audio. Managing your storage efficiently means occasionally reviewing and removing less impactful Live Photos or offloading them to cloud services. Additionally, Live Photos require stable hands or tripods when attempting effects like Long Exposure, where unintentional motion can lead to unflattering results.
The versatility of this feature also extends into creative experiments. Try pairing Live Photos with reflective surfaces like water or glass, where subtle movements create mesmerizing symmetries. Or use it in low-light conditions to capture the flicker of candlelight, the twinkle of holiday decorations, or the soft flickering of city lights. The capacity to include ambient audio also adds layers of memory—a rustling breeze, a child’s laughter, distant waves—all become part of the scene, enriching the emotional tapestry.
In certain models and iOS versions, you can also convert Live Photos to short video files, enabling effortless sharing on social media platforms where animated content tends to perform better. This adds functionality as well as flexibility, allowing the same capture to be deployed across multiple content formats. Whether used for personal archives or professional portfolios, this adaptability expands the creative potential of each frame you take.
For those delving deeper into visual arts or experimental photography, Live Photos serve as a bridge between static and cinematic forms. They function almost like visual haikus—small, self-contained moments that suggest motion, sound, and story within a fraction of time. With some third-party apps, you can even blend Live Photos with overlays, music, or sequences, creating multimedia compositions rooted in spontaneity.
Ultimately, the true genius of Live Photos is their ability to transform passive photography into an active memory experience. They offer a more poetic, dimensional way to revisit your past, where photographs are not just seen but felt—where stillness meets motion in perfect harmony. Unlike traditional video, they remain compact and unobtrusive. Unlike static images, they breathe with the rhythm of life. This duality places Live Photos at the intersection of innovation and intimacy.
If you're aiming to elevate your mobile photography with minimal effort but maximum emotional resonance, then Live Photos should become a core part of your toolkit. They allow you to become both photographer and storyteller, freezing time while honoring its passage. From birthdays to thunderstorms, from serene landscapes to bustling streets, every Live Photo becomes a vivid thread in your visual tapestry.
The next time you find yourself reaching for your iPhone to capture a moment, pause briefly. Ask yourself not just what you're photographing, but why. And if the answer involves memory, motion, or meaning—enable Live Photos. Let your images speak, move, and echo. Let them live.
11. Fine-Tune Sharpness with Manual Focus
In the realm of mobile photography, clarity is often what separates a fleeting snapshot from a captivating image. The iPhone camera, renowned for its intelligent autofocus, typically does a commendable job of adjusting to your scene’s depth and lighting conditions. Yet, as with all forms of automation, there are moments when it falters—especially in nuanced settings like macro photography, low-light environments, or complex compositions. This is where taking control through manual focus becomes not just helpful, but essential.
By tapping directly on your subject within the viewfinder, you signal to your iPhone where visual clarity should be prioritized. A yellow focus box will materialize on the screen, indicating that the device has recognized your command and adjusted accordingly. While this may seem like a minor interaction, the difference it makes in the final photograph can be substantial. This seemingly small gesture hands back creative authority to the photographer, allowing you to dictate the story you wish to tell.
For even greater precision, press and hold on the area you’ve tapped. This activates the AE/AF Lock—a combined locking of both Auto Exposure and Auto Focus. With this feature enabled, your camera won’t shift focus or alter exposure values, even if you reposition your shot or if your subject moves slightly within the frame. It’s a subtle but powerful way to maintain control in unpredictable or dynamic environments.
Imagine you’re photographing a small insect on a flower, or the shimmering eyes of a friend during golden hour. In such scenarios, the autofocus might struggle, shifting erratically between background and foreground elements. Locking your focus ensures that the critical detail—the part that truly carries the emotional or aesthetic weight of the image—remains razor-sharp, despite the visual noise surrounding it.
Manual focus becomes especially indispensable in macro photography. When shooting close-up subjects, such as dew-laden petals, textured surfaces, or tiny crafted details, the depth of field becomes incredibly shallow. Autofocus often fails to distinguish between elements that are mere millimeters apart. In these moments, tapping precisely where you want the focal plane to fall is the only way to avoid soft, unintentional blur.
Portraiture also benefits immensely from manual focus. While the iPhone does a remarkable job of detecting faces and simulating background blur in Portrait Mode, there are instances when the camera focuses slightly behind or in front of the eyes—the most expressive part of any human subject. Correcting this with a deliberate tap ensures emotional resonance. After all, an image where the eyes are even slightly out of focus can lose its impact, no matter how compelling the composition or lighting may be.
Using manual focus also empowers you to work around challenging lighting scenarios. When shooting in harsh backlight, near bright reflections, or under flickering artificial light, autofocus may become inconsistent or inaccurate. By locking both focus and exposure manually, you prevent your iPhone from recalibrating mid-shot—especially important when composing images that require careful balancing of highlights and shadows.
Recomposing your frame after locking focus is another advanced yet intuitive technique that manual control enables. Let’s say you want your subject to occupy the side of the frame rather than dead center, in accordance with the rule of thirds. First, tap to focus on your subject. Then, hold your finger until the AE/AF Lock activates. Now you’re free to move your phone slightly, shifting the subject off-center, without risking a change in focal sharpness or light balance. This capability allows you to create more intentional, artful compositions without sacrificing precision.
For mobile videographers, this technique is equally transformative. Locking focus and exposure provides the visual stability necessary to maintain professional-looking footage. It eliminates the jarring pulsing effect caused by autofocus hunting, where the camera continuously shifts focus trying to interpret what matters most. In cinematic storytelling, consistency is critical, and this feature gives you that control with the ease of a long press.
Another underappreciated advantage of manual focus is its role in night photography. Low light can confound even the best autofocus systems, leading to grainy, misfocused images. With manual adjustment, you can lock focus on a subject illuminated by street lamps or neon signage, ensuring your image has defined edges and a sense of deliberate clarity rather than murky abstraction. Combining AE/AF Lock with a steady hand or tripod and utilizing Night Mode can result in astonishing low-light imagery previously thought impossible on a phone.
The creative potential unlocked by manual focusing is immense. You might experiment with shallow focus to isolate a subject against a chaotic background, letting shapes melt away into a gentle bokeh. Or you could selectively focus on reflections in water, glass, or even a mirror, crafting layered, almost surreal compositions. By choosing exactly where your viewer’s eye will go first, you become the author of visual hierarchy within your frame.
When paired with exposure control—which appears automatically after tapping to focus—you gain even more artistic control. Adjusting exposure by sliding your finger up or down allows you to brighten or darken the image in relation to the focus point. This is particularly helpful in high-contrast environments, such as sunlit interiors or shadowy streetscapes, where minor adjustments can rescue both color and texture.
If you’re experimenting with creative lighting setups—perhaps using LEDs, ambient light from a screen, or reflective surfaces—manual focus ensures that your chosen illumination enhances rather than confuses your composition. Focus becomes the stabilizing force around which you build your scene.
From a content creation standpoint, manual focus also ensures consistency across multiple shots, which is essential when curating visuals for a portfolio, social media grid, or digital campaign. A cohesive look and feel often hinges on consistently sharp subjects and controlled lighting. Mastering manual control provides a foundation for developing a signature visual style—something that sets your work apart in an oversaturated visual ecosystem.
Furthermore, the tactile experience of focusing manually, even on a touchscreen, cultivates a more mindful approach to image-making. It encourages photographers to pause, observe, and deliberately engage with their subject, rather than relying on rapid-fire automation. This mindfulness often results in more meaningful, aesthetically resonant photographs that reflect both technical care and emotional intention.
The AE/AF Lock itself, while simple to activate, is a gateway to advanced techniques that professional photographers have used for decades. It embodies a shift from passive capturing to active creation—where every detail, from focal plane to exposure, is sculpted by you, the visual storyteller.
To sum it up, the iPhone's manual focus feature is far more than a workaround—it’s a refined instrument of precision and expression. It allows you to assert visual dominance in complex or demanding shooting scenarios, to guide your viewer’s eye with intention, and to compose photographs that resonate beyond the ordinary. Whether capturing intimate portraits, detailed textures, or fast-moving scenes, this tool becomes your ally in transforming fleeting moments into enduring art.
10. Adjust Brightness with the Exposure Dial
Photography, in its essence, is the orchestration of light—an intricate dance of illumination, shadow, and tone. Your iPhone, though sleek in appearance, houses an advanced set of photographic tools that offer nuanced control over this fundamental element. Among the most underutilized yet powerful of these tools is the exposure dial, a simple mechanism that allows you to manually modulate brightness in real-time, empowering you to capture scenes as you perceive them rather than as your device automatically interprets them.
Automatic exposure settings on mobile cameras often work well in general situations, using artificial intelligence and ambient light meters to estimate an average exposure that satisfies most scenes. However, photography rarely thrives in averages. The iPhone’s exposure compensation feature—elegantly integrated into the Camera app—puts expressive power back into the hands of the user. This tool is essential for those who seek creative freedom in their compositions and wish to avoid the flat, washed-out results that automation sometimes produces.
Activating this functionality is intuitive. Begin by tapping your desired focus point on the viewfinder. A small sun icon will appear next to the yellow focus box. This is the manual exposure slider. Drag your finger vertically—up to increase brightness, down to decrease it. What may seem like a subtle alteration in luminance actually holds the key to creating dramatic silhouettes, recovering overexposed highlights, and introducing emotional tonality into your imagery.
For instance, when photographing during the golden hour—those few magical minutes just after sunrise or before sunset—light tends to be warm, directional, and dynamic. Automatic exposure might attempt to normalize the frame, unintentionally diluting the shadows and bleaching the highlights. By manually reducing the exposure with a gentle downward swipe, you preserve the contrast and texture, allowing sunlight to cascade through leaves or bounce off skin in a way that evokes warmth and nostalgia.
|
Related Catagories: |
Conversely, in bright, snow-covered landscapes or beaches at midday, automatic settings often fail to account for the intense reflectivity of the environment, resulting in overexposed, detail-starved images. Here, reducing the exposure manually reintroduces texture into the sand or snow, bringing out granularity and shadow play that would otherwise be lost in an expanse of white. The result is not only more visually pleasing but also more truthful to the scene as experienced in person.
In low-light scenarios, increasing exposure can help you capture atmospheric details without resorting to flash, which often introduces harsh lighting and undesirable reflections. Shooting indoors with warm incandescent lighting or at twilight, you might slightly elevate exposure to gently brighten shadowed corners or draw attention to ambient features—perhaps the subtle glow of a lamp, the reflection on a wet street, or the soft flicker of candles during a dinner setting.
The exposure dial is not just a technical tool; it is a narrative device. The way light is interpreted in a photograph directly impacts its emotional undertones. A dimly lit alley bathed in cool shadows can suggest mystery or solitude. A brightened café scene with soft highlights can evoke warmth and comfort. Adjusting exposure manually helps you convey these moods more precisely, granting you a kind of authorship over your visual stories.
Portrait photography is another genre where the exposure dial shines. By lowering exposure slightly, skin tones become richer and more dimensional, avoiding the overly flat look that can result from bright indoor lighting. Alternatively, slightly increasing exposure can soften shadows around the face and create a more airy, flattering portrait. The key lies in fine-tuning, rather than relying on the camera’s algorithms, which often aim for an average brightness that may not suit your creative intent.
When combined with manual focus and AE/AF Lock, exposure control becomes an even more formidable asset. Imagine shooting a subject against a city skyline at dusk. Tap to focus on the subject, hold to lock focus and exposure, and then adjust the exposure dial until the ambient light around the buildings takes on a cinematic glow. This triple-layered control is what distinguishes casual snapshots from intentional photography.
For those exploring mobile videography, the exposure dial ensures consistency across scenes. Nothing disrupts the flow of a video more than unanticipated brightness shifts caused by automatic exposure recalibration. Before you begin recording, use the exposure slider to set your preferred light level, then engage AE/AF Lock. This ensures your scene remains visually stable and professional, regardless of movement or environmental changes.
Exposure control also enhances the effectiveness of the iPhone’s other photographic features. For example, when using Live Photos or Burst Mode, setting a deliberate exposure ensures each frame in the sequence adheres to your desired mood and luminance. With filters, adjusting exposure beforehand can prevent colors from becoming oversaturated or muted. Even Night Mode benefits from an initial manual exposure tweak, especially when composing more experimental or low-key night scenes.
Creative photographers can push the envelope further by using exposure compensation as part of an artistic process. Purposefully underexposing scenes can create silhouettes, vignettes, or chiaroscuro effects reminiscent of classic film photography. Overexposing slightly can bleach out backgrounds, emphasizing shape over detail—a technique often used in minimalist compositions. These aren’t mere corrections; they are stylistic choices that transform the ordinary into the evocative.
Another compelling use of exposure control is with reflective and high-glare surfaces, such as water, glass, or polished metal. In such cases, slight downward exposure adjustments help manage glare and enhance reflection detail without losing the brilliance of the light source. This is especially valuable in architectural photography or abstract compositions where surface quality plays a crucial role.
Photographers working with fast-moving light—like sunsets, concerts, or fireworks—will also appreciate how quick and responsive the exposure dial is. Adjusting in real-time allows you to compensate instantly for the shifting intensity of ambient illumination, capturing the perfect balance just before the scene changes again. This is particularly useful when you don’t have the time or tools to bracket exposures manually or use third-party apps.
Even in editorial or social content creation, exposure adjustment ensures your photos maintain a consistent visual tone, particularly important for curated Instagram feeds, portfolio websites, or storytelling slideshows. A single swipe of the exposure dial can bring harmony to an image that would otherwise clash with the rest of your content in tone or brightness.
Though seemingly basic, the exposure slider is a gateway into deliberate and expressive photography. It invites a slower, more intentional shooting process—one where each swipe of your finger helps articulate mood, direct attention, and define atmosphere. It fosters a heightened awareness of light, helping you learn how to read and sculpt it with finesse.
9. Perfect Your Composition Using Grid Overlays
Mastering photography is not simply about capturing what lies in front of you—it is about how you frame it, how you guide the viewer’s eye, and how you evoke emotion through visual architecture. While spontaneity can produce magical results, the underlying success of consistently powerful photography often lies in its compositional foundation. The iPhone camera, with its suite of intelligent tools, offers a hidden gem for enhancing composition: the grid overlay.
Activating the grid function in your iPhone’s camera settings is an effortless yet profound step in refining your visual narrative. This tool enables a compositional principle known as the Rule of Thirds—a method rooted in classical art and visual psychology that divides the screen into nine equal parts using two horizontal and two vertical lines. These subtle boundaries act as guides, encouraging you to place key elements at their intersections or along the lines to create dynamic, balanced images.
To activate the grid, open your device's Settings app, scroll down to the Camera section, and toggle on the Grid option. Once enabled, every time you launch the Camera app, you’ll see this invisible scaffolding—no post-processing or app-switching needed. While it may appear simplistic at first glance, its influence over your framing choices can be transformative.
Why does this work so well? The human eye naturally gravitates toward points of intersection, rather than the dead center. By positioning your main subject slightly off-center—at one of the four intersection points created by the grid—you invite the viewer to explore the entire image, rather than fixating immediately on a centrally placed subject. This approach lends photographs a sense of movement, tension, and balance, even in the most static scenes.
This technique becomes particularly useful in landscape photography. Aligning the horizon along either the top or bottom horizontal line (rather than slicing the image directly in half) adds perspective and guides the viewer’s gaze deeper into the frame. For instance, placing the horizon along the lower third of the grid emphasizes dramatic skies and cloud formations, while placing it along the upper third foregrounds terrain textures, water surfaces, or leading lines that draw the viewer into the scene.
In portrait photography, the grid helps with positioning eyes and faces for a more engaging composition. Rather than centering the face, align the subject's eyes with the top third line and place them slightly to one side. This asymmetry introduces an element of curiosity, often making the photograph feel more natural and emotionally engaging. When your subject is looking across the frame, leaving empty space (also known as "look room" or "negative space") in front of them creates visual anticipation and story depth.
Architectural and urban photography equally benefit from the grid overlay. By aligning buildings, vertical structures, or street lines with the vertical gridlines, you eliminate unintended distortion and crookedness. It allows for precise framing—helping maintain symmetry or intentionally breaking it with calculated asymmetry. Leading lines from architecture—hallways, bridges, fence lines—can also be carefully aligned to guide the viewer's attention directly toward your focal point.
The grid overlay is indispensable when shooting reflections, shadows, or symmetrical subjects. In these compositions, the alignment of visual elements becomes critical. You might, for instance, place a subject at the vertical intersection and allow a reflected version of it to fall into a lower third section. This careful spatial arrangement subtly enhances aesthetic appeal without the viewer even being consciously aware of why the photo “feels right.”
Another compelling use of the grid is when composing storytelling or action-oriented scenes. Say you’re photographing a cyclist riding through a park. Positioning the subject at the left or right third gives them “room” to move through the frame, allowing you to portray energy and progression. Placing subjects at the edge of a grid rather than dead-center adds dimension and often draws viewers into an unfolding story.
This technique also dramatically improves your social media content. Platforms like Instagram and Pinterest reward visually pleasing compositions with more engagement. Using the grid overlay to align visual anchors—such as horizon lines, product placements, or facial features—ensures that your feed looks cohesive and professional, even when viewed as a grid itself.
What makes the grid overlay especially potent for iPhone users is its seamless integration into an already intuitive interface. You don’t need additional apps or third-party add-ons. You simply enable it once in settings, and it becomes a silent assistant in every shot you take. Its guidance remains subtle and non-intrusive, allowing creative freedom while instilling discipline into your compositions.
Advanced photographers often use the Rule of Thirds as a foundational guideline before deliberately breaking it to develop a personal style. For instance, centering a subject can be powerful when used sparingly—especially in minimalistic or symmetrical compositions. But by understanding the visual balance offered by the grid, you learn when breaking the rule makes artistic sense, rather than relying on instinct alone.
When paired with other manual tools—like focus locking and exposure control—the grid overlay becomes part of a broader photographic strategy. You can select your focal point on one intersection, lock exposure for controlled lighting, and then use the grid to finalize your framing. This holistic approach to mobile photography transforms your device from a casual camera into a professional creative instrument.
If you're experimenting with flat lays, product photography, or culinary shots, the grid is equally invaluable. It assists in aligning edges, creating symmetry between objects, and ensuring spacing consistency. This level of attention to detail adds polish to commercial and content-focused photography, making your visuals appear more deliberate and brand-aware.
Even in more abstract or artistic compositions, the grid helps introduce underlying structure. Whether you’re working with negative space, layered depth, or geometric forms, the visual scaffolding provided by the grid ensures that your experiments don’t descend into chaos but maintain a sense of coherence. It gives you the freedom to innovate within a disciplined spatial framework.
Training your eye with the grid also leads to long-term improvements in your photographic intuition. Over time, you begin to visualize the Rule of Thirds even when the grid isn’t visible. This subconscious understanding of composition results in faster, more fluid shooting—even in spontaneous moments where you must react quickly.
8. Maximize Creativity with Built-In Filters
Native iPhone filters offer a quick yet nuanced way to stylize your shots. Unlike garish overlays, these filters subtly shift color temperature, contrast, and saturation to evoke a specific mood. Choose from naturalistic tones like Vivid for enhanced contrast or Dramatic for moodier depth, and classic monochrome filters for timeless elegance.
To apply a filter before shooting, tap the overlapping circles icon. On newer iPhones, swipe up on the screen to access filters. If you'd prefer post-editing, select the image in Photos, tap Edit, then swipe through filters. Because these are non-destructive edits, you can always revert to the original. Using filters allows you to craft a consistent aesthetic across your portfolio without needing third-party apps.
7. Capture Fast Action Using Burst Mode
Life doesn’t always wait for the shutter. When photographing erratic motion—be it children playing, athletes in motion, or wildlife—Burst Mode becomes indispensable. On older iPhones, simply hold down the shutter button. On newer models, drag the shutter left to activate continuous shooting.
Your camera will rapidly capture multiple frames, maximizing the chance of freezing the perfect moment. Later, open the burst in Photos and tap Select to browse through each frame. You can save the sharpest or most expressive version and discard the rest, ensuring precision and spontaneity coexist.
6. Frame Yourself or the Group with the Self-Timer
Self-portraits and group shots often lack finesse due to rushed composition or shaky hands. The built-in timer solves both issues. Activate it by tapping the upward arrow at the top of your camera screen, then selecting a 3- or 10-second delay.
The shorter timer is ideal for minimizing shake during long exposures, while the 10-second option allows ample time to position yourself or coordinate a group pose. For best results, pair with a tripod or a stable surface. This feature opens up creative avenues for hands-free storytelling—be it scenic selfies or cinematic group photos.
5. Optimize Format with Aspect Ratio Selection
Framing is more than aesthetics—it determines how your image will be perceived and where it fits. The iPhone offers different aspect ratios for various visual intents: 4:3 for standard photography, 1:1 for social media, and 16:9 for cinematic landscapes.
Rather than cropping post-capture, which can degrade resolution, compose intentionally by selecting your ratio before or after shooting. Open an image in Photos, tap Edit, then use the crop icon to access aspect ratios. This ensures your visual storytelling aligns with your platform and purpose without sacrificing detail.
4. Choose the Right Capture Mode and Lens
Modern iPhones include a range of capture modes and lenses to suit every scene. Swipe to switch between Photo, Portrait, Square, and Pano modes. Use Square for social media, Pano for expansive scenes, and Portrait for refined depth-of-field effects.
Lens selection further tailors your shot. Tap the zoom indicators (0.5x for ultra-wide, 1x for standard, and 2x or higher for telephoto) to shift perspective. The ultra-wide lens excels at interiors or architecture, the wide lens handles most everyday scenarios, and the telephoto lens lets you shoot discreetly or compress distance—ideal for portraits and distant subjects.
3. Use HDR for Balanced Lighting in Tough Conditions
High Dynamic Range (HDR) merges multiple exposures to render scenes with intense contrast more naturally. It’s perfect for capturing detail in both shadows and highlights—think backlit portraits, sunsets, or interiors with bright windows.
On newer iPhones, Smart HDR and Deep Fusion are automatically enabled, using computational photography to optimize every pixel. But you can manually toggle HDR in the camera interface on older models. This function minimizes blown highlights and murky shadows, yielding balanced, high-fidelity imagery.
2. Emphasize Your Subject with Portrait Mode
Portrait Mode leverages computational algorithms and dual or triple lenses to simulate shallow depth-of-field. This blurs the background while keeping your subject pin-sharp, emulating DSLR-quality bokeh. It's perfect for portraits, macro-style images, and even still life photography.
Access Portrait Mode by swiping in the camera app. Follow the on-screen prompts to position your subject at the correct distance. The result is a dramatically isolated subject that commands attention and evokes an editorial sensibility. It’s available on the iPhone 7 Plus and later.
1. Add Mood and Drama with Portrait Lighting Effects
Portrait Lighting takes subject isolation further by mimicking professional studio lighting setups. Once in Portrait Mode, scroll through options like Natural Light, Studio Light, Contour Light, Stage Light, and Stage Light Mono.
These effects accentuate facial features, deepen contrast, and eliminate distractions. Studio Light brightens the face evenly, Contour Light adds dramatic shadowing, and Stage Light removes the background entirely, creating a theatrical or minimalist vibe. Use these settings to shift the emotional tone of your image with intention and flair.
Final Thoughts: Unleashing Your iPhone's Full Photographic Potential
Photography is not bound by gear but guided by vision—and your iPhone is more than capable of bringing that vision to life. By mastering these nuanced camera tools, you're not just taking better photos; you're crafting visual narratives with purpose and poise. Whether you’re adjusting exposure manually, refining focus, using creative lenses, or applying cinematic filters, each tool offers a doorway into more compelling storytelling.


