Time-lapse videos have transformed the way people capture and present movement over long periods. From dramatic sunsets and bustling city streets to blooming flowers and construction projects, time-lapse photography condenses hours, days, or even months into a visually engaging sequence that lasts only seconds or minutes. This style of filmmaking offers creators a unique opportunity to showcase change, motion, and progression in a way that standard video recording cannot achieve.
The popularity of time-lapse content has increased significantly due to social media platforms, digital marketing, filmmaking trends, and the growing accessibility of high-quality cameras and smartphones. What once required expensive equipment and technical expertise can now be achieved with affordable tools and creative planning. Beginners and professionals alike are exploring time-lapse techniques to create cinematic visuals that attract viewers and enhance storytelling.
Creating a compelling time-lapse video involves more than simply placing a camera on a tripod and recording. Lighting conditions, interval settings, camera stability, composition, editing methods, and subject selection all play a crucial role in producing professional results. Understanding these elements allows creators to elevate their work and unlock endless creative opportunities.
This guide explores every major aspect of time-lapse video creation. Whether you are using a DSLR camera, mirrorless system, action camera, or smartphone, learning the proper techniques can help you produce smooth, detailed, and visually stunning footage. By mastering the process, you can turn ordinary scenes into extraordinary visual experiences that captivate audiences and strengthen your creative skills.
Understanding the Basics of Time-Lapse Photography
Time-lapse photography is a technique where images are captured at specific intervals over a period of time and later combined into a video sequence. When played back at normal speed, the result creates the illusion that time is moving much faster than reality. Slow natural processes suddenly appear dynamic and energetic, making even ordinary events visually fascinating.
Traditional video recording captures many frames every second continuously. Time-lapse photography works differently because it takes photographs at spaced intervals rather than constant recording. For example, a camera may take one image every five seconds for several hours. When those images are compiled into a video at 24 or 30 frames per second, the lengthy event becomes compressed into a short cinematic clip.
The technique works exceptionally well for subjects that change slowly over time. Clouds drifting across the sky, stars moving during the night, crowds gathering at public places, changing weather conditions, or traffic patterns become visually dramatic through time-lapse recording. This ability to reveal hidden motion makes the format highly attractive for filmmakers, travelers, artists, and content creators.
Understanding frame rates is essential for producing smooth results. Most time-lapse videos are exported at 24, 25, or 30 frames per second. If you capture 300 images and export them at 30 frames per second, the final video will last approximately ten seconds. The relationship between capture intervals and playback speed determines the final visual effect.
Another important concept is interval timing. The interval refers to the amount of time between each captured frame. Short intervals are suitable for fast-moving subjects such as traffic or people, while longer intervals work better for slower changes like plant growth or sunsets. Selecting the correct interval greatly impacts the smoothness and pacing of the final sequence.
Time-lapse creation also involves planning for environmental changes. Lighting shifts, weather conditions, and camera battery life can influence the quality of the footage. Careful preparation helps avoid interruptions and ensures consistency throughout the shooting process.
Choosing the Right Equipment for Time-Lapse Videos
Selecting the right equipment is one of the most important steps in creating successful time-lapse videos. Although advanced gear can improve image quality and flexibility, beginners can still achieve excellent results using simple setups. Understanding the purpose of each piece of equipment allows creators to make informed decisions based on their goals and budget.
A reliable camera forms the foundation of any time-lapse setup. DSLR and mirrorless cameras are popular choices because they provide manual controls, interchangeable lenses, and high image quality. These cameras also perform well in low-light conditions and allow users to capture RAW images for greater editing flexibility. Action cameras are another useful option, especially for outdoor adventures and moving shots. Modern smartphones also include built-in time-lapse features that make the process accessible for casual creators.
Lenses significantly affect the appearance of time-lapse footage. Wide-angle lenses are commonly used because they capture large scenes and emphasize movement within the frame. They work especially well for landscapes, cityscapes, and sky scenes. Telephoto lenses can also create dramatic effects by compressing distance and highlighting specific subjects.
A sturdy tripod is essential for maintaining stability during long shooting sessions. Even slight camera movement can ruin a sequence and create distracting flickering or jumps in the final video. Investing in a solid tripod helps maintain sharpness and consistency throughout the shoot.
Intervalometers are another valuable tool for time-lapse photography. Many modern cameras include built-in interval shooting modes, but external intervalometers provide additional control and flexibility. These devices automate the process of capturing images at selected intervals, allowing creators to focus on composition and environmental conditions.
Battery life becomes a critical factor during long sessions. Time-lapse recording may last several hours or even days, making spare batteries or external power supplies extremely useful. Portable power banks and AC adapters can prevent interruptions during extended projects.
Memory cards also deserve attention because high-resolution images consume significant storage space. Fast and reliable memory cards reduce the risk of recording delays and data corruption. Carrying extra storage ensures that long sequences can be completed without running out of space.
Filters can improve footage quality under challenging lighting conditions. Neutral density filters are particularly useful during daytime shoots because they reduce excessive brightness and allow for longer exposure times. This creates smoother motion blur in moving subjects such as water, traffic, or clouds.
The choice of equipment ultimately depends on the creator’s goals, budget, and preferred shooting style. Even a simple gear can produce impressive results when used with proper planning and creativity.
Planning Your Time-Lapse Project
Successful time-lapse videos rarely happen by accident. Careful planning is necessary to achieve smooth footage, compelling visuals, and consistent image quality. Before recording begins, creators should consider the subject, location, timing, lighting conditions, and intended outcome of the project.
The first step involves selecting a strong subject. Dynamic scenes with visible movement tend to produce the most engaging results. Moving clouds, changing city lights, ocean waves, traffic patterns, sunrise sequences, and crowded public spaces all provide visually interesting transformations over time. The chosen subject should demonstrate noticeable change during the recording period.
Location scouting is equally important. Visiting the location beforehand helps identify the best camera angles, lighting conditions, and potential obstacles. Understanding how sunlight moves across the scene can prevent exposure problems later. It also allows creators to determine safe and stable positions for their equipment.
Timing plays a major role in time-lapse photography. Different subjects require different shooting durations and intervals. A sunset may require only a few hours of recording, while plant growth or construction projects can take days or weeks. Matching the interval setting to the speed of the subject ensures smooth playback and natural motion.
Weather conditions can greatly influence the visual quality of a sequence. Dramatic clouds, fog, storms, or changing light patterns often enhance the cinematic appearance of time-lapse footage. However, rain, wind, and extreme temperatures may also damage equipment or disrupt shooting. Monitoring forecasts allows creators to prepare for environmental challenges.
Composition is another critical element during planning. A balanced frame with strong foreground and background elements creates depth and visual interest. Including moving subjects within the composition helps emphasize the passage of time. Leading lines, reflections, and symmetry can strengthen the overall cinematic effect.
Creators should also estimate the number of images required for the final video. This calculation helps determine storage needs and recording duration. For example, producing a twenty-second video at 30 frames per second requires 600 images. Understanding these numbers helps avoid incomplete sequences.
Safety and accessibility must also be considered. Public spaces may involve crowds, security restrictions, or changing environmental conditions. Ensuring that equipment remains secure throughout the recording session is essential for preventing accidents or theft.
Planning ultimately reduces technical problems and improves creative control. A well-prepared shoot increases the likelihood of capturing visually stunning footage that aligns with the creator’s vision.
Camera Settings for Professional Results
Mastering camera settings is essential for producing smooth and professional-looking time-lapse videos. Automatic settings may seem convenient, but they often create inconsistent exposure and color shifts that become distracting during playback. Using manual controls provides stability and ensures a polished final result.
Manual mode is the preferred shooting mode for most time-lapse projects. Locking exposure settings prevents sudden brightness changes between frames. This consistency creates smoother transitions and reduces flickering during playback.
Aperture selection affects depth of field and image sharpness. Wide apertures create a shallow depth of field and isolate subjects, while narrower apertures keep more of the scene in focus. Many time-lapse creators choose mid-range apertures to maintain sharpness throughout the frame.
Shutter speed influences motion blur. Faster shutter speeds freeze movement, creating sharp individual frames, while slower speeds produce smoother motion blur. For subjects such as moving traffic or flowing water, slightly longer exposures create a cinematic appearance. Neutral density filters often help achieve slower shutter speeds during bright daylight conditions.
ISO settings should remain as low as possible to minimize image noise. Low ISO values maintain better image quality and preserve detail, especially during nighttime or low-light shoots. Raising ISO excessively can introduce grain and reduce sharpness.
White balance should also be set manually instead of automatic mode. Automatic white balance can shift colors between frames, creating noticeable flickering during playback. Locking the white balance maintains consistent tones throughout the sequence.
Image format selection impacts editing flexibility. RAW files contain more image data than JPEG files, allowing greater control over exposure, color correction, and detail recovery during post-production. Although RAW files require more storage space, they provide higher-quality results for professional projects.
Focus settings should remain fixed once the composition is established. Autofocus may continuously adjust during recording, causing unwanted shifts in sharpness. Manual focus ensures stable and consistent results.
Interval settings must match the movement speed of the subject. Fast-moving subjects require shorter intervals, while slow-changing scenes need longer gaps between shots. Experimenting with intervals helps creators achieve the desired pacing and visual effect.
Using consistent camera settings throughout the recording process significantly improves the quality of the final video. Stable exposure, accurate focus, and proper motion blur contribute to a cinematic and professional appearance.
Best Subjects for Time-Lapse Photography
Choosing the right subject is one of the most exciting aspects of time-lapse photography. Some scenes naturally transform into captivating visual experiences when accelerated, revealing patterns and movement that are difficult to notice in real time.
Sunrises and sunsets are among the most popular time-lapse subjects because they showcase dramatic lighting transitions and colorful skies. The changing position of the sun creates dynamic shadows and vibrant tones that add emotional depth to the footage.
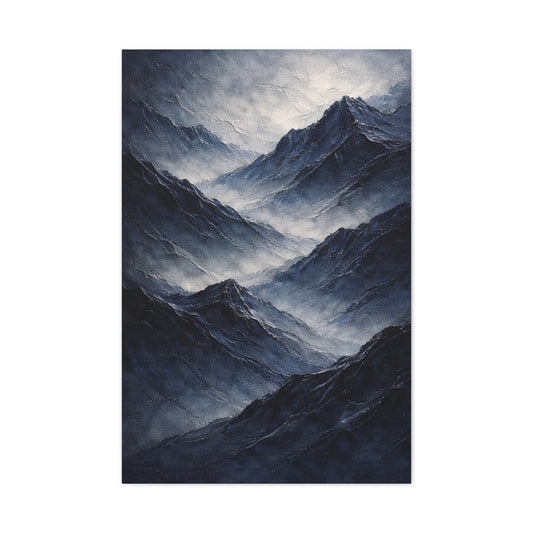
Cloud movement also produces stunning results. Fast-moving clouds rolling across mountains or city skylines create a sense of energy and scale. Storm formations, fog, and changing weather conditions can make even simple landscapes appear cinematic.
Cityscapes offer endless creative opportunities for urban time-lapse projects. Traffic lights, crowded streets, trains, and illuminated buildings create visually striking sequences filled with motion and rhythm. Nighttime city scenes become especially engaging due to the contrast between moving lights and static structures.
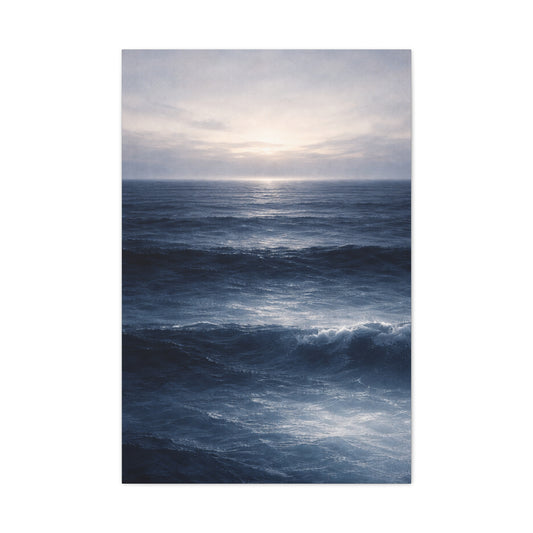
Nature subjects remain highly popular among time-lapse creators. Ocean waves, waterfalls, rivers, forests, and seasonal transitions reveal beautiful natural movement when accelerated. Flower blooming sequences are particularly fascinating because they expose gradual transformations invisible to the naked eye.
Astronomy time-lapse photography captures the movement of stars, the Milky Way, and celestial events across the night sky. These sequences require long exposures and careful planning but produce breathtaking results that showcase the vastness of space.
Construction projects also work exceptionally well for long-term time-lapse videos. Buildings rising over weeks or months visually demonstrate progress and transformation. Businesses frequently use these videos for marketing and project documentation.
Human activity can create compelling time-lapse sequences as well. Crowds moving through busy markets, airports, or festivals generate interesting patterns and energy. Public transportation hubs are particularly effective because they combine movement, structure, and changing light conditions.
Seasonal changes provide another creative opportunity. Recording the same location over several months can reveal dramatic environmental transformations. Trees changing colors, snow melting, or gardens blooming create emotionally powerful visual narratives.
The best time-lapse subjects are those that demonstrate noticeable change over time. By observing the world, creators can discover unique scenes that transform ordinary moments into extraordinary visual stories.
Creating Motion in Time-Lapse Videos
Adding motion to time-lapse videos can dramatically increase their cinematic quality and visual impact. Static shots are effective, but introducing controlled camera movement creates depth, immersion, and a more dynamic viewing experience.
Motion control systems are often used in professional time-lapse filmmaking. These systems move the camera slowly and precisely during recording, creating smooth cinematic motion when played back. Sliders, motorized heads, and rotating platforms are common tools for achieving this effect.
Camera sliders move the camera horizontally during shooting. This subtle movement adds depth and reveals different elements within the scene. Sliding motion works particularly well for landscapes, cityscapes, and indoor environments because it enhances perspective and visual flow.
Pan and tilt motion create another layer of cinematic storytelling. Slowly rotating the camera while capturing images allows creators to reveal expansive scenes and guide viewers' attention. Pan movements are commonly used for city skylines and star trails, while tilt movements work well for tall buildings or mountain landscapes.
Hyperlapse photography takes motion a step further by physically moving the camera between each shot. This technique creates the illusion of traveling through space at accelerated speed. Hyperlapse videos require careful stabilization and precise positioning, but they can produce highly engaging results.
Drone time-lapse photography has become increasingly popular due to advancements in aerial technology. Drones allow creators to capture sweeping landscapes, city views, and environmental changes from unique perspectives. Aerial time-lapse footage adds scale and dramatic movement that traditional ground-based setups cannot achieve.
Smooth motion requires precise planning and stable equipment. Sudden shifts or inconsistent movement can make footage appear shaky and distracting. Motorized systems help maintain consistency throughout the recording process.
Foreground elements enhance the sense of motion and depth. Including moving objects close to the camera creates a stronger three-dimensional effect. Trees, fences, or architectural details can add visual layers that improve the cinematic feel of the sequence.
Motion should complement the subject rather than overpower it. Subtle and controlled movement often produces more professional results than excessive or erratic camera motion. Balancing movement with composition helps maintain viewer focus and storytelling clarity.
Incorporating motion into time-lapse videos allows creators to produce visually rich sequences that feel immersive and cinematic. Even simple camera movement can significantly elevate the quality of a project.
Editing and Post-Production Techniques
Editing is where time-lapse footage transforms from a collection of still images into a polished cinematic sequence. Proper post-production techniques enhance visual quality, smooth motion, and overall storytelling impact.
The editing process usually begins by importing the image sequence into video editing software. Popular programs such as Adobe Premiere Pro, Final Cut Pro, DaVinci Resolve, and Lightroom provide tools specifically designed for time-lapse workflows. These applications allow creators to organize, edit, and export high-quality footage efficiently.
Color correction is one of the most important stages of editing. Adjusting exposure, contrast, highlights, shadows, and white balance ensures visual consistency throughout the sequence. RAW image files provide greater flexibility during this stage because they contain more image data than compressed formats.
Flicker reduction is another critical editing task. Flickering occurs when slight exposure differences appear between frames, creating distracting brightness fluctuations during playback. Specialized software and plugins help smooth these variations and produce more stable footage.
Stabilization tools can correct minor camera movement caused by wind or accidental vibrations. Smooth footage enhances professionalism and prevents viewer distraction. However, excessive stabilization may crop the image and reduce overall quality, so moderation is important.
Frame rate selection affects the pacing and feel of the final video. Lower frame rates create a more cinematic appearance, while higher frame rates produce smoother motion. Most creators export time-lapse videos at 24 or 30 frames per second, depending on their preferred style.
Adding music significantly improves emotional engagement. Carefully selected soundtracks enhance pacing, atmosphere, and storytelling. Calm ambient music may suit nature scenes, while energetic tracks work better for urban sequences or fast-moving subjects.
Transitions and sequencing also influence the viewer's experience. Combining multiple time-lapse clips with smooth transitions creates a cohesive narrative flow. Overusing effects can become distracting, so subtle editing choices often produce stronger results.
Cropping and reframing provide additional creative flexibility during editing. High-resolution images allow creators to zoom or adjust composition without major quality loss. This technique can simulate camera movement or improve framing after recording.
Export settings determine the final quality of the video. High-resolution formats such as 4K preserve detail and enhance viewing experiences on large screens. Compression settings should balance file size with image quality to maintain sharpness and smooth playback.
Post-production allows creators to refine their artistic vision and maximize the visual potential of their footage. Careful editing transforms raw image sequences into captivating cinematic experiences.
Common Mistakes to Avoid in Time-Lapse Creation
Even experienced creators encounter challenges during time-lapse production. Understanding common mistakes helps prevent technical problems and improve overall video quality.
One of the most frequent issues is unstable camera positioning. Small vibrations caused by wind, uneven surfaces, or accidental contact can ruin an entire sequence. Using a sturdy tripod and avoiding physical interference helps maintain smooth footage.
Automatic exposure settings often create flickering because the camera continuously adjusts brightness between frames. Shooting in manual mode ensures consistent exposure and reduces post-production problems.
Incorrect interval settings can also negatively affect motion quality. Intervals that are too short may produce unnecessarily large image counts, while intervals that are too long create choppy playback. Matching intervals to subject movement is essential for natural-looking motion.
Battery failure is another common problem during long recording sessions. Running out of power before completing the sequence can interrupt the project and waste valuable time. Carrying spare batteries or external power solutions helps prevent unexpected shutdowns.
Insufficient storage space may also cause recording interruptions. High-resolution images quickly fill memory cards, especially during extended shoots. Estimating storage requirements beforehand avoids incomplete sequences.
Changing focus accidentally can ruin sharpness consistency. Once focus is established, switching to manual focus mode prevents unwanted adjustments during recording.
Poor weather preparation can damage equipment or disrupt shooting conditions. Rain, dust, and extreme temperatures may affect cameras and lenses. Protective covers and environmental awareness help safeguard equipment during outdoor shoots.
Overediting is another issue that reduces professionalism. Excessive color grading, transitions, or visual effects can distract viewers from the actual footage. Balanced editing enhances the natural beauty of the scene without overwhelming it.
Ignoring composition can result in visually weak footage. Simply recording movement is not enough to create compelling time-lapse videos. Strong framing, depth, and subject placement contribute significantly to cinematic quality.
Rushing the planning process often leads to avoidable mistakes. Careful preparation improves efficiency and increases the likelihood of capturing successful footage. Patience and attention to detail are essential qualities for time-lapse creators.
Avoiding these common errors helps creators produce smoother, more professional, and visually engaging time-lapse videos.
Conclusion
Time-lapse video creation is an exciting and rewarding form of visual storytelling that allows creators to capture the beauty of motion, transformation, and the passage of time. By condensing long events into short cinematic sequences, time-lapse photography reveals patterns and perspectives that are often invisible in everyday life. Whether recording dramatic sunsets, bustling city streets, moving clouds, or creative projects, this technique offers endless opportunities for artistic expression.
Creating high-quality time-lapse videos requires a combination of planning, technical understanding, patience, and creativity. Choosing the right equipment, mastering manual camera settings, selecting compelling subjects, and understanding interval timing all contribute to professional-looking results. Stable camera support, proper lighting control, and thoughtful composition help ensure smooth and visually engaging footage.
Editing and post-production further refine the final video by improving color consistency, reducing flicker, stabilizing motion, and enhancing emotional impact through music and pacing. Even beginners can achieve impressive results using smartphones and affordable tools when proper techniques are applied.
The true power of time-lapse photography lies in its ability to transform ordinary scenes into extraordinary experiences. It encourages creators to observe the world differently and discover beauty in gradual change. As technology continues to evolve, time-lapse filmmaking will remain an accessible and inspiring medium for photographers, filmmakers, travelers, artists, and content creators around the world.
By practicing consistently and experimenting with new ideas, anyone can unlock their creative potential and produce visually stunning time-lapse videos that captivate audiences and leave lasting impressions.