Projection photography is a unique technique where images or patterns are projected onto a subject, creating visually striking compositions. Unlike traditional photography, this method blends light, color, and shadow to transform everyday objects into artful narratives. Beginners often find it daunting, but understanding the fundamentals makes it approachable.
One crucial step is selecting high-quality imagery to project. You can find inspiring designs through resources such as high-quality art prints that showcase a variety of textures, tones, and moods ideal for projection projects. Choosing the right visual can set the tone and mood for the entire shoot.
The next step is experimenting with projection angles and distances. This allows for creative control over how the image interacts with the subject. Playing with shadows, light diffusion, and surface textures opens opportunities to explore dynamic compositions and abstract visuals.
Selecting the Perfect Projection Image
The choice of projection image directly impacts the final photograph. Abstract designs, patterns, or iconic visuals can be used depending on your creative vision. Black-and-white abstractions, in particular, work well for creating dramatic contrast and depth.
Resources like black and white abstract prints provide excellent inspiration for selecting bold imagery suitable for projection photography. The stark contrast can be particularly effective when highlighting textures or contours on human subjects or objects.
It’s also essential to consider the narrative of your projection. Each design tells a story or evokes an emotion, so aligning your projection choice with the intended mood enhances the overall impact of the photograph.
Preparing Your Shooting Environment
Creating the right environment is essential in projection photography. A darkened room is often preferable, as it allows the projected image to stand out vividly. Minimizing ambient light helps maintain clarity and detail in the final capture.
You can enhance your environment by curating visual references from sources like black and white floral prints which showcase elegant patterns suitable for projection onto textured surfaces. These can serve as inspiration for incorporating floral or geometric motifs into your shoot.
Additionally, the positioning of the projector relative to your subject affects image sharpness and distortion. Understanding how to manipulate these variables ensures you achieve the desired artistic effect while maintaining clarity and focus.
Choosing the Right Equipment
Investing in suitable equipment enhances the quality of your projection photography. A high-lumen projector, a sturdy tripod, and a reliable camera capable of manual exposure adjustments are key components. Each piece plays a role in shaping the final aesthetic of your images.
Learning to use your equipment creatively can be supported by tutorials on digital imaging, such as create 3D text Photoshop, which offers insights into layering and enhancing projected visuals digitally. This knowledge is especially useful when combining projection photography with graphic design elements.
Understanding projector settings, lens focal lengths, and camera ISO also ensures your images are crisp, well-lit, and dynamic. Experimentation is encouraged to discover unique effects and stylistic approaches that suit your creative vision.
Mastering Black and White Projection
Black-and-white photography holds timeless appeal, particularly in projection work. The absence of color emphasizes contrast, shapes, and textures, creating powerful imagery. For beginners, mastering black-and-white projection can serve as an excellent starting point.
Guides like black and white landscape guide provide essential techniques for capturing tonal balance, managing shadows, and highlighting key details. These principles translate effectively to projection photography, where light and dark interplay dramatically on surfaces.
Experimenting with monochrome projections allows you to focus on composition, texture, and light control without the distraction of color, helping develop a strong foundational skill set in this art form.
Exploring Creative Angles and Perspectives
One of the most exciting aspects of projection photography is experimenting with angles and perspectives. Slight changes in viewpoint can completely alter the perception of the projected image, turning a simple photograph into a captivating visual narrative.
Studying visual storytelling methods, such as those discussed in Instagram caption techniques, can inspire creative framing and subject interaction. While the focus is on social media captions, the concepts of visual emphasis and narrative coherence are highly transferable to photography.
By moving around your subject, adjusting projector placement, or changing camera height, you unlock diverse artistic possibilities and achieve a more engaging composition.
Incorporating Iconic Imagery
Incorporating well-known imagery into projection photography can add a layer of cultural significance and emotional resonance. Musicians, historical figures, or abstract icons can evoke instant recognition and nostalgia.
For instance, projecting images inspired by Jimi Hendrix playing prints can lend a dynamic, rhythmic energy to portraits or still-life compositions. Such visuals create a connection between viewer and subject, enriching the overall narrative of the photograph.
Balancing iconic imagery with originality is key. Personal interpretation and creative adjustment ensure your work remains unique and expressive, rather than a simple replication of popular visuals.
Combining Digital and Physical Techniques
Blending digital editing with physical projection techniques expands creative potential. Post-processing can refine light balance, enhance contrast, or add subtle textures that complement the projected image. Beginners should focus on learning foundational software skills to augment their photography.
Tutorials like essential camera settings emphasize camera control and editing practices that enhance both traditional and projection photography workflows. Combining these skills allows for seamless integration of projection effects with polished, professional outcomes.
Digital enhancements also facilitate experimentation, enabling artists to iterate and adjust their creative vision without repeating entire physical shoots.
Experimenting With Color Projections
While black-and-white projections are classic, adding color introduces a new dimension to creative photography. Warm tones, cool hues, and gradient transitions can dramatically alter the emotional tone of your images.
Exploring visually striking examples, such as modern living room inspiration, can inspire color palettes and composition ideas for projection photography. The interplay of light, shadow, and color can transform ordinary surfaces into vibrant storytelling visuals.
For beginners, experimenting with color projections encourages bold creativity, helping to develop an understanding of mood, harmony, and visual balance in photography.
Incorporating Movement in Projections
Adding motion to projection photography introduces dynamic energy. Moving the subject, shifting the projector, or using multiple light sources creates layered visual effects that enhance depth and intrigue. Motion can convey emotion, narrative progression, or abstract aesthetics.
You can take inspiration from iconic motion examples like Jimi Hendrix poster prints to understand rhythm, flow, and the visual impact of movement. These examples provide insight into translating physical energy into a photographic medium.
Experimenting with shutter speed and motion blur allows for controlled creative expression, giving your images a lively, multidimensional quality.
Capturing Unique Portraits
Projection photography excels in portraiture, offering a creative alternative to conventional portrait techniques. The interplay between projected visuals and facial features can highlight personality, emotion, and mood in unexpected ways.
Using inspirational references like John Wick movie prints can help frame dramatic portrait ideas. These visuals suggest cinematic lighting, bold contrast, and thematic storytelling that translate well to projection setups.
Successful projection portraits balance projected imagery with subject expression, ensuring the photograph conveys both technical skill and emotional resonance.
Developing a Signature Style
As with any art form, creating a unique style is essential for long-term creative growth. Projection photography allows for experimentation with textures, imagery, color, and perspective, making it ideal for developing a recognizable visual identity.
By regularly reviewing inspirations like high-quality art prints, photographers can refine their aesthetic preferences and identify recurring themes or motifs in their work. Consistent practice and thoughtful experimentation help cultivate originality and mastery over this niche art form.
Developing a signature style involves embracing creativity while refining technical skills, ultimately producing photographs that are uniquely identifiable and artistically compelling.
Exploring Texture and Surface Interaction
One of the most captivating aspects of projection photography is the way projected images interact with different textures and surfaces. Unlike conventional photography, where the background often serves as a passive element, projection photography turns surfaces into active participants in the visual story. Smooth surfaces reflect light evenly, producing clean, crisp projections with sharp edges and clear detail. On the other hand, textured surfaces, such as fabric, wood, or stone, scatter light in unique ways, creating patterns, distortions, and unexpected visual effects that can enhance the artistic depth of an image.
Experimenting with different materials allows photographers to discover the dynamic interplay between light and form. For example, projecting an abstract design onto a fabric-covered surface may produce a soft, ethereal effect, while the same design on a metallic or reflective surface can appear vibrant and intense. The subtle nuances of surface interaction encourage photographers to consider not only the projected image itself but also how its environment shapes perception. This interaction opens endless possibilities for creative experimentation, from subtle enhancements to dramatic distortions.
Surface interaction also influences mood and storytelling within the photograph. Rough or irregular surfaces can evoke a sense of mystery or tension, while smooth, clean surfaces might communicate calmness and clarity. By understanding the relationship between projection and texture, photographers gain greater control over the emotional impact of their work. Beginners can start by experimenting with everyday materials, such as paper, fabric, or household objects, to observe how light behaves differently on each. Over time, developing an intuition for surface choices and their effects can become a signature element of a photographer’s style, elevating their work beyond simple projections to immersive, textured visual experiences.
Exploring Blue Tones in Projections
Color plays a pivotal role in projection photography, and blue tones can create a calming yet dramatic atmosphere. Experimenting with different shades of blue allows beginners to explore how mood, depth, and light interact on surfaces. The subtle variations of hue and intensity can completely transform a scene, making it essential to study color theory in conjunction with projection techniques.
You can find inspiration for working with blue shades through collections like collection of blue tones, which showcase a range of tones suitable for projection experiments. Observing how designers use these shades to convey emotion helps photographers understand the potential impact of color in storytelling.
Lighting intensity also affects how blue tones appear when projected. Adjusting projector brightness, distance, and focus allows the color to appear soft and diffused or bold and vibrant, giving artists flexibility in shaping their visual narrative.
Using Abstract Blue Imagery
Abstract projections provide an opportunity to challenge perception and evoke emotion without relying on literal representation. Blue abstracts, in particular, offer a versatile palette for creating depth and mystery in photography. Patterns, textures, and dynamic gradients encourage experimentation with perspective and surface interaction.
Collections like blue abstract collection offer inspiration for selecting complex designs that interact with your subject in unique ways. Abstract forms projected onto irregular surfaces can produce unexpected shadows and contours that enhance artistic complexity.
Projection photographers often combine multiple abstract layers to generate multidimensional effects. This layering emphasizes the interplay of light and shadow, giving compositions a surreal and immersive quality.
Integrating Modern Vintage Themes
Combining modern imagery with vintage aesthetics in projection photography can create captivating contrasts. Objects, furniture, or textured backgrounds can serve as storytelling elements, bridging past and present. Learning to harmonize these elements helps produce images that are both visually engaging and conceptually layered.
Resources like modern marvels settings illustrate how contemporary objects can interact with retro environments to produce compelling visual tension. Translating these ideas into projection photography allows for creative reinterpretation of space and subject.
The choice of subject, angle, and lighting is crucial when merging modern and vintage motifs. Slight adjustments in projector placement or exposure can emphasize the contrast or harmonize the elements, depending on the desired effect.
Incorporating Mythic Interior Motifs
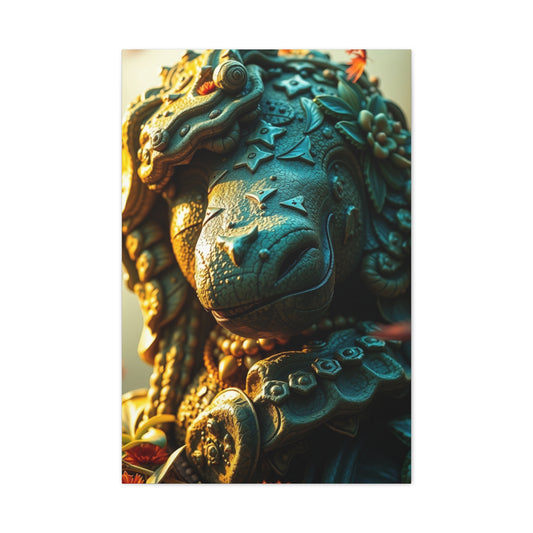
Projection photography has the power to animate mythic and folkloric imagery by reshaping interior spaces into immersive storytelling environments. Through intricate patterns, symbolic motifs, and layered light, these installations evoke a sense of wonder, creating atmospheric experiences that feel enchanted while deepening the emotional and visual narrative.
Inspiration can be drawn from sources such as mythic interior design, which highlight imaginative interiors inspired by myth and folklore. Observing the interplay of shapes, textures, and motifs aids in selecting projections that resonate with storytelling.
Balancing light, subject, and projected imagery is essential. Too much visual complexity may overwhelm the photograph, while subtle layering allows details to emerge gradually, encouraging viewers to explore the composition closely.
Capturing Iconic Figures
Incorporating famous or recognizable subjects in projection photography provides narrative strength and emotional resonance. Projected images of historical figures, celebrities, or fictional characters can create instantly engaging compositions.
For example, projecting an image inspired by Joshua portrait print can serve as a focal point for portraits or thematic setups. Integrating iconic imagery encourages photographers to consider character, emotion, and pose while experimenting with light placement.
Careful attention to scale and perspective is crucial to maintain clarity and visual impact. The projected figure should harmonize with the subject, rather than overpower or distort it, creating a balanced and immersive composition.
Exploring Mythology and Folklore
Mythology provides rich material for projection photography. Ancient stories, creatures, and symbolic imagery can be transformed into creative visual narratives, adding depth and cultural resonance to images.
Guides like mythology folklore guide highlight ways to adapt classical tales into modern artistic contexts. Incorporating symbolic elements into projections allows photographers to layer meaning and engage viewers beyond aesthetic appeal.
Combining narrative elements with lighting and composition techniques ensures that each photograph tells a coherent story. Attention to contrast, sharpness, and subject alignment enhances readability while maintaining artistic flair.
Nature and Environmental Themes
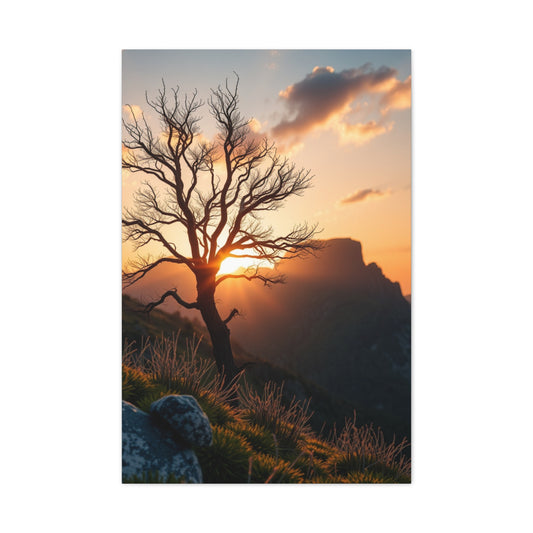
Nature-inspired projections can convey fragility, beauty, and the passage of time. Organic patterns, landscapes, and animal imagery add emotional weight and visual interest, making them ideal for thematic exploration.
Artists can draw inspiration from works like nature fragility print, which depict ecological concerns with expressive visual language. Translating these ideas into projections emphasizes texture, movement, and environmental storytelling.
Experimenting with natural surfaces, such as leaves, water, or textured materials, further enhances the realism and immersive quality of projected nature imagery. Subtle adjustments in projector brightness and color saturation help evoke mood and atmosphere.
Futuristic Nature Concepts
Blending futuristic and natural concepts opens new avenues in projection photography. Abstract patterns inspired by the environment, technology, and space can create surreal visual experiences.
References such as natures next frontier provide examples of experimental techniques that merge innovation and organic elements. Applying these concepts in projections encourages creative exploration of light, form, and context.
Projection photographers can experiment with symmetry, repetition, and motion to evoke forward-looking narratives while maintaining a connection to the natural world. Combining organic and abstract elements often produces striking and memorable imagery.
Using Sports Themes Creatively
Sports-themed projections can add dynamic energy and movement to photography. Athletes, action sequences, or symbolic representations provide opportunities to experiment with motion blur, lighting contrast, and focal emphasis.
Inspirational materials like Kelce rugby poster illustrate dramatic poses, energy, and composition that can be adapted into projection setups. Observing the balance of body lines and motion can guide projector placement and camera angles.
Incorporating sports imagery challenges photographers to anticipate movement and interact creatively with projected images, emphasizing rhythm, timing, and storytelling.
Cinematic Character Projections
Projection photography is particularly effective for cinematic themes, where iconic characters and scenes can enhance storytelling. Light, shadow, and texture combine to create dramatic, immersive visuals that mirror filmic aesthetics.
For instance, projecting imagery inspired by Kenobi movie print allows for a cinematic narrative in portraits or staged compositions. Paying attention to contrast, color tone, and subject positioning amplifies the dramatic effect.
This approach encourages experimentation with mood, perspective, and composition, allowing photographers to create images that feel like stills from a larger story, bridging photography with cinematic storytelling.
Building Cohesive Thematic Series
Projection photography becomes even more impactful when images are created as part of a thematic series. Selecting a cohesive color palette, consistent lighting style, or recurring subject matter establishes visual continuity across multiple works.
Themes inspired by mythology, nature, sports, or cinema allow photographers to experiment with narrative sequencing while maintaining individual image strength. Series creation encourages planning, conceptualization, and experimentation, fostering a deeper understanding of projection techniques.
Focusing on cohesive storytelling across multiple projections builds a recognizable style, strengthens artistic voice, and provides opportunities for creative expression beyond standalone images.
Experimenting With Light and Shadow
Light and shadow are the fundamental building blocks of projection photography, and mastering their interplay is essential for creating striking visuals. Shadows can emphasize depth, texture, and form, while light highlights details and guides the viewer’s attention. By consciously manipulating both, photographers can transform ordinary subjects into dynamic, multidimensional compositions. The direction, intensity, and quality of light all influence how projections interact with surfaces, producing subtle nuances or bold contrasts that define the mood of the image.
Beginners should experiment with different light sources and projector settings to understand how shadows behave. Hard light creates crisp, defined edges, emphasizing shapes and contours, while soft light diffuses across surfaces, producing a gentle, ethereal effect. Moving the projector closer or farther away from the subject changes the scale and sharpness of the projected image, allowing photographers to control how dominant or subtle the visual elements appear. Exploring these variations encourages creative thinking and develops technical skill.
The relationship between light and shadow also affects storytelling. Shadows can add mystery, tension, or drama, whereas bright, well-lit areas communicate clarity and focus. Strategic placement of objects or subjects within the projected scene allows photographers to create visual hierarchies and lead the viewer’s eye through the composition. By observing how surfaces reflect or absorb light, artists can discover unique interactions that transform simple projections into compelling, immersive images. Regular experimentation with light intensity, angles, and shadow play not only strengthens technical abilities but also fosters a deeper understanding of visual storytelling. This exploration ultimately empowers photographers to push creative boundaries and develop a distinct style within the medium of projection photography.
Incorporating Nautical Themes
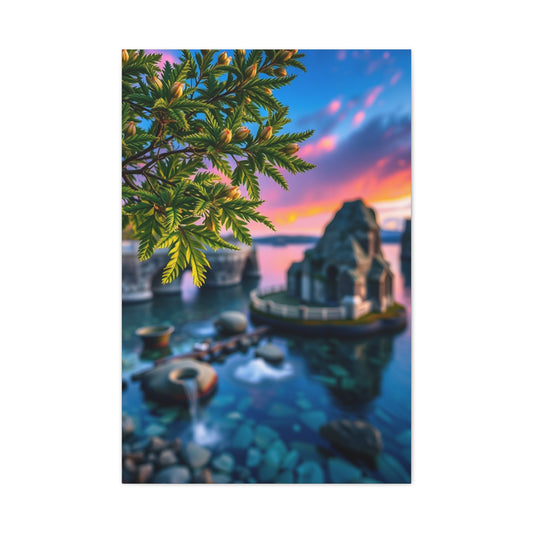
Nautical imagery can add calm, reflective moods to projection photography. Boats, harbors, and seascapes provide opportunities to explore perspective, texture, and depth in both still-life and portrait compositions. Light interacting with water surfaces adds dynamic reflections and highlights, creating a natural play between projection and environment.
Exploring collections like boat visual inspiration provides ideas for incorporating maritime subjects into your projections. Studying shapes, proportions, and contrasts helps photographers understand how water and nautical objects can enhance storytelling.
Positioning and distance of the projector influence how reflections and shadows interact with the subject. Experimenting with angles ensures that projected waves, hulls, or sails appear three-dimensional, adding realism and atmosphere to the image.
Mastering Nighttime Photography
Nighttime photography offers a unique challenge for projection techniques. Low light conditions require careful control of exposure, ISO, and shutter speed to capture projected imagery clearly while preserving ambient atmosphere. Shadows and highlights take on greater importance, transforming ordinary subjects into dramatic compositions.
Resources like nighttime city techniques provide guidance for balancing artificial lighting and natural darkness, useful when projecting visuals onto surfaces in dim environments. Observing these methods helps integrate projections seamlessly into night scenes.
Experimenting with different light sources, from neon signs to streetlights, can add texture and color contrasts to projections. By combining projected imagery with existing nighttime elements, photographers can create immersive, cinematic photographs.
Using Classic DSLR Techniques
Understanding camera fundamentals remains critical in projection photography. Classic DSLR models continue to offer excellent control over manual settings, allowing precise adjustment of focus, exposure, and aperture for projection work.
Reviews like Nikon D40x review highlight how traditional DSLRs still provide excellent image quality and flexibility for creative photography. Using a DSLR ensures that projected images retain sharpness and clarity across diverse surfaces.
Beginners should practice manual settings to control depth of field, motion blur, and light balance. Mastering these techniques allows photographers to adapt quickly to various projection scenarios, whether indoors, outdoors, or in low light.
Capturing Childhood Wonder
Projection photography can convey emotions and narratives effectively, particularly when focused on human subjects. Children interacting with projected imagery can evoke innocence, curiosity, and imagination.
For inspiration, images like kid admiring airplane illustrate how projected elements can complement human expression. The placement of projections relative to gestures or gaze creates a story that goes beyond visual aesthetics.
Timing and subtle movement are crucial. Small adjustments in projector angle or subject orientation can dramatically alter the mood and depth, highlighting personality or emotion within the photograph.
Scandinavian Style in Projections
Scandinavian aesthetics emphasize simplicity, neutral tones, and minimalistic design, providing a clean backdrop for projection photography. Using projection in Nordic-style spaces allows visuals to stand out while maintaining balance and harmony.
Resources like Nordic home style provide examples of how light, texture, and space can interact for maximum visual impact. Studying these interiors helps photographers integrate projection seamlessly without overwhelming the composition.
By combining minimalist design with projections, beginners can explore subtle contrasts, shadow play, and tonal balance. This approach highlights both the environment and projected imagery equally.
Retro-Futurism in Projection
Retro-futuristic designs blend nostalgia with modern innovation, creating visually stimulating projections. Geometric shapes, bold colors, and dynamic layouts provide endless opportunities for experimentation with light, shadow, and perspective.
Collections like retro-futurism design demonstrate creative approaches to combining past aesthetics with futuristic concepts. Adapting these ideas into projection photography encourages bold, expressive compositions.
Experimenting with retro-futuristic projections allows photographers to merge abstract and figurative elements, producing layered, multidimensional visuals that engage viewers on multiple levels.
Off-Camera Flash Techniques
Off-camera flash expands creative control over lighting in projection photography. Using multiple light sources helps sculpt shadows, highlight textures, and separate subjects from backgrounds. Mastering flash placement and intensity is essential for creating depth and dimension in projected imagery.
Tutorials like off-camera flash guide illustrate how lighting can transform a simple projection into a three-dimensional masterpiece. Experimentation encourages photographers to understand the relationship between projected light and artificial light.
Adjusting flash angles relative to projections allows for dramatic effects, enhancing both texture and mood while ensuring the subject remains visually integrated with projected imagery.
Chalkboard and Educational Themes
Chalkboard-style projections provide a playful and versatile medium for storytelling. Letters, diagrams, and illustrations can be projected to enhance narratives or thematic concepts within an image.
Examples like kingdom chalkboard print demonstrate how graphic elements can interact with physical subjects to create visually engaging compositions. Projection onto textured surfaces adds depth and character.
Photographers should consider composition carefully, ensuring the text or illustrations complement the subject and overall narrative. Attention to angle, focus, and alignment ensures clarity and impact.
Aquatic and Koi Fish Imagery
Water-inspired projections, particularly koi fish imagery, can create calming and dynamic effects. Movement, color contrast, and reflection enhance visual interest when projecting aquatic themes onto varied surfaces.
Collections such as koi fish print provide ideas for incorporating aquatic motifs into projections. Observing color gradients, fin patterns, and water textures helps create lifelike yet artistic effects.
Using surfaces with slight texture or reflective qualities enhances the realism of water effects while adding depth and visual layering. Careful adjustment of projector angle and intensity ensures fluid, immersive results.
Mixed Media and Cultural Themes
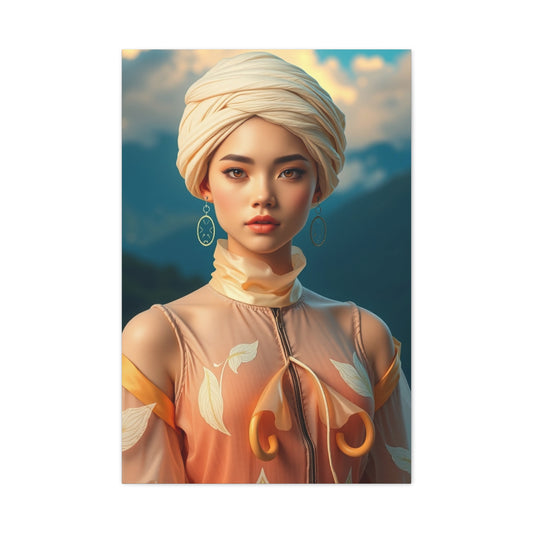
Mixed-media projections allow photographers to combine different artistic elements, from painting to photography, into cohesive visuals. This technique creates layered, textured compositions that evoke cultural narratives or unique aesthetic experiences.
For example, Korean girls painting offers inspiration for blending portraiture with abstract or cultural elements. Such approaches encourage creative experimentation with lighting, color, and texture in projections.
The key to successful mixed-media projection is balance. Each layer should complement rather than compete with others, ensuring the final image remains readable while conveying depth and complexity.
Exploring Movement and Motion Blur
Movement is a powerful tool in projection photography, adding energy and dynamism to images. Capturing motion, whether through the movement of subjects or the projection itself, introduces layers of complexity and visual intrigue. Motion blur can emphasize speed, direction, or flow, while still allowing the projected imagery to remain legible and expressive. This interplay creates photographs that feel alive and immersive.
To experiment with motion, photographers can adjust shutter speed and combine it with carefully controlled projector light. A slower shutter allows the motion of subjects or the projector’s light to create streaks and trails, adding abstract and artistic qualities to the composition. Conversely, faster shutter speeds freeze motion, emphasizing crisp details while maintaining the narrative created by projections.
The creative use of movement also extends to camera placement. Panning, tilting, or shifting the camera during exposure introduces unique distortions and interactions between light and shadow. Additionally, subject movement within a projected scene can enhance storytelling, whether by suggesting action, emotion, or a sequence of events. Observing how projected elements behave under different types of motion helps photographers plan more intricate and visually compelling compositions. Regular experimentation with movement and projection encourages a deeper understanding of timing, rhythm, and visual balance, allowing artists to develop a signature style that captures both motion and atmosphere in their photographs.
Experimenting With Minimalism
Minimalism in projection photography emphasizes simplicity, space, and focus. By reducing clutter and highlighting a single subject or a few essential elements, photographers can create powerful, striking images. Minimalist compositions draw the viewer’s attention to the interplay between the projection and the subject, making the relationship between light and form more apparent.
A key principle in minimalist projection photography is the use of negative space. Empty or uncluttered areas allow projected imagery to stand out without distraction. This approach encourages careful consideration of composition, balance, and contrast, ensuring that every element in the frame serves a purpose. Light and shadow become the main storytelling tools, highlighting textures, shapes, and edges with precision.
Minimalism also encourages experimentation with color, geometry, and perspective. Projected shapes, lines, or patterns can become the central focus, transforming ordinary surfaces into visually compelling art. By stripping away excess details, photographers can explore subtleties in projection behavior, such as how soft gradients fade across surfaces or how shadows interact with simple forms. Practicing minimalist techniques not only strengthens technical skills but also fosters creative discipline, teaching photographers to communicate ideas and emotion effectively using only essential visual elements.
Conclusion
Projection photography is a dynamic and versatile art form that combines creativity, technical skill, and experimentation. Across the three parts of this series, we explored a wide range of techniques, themes, and approaches that beginners can use to create captivating, immersive images. From understanding color theory and surface interaction to experimenting with movement, light, and minimalism, the possibilities for creative expression are virtually limitless. The essence of projection photography lies in its ability to transform ordinary spaces, objects, and subjects into extraordinary visual narratives that engage viewers on multiple levels.
One of the core lessons in projection photography is the importance of experimentation. Each surface, light source, and projected image behaves differently, and understanding these nuances requires hands-on exploration. Beginners are encouraged to try a variety of textures, angles, and distances to observe how light interacts with surfaces. Smooth backgrounds create clean, crisp projections, while textured or irregular surfaces scatter light, producing unexpected visual effects. This playful interaction between projection and environment encourages photographers to think beyond conventional framing, allowing spontaneity and innovation to shape their work.
Color is another powerful element that can elevate projection photography. By exploring different hues and tones, photographers can evoke mood, highlight specific areas of a composition, or create a sense of depth. Blues, warm tones, and neutral palettes each offer unique storytelling potential, and understanding how color interacts with light and shadow enhances creative control. Similarly, layering abstract or thematic projections adds complexity and dimension, transforming simple subjects into multi-layered visual experiences. These techniques emphasize that projection photography is not just about the image being projected, but also about how that image interacts with its surroundings to tell a story.
Lighting and shadow remain fundamental to the art form. Whether working with ambient light, off-camera flashes, or projector intensity, controlling light enables photographers to emphasize textures, sculpt subjects, and manipulate perception. Shadows add drama, mystery, and depth, while highlights can draw attention to key elements. Experimenting with light placement, intensity, and movement allows for dynamic compositions, where both projected imagery and the physical subject become integral components of the final photograph. Understanding these interactions builds a strong technical foundation while also encouraging artistic experimentation.
Movement and minimalism are additional avenues that expand the creative toolkit for projection photographers. Motion blur can convey energy and flow, turning static projections into dynamic narratives. Minimalist approaches, on the other hand, emphasize simplicity and focus, allowing projections to become the central visual element. Both techniques require careful planning and observation, fostering a deeper understanding of composition, timing, and visual storytelling. By mastering these methods, photographers gain the ability to create images that are both technically proficient and emotionally compelling.
Projection photography encourages narrative exploration and conceptual thinking. From mythological motifs and cinematic themes to nostalgic, retro-futuristic designs or nature-inspired imagery, every projected image can tell a story. The medium allows for layering of meaning, symbolism, and emotion, inviting viewers to engage with images beyond surface aesthetics. Whether working with human subjects, architectural elements, or abstract designs, the combination of projection, light, and environment offers endless opportunities for innovation and expression.
For beginners, the most important takeaway is to embrace experimentation, patience, and curiosity. Technical skills such as understanding projector settings, camera controls, and lighting are important, but equally crucial is the willingness to explore, make mistakes, and learn from each creative experiment. Projection photography rewards those who are attentive to detail, sensitive to light and color, and open to discovering the unexpected interactions between projection and environment.
As this series demonstrates, mastering projection photography is a journey that balances technique, creativity, and vision. By integrating color theory, surface interaction, lighting, movement, and narrative, beginners can progressively develop a unique style. The art form offers limitless potential for self-expression, storytelling, and visual innovation. Every photograph is an opportunity to transform ordinary spaces into immersive experiences, communicate emotion, and explore the transformative power of light and imagery.
Projection photography is not merely a method of displaying images; it is a creative practice that encourages exploration, innovation, and personal expression. Beginners who immerse themselves in experimentation, study the interplay of light and surfaces, and thoughtfully integrate color, movement, and narrative will find themselves equipped to produce compelling and memorable work. By embracing both technical and artistic elements, projection photography becomes a medium where imagination meets reality, creating a visual language that is rich, versatile, and endlessly inspiring.


