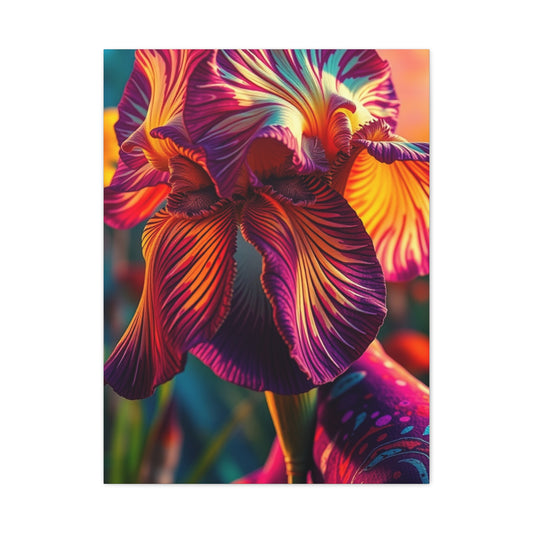
Photography is more than just capturing a moment—it’s about conveying a story, evoking emotions, and transforming ordinary scenes into extraordinary visuals. For beginners, the world of photography can feel overwhelming, but with a few strategic tips, you can dramatically improve your images almost instantly. This guide explores essential techniques and creative approaches that will elevate your photography and help you see the world through a more artistic lens.
Understanding the Power of Light
Lighting is the cornerstone of photography. Without proper lighting, even the most beautiful subjects can appear flat or uninteresting. Natural light is often the easiest and most flattering option for beginners. Early mornings and late afternoons, known as the golden hours, provide a soft, warm glow that enhances textures and highlights natural colors. Shadows can also be your allies when used intentionally, creating depth and adding dimension to your images.
Sometimes, experimenting with artificial light can offer new perspectives. A simple lamp or LED light can dramatically change the mood of your photograph. For example, highlighting a single object in a dim room can draw the viewer’s eye directly to it, creating a sense of focus and narrative. Combining natural and artificial light creatively can produce unique and professional results. For those looking to print their best shots, photo square prints provide a modern format that emphasizes symmetry and balance, making lighting even more critical to maintain clarity and depth.
Additionally, experimenting with the direction and intensity of light can enhance textures and reveal subtle details that might otherwise go unnoticed. Adjusting the position of your light source can create soft shadows or dramatic highlights, adding depth and dimension to your subject. Reflectors, diffusers, or even household objects like white boards or curtains can help manipulate light for a more controlled effect. Observing how light interacts with surfaces and materials allows photographers to develop a more intuitive understanding of illumination, which is essential for creating visually compelling images.
Focusing on Composition
Composition is the visual arrangement of elements within a photograph. Even with perfect lighting, poor composition can make a photo feel unbalanced or chaotic. Beginners should start by learning the rule of thirds. By dividing the frame into nine equal sections and placing key elements along these lines or at their intersections, you create a natural sense of balance that appeals to the human eye.
Other compositional techniques include leading lines, symmetry, and framing. For instance, a winding path or a row of streetlights can guide the viewer’s gaze through the image, adding a sense of movement and story. Experimenting with foreground and background layers can also enhance the depth of your images. To see examples of visually striking arrangements, you can explore fine art photography wall art, which demonstrates how expert photographers use composition to create compelling visual narratives.
Using negative space effectively can help isolate the subject and emphasize its importance, while balancing elements across the frame prevents visual clutter. Beginners can also experiment with different perspectives, such as low-angle or high-angle shots, to add variety and intrigue. Practicing these approaches consistently helps develop a natural sense of balance, proportion, and storytelling within every composition.
Choosing the Right Environment
The environment you choose for your photography plays a significant role in the mood and context of your images. Indoor settings, outdoor landscapes, and urban streetscapes each offer unique opportunities for creative exploration. Paying attention to details such as colors, textures, and patterns can make your photographs more engaging.
For example, photographing a dining area allows you to play with reflections, textures, and focal points. By adjusting your camera angle or using natural light from a nearby window, you can enhance the sense of space and warmth in the room. Stylish elements can further elevate your photos; for inspiration on integrating refined interiors, refer to stylish wash basin designs to elevate your dining room, which highlights how subtle design choices can influence visual storytelling.
Paying attention to small details such as table settings, decorative accents, or the arrangement of furniture can make a significant difference in the overall composition. Experimenting with different focal lengths allows you to emphasize specific elements while maintaining context, giving your images a professional and polished feel. Incorporating textures like wood, fabric, or glass adds tactile interest and depth. By observing how light interacts with these surfaces throughout the day, photographers can create dynamic and inviting interior shots that capture both the mood and character of the space.
Paying Attention to Detail
Details can make or break a photograph. Beginner photographers often overlook small elements like background clutter, uneven lines, or minor imperfections, but these can significantly affect the viewer’s perception. Focusing on clean lines, minimal distractions, and consistent color palettes ensures that your subject stands out and communicates a clear message.
One way to practice this is by photographing everyday objects with a fresh perspective. Simple arrangements on a table or a bedside setup can become visually compelling if thoughtfully composed. Incorporating accessories or personal touches enhances the narrative without overwhelming the image. For practical examples of detail-focused setups, stylish ways to decorate your bedside table showcases creative styling ideas that also translate effectively into photography.
Another approach is to experiment with different angles and distances to create unique viewpoints. Shooting from above or at a close-up perspective can reveal patterns and textures that are not immediately obvious, making ordinary objects appear more intriguing. Paying attention to the interplay of light and shadow further enhances depth and dimensionality. Additionally, considering color contrasts and complementary tones can make your subject pop while maintaining harmony within the frame. Consistently practicing these techniques helps develop a keen eye for detail and composition.
Experimenting with Color and Contrast
Color and contrast are essential for evoking mood and directing attention in photography. Bold colors can create dynamic energy, while muted tones can evoke calm and introspection. Beginners should experiment with complementary colors to make subjects pop or analogous tones to create harmony within the frame.
Contrast not only applies to color but also to light and shadow. High contrast images are dramatic and eye-catching, while low contrast can appear soft and ethereal. Adjusting exposure settings or post-processing images can enhance these effects. When photographing home interiors or large-scale compositions, consider the impact of standout pieces. For example, statement artwork such as the opulent kitchen masterpiece can become the focal point, giving your images structure and vibrancy through deliberate color contrast.
Experimenting with complementary colors and varying textures can further enhance contrast and visual interest. Paying attention to how different materials—such as wood, metal, or fabric—interact with light helps create a sense of depth and richness within the image. Shadows can be used creatively to emphasize shapes or guide the viewer’s eye, while highlights draw attention to key details. By thoughtfully combining these elements, photographers can produce balanced, dynamic compositions that feel intentional and engaging, elevating even simple interior scenes into striking visual narratives.
Using Angles to Your Advantage
Shooting from different angles transforms ordinary subjects into visually interesting compositions. Beginners often stick to eye-level shots, which can make images feel flat or uninspired. Moving lower, higher, or to the side can reveal unexpected patterns, textures, or perspectives that add dimension to your photographs.
Angles also allow you to emphasize scale, depth, or relationships between objects in a scene. For instance, capturing furniture, architectural elements, or art from an unusual angle can create a more engaging composition that feels curated rather than accidental. Exploring creative angles can be inspired by interior arrangements; understanding spatial balance is critical, as seen in stylish ways to divide your hall, which demonstrates how perspective and layout can drastically influence visual appeal.
Beginners can also experiment with varying camera heights and distances to add layers of interest to their shots. Low-angle perspectives can make objects appear grander, while high-angle shots provide a broader context of the space. Combining these angles with strategic framing or foreground elements enhances the sense of depth and guides the viewer’s eye through the image. Consistently exploring different viewpoints encourages creativity, helps identify the most compelling compositions, and ultimately strengthens one’s ability to capture interiors in a visually dynamic and balanced manner.
Incorporating Art and Inspiration
Photography thrives when inspired by other art forms. Studying classic paintings, modern art installations, or curated wall decor can provide new ideas for framing, lighting, and subject choice. Artistic influences encourage experimentation, allowing beginners to develop a unique style while learning from established visual principles.
Using decorative or thematic elements can elevate your photography significantly. Whether photographing interiors, objects, or abstract scenes, the inclusion of elegant or bold artwork can create focal points and enhance visual storytelling. For instance, a piece like the opulent Klimt Reverie demonstrates how strategic placement and artistic flair contribute to both aesthetic appeal and photographic potential.
Incorporating complementary accessories or surrounding elements can further reinforce the visual narrative. Paying attention to color harmony, texture, and proportion ensures that the artwork integrates seamlessly into the composition while still standing out as a focal point. Experimenting with lighting and shadows around the piece can highlight intricate details and add depth, creating a more immersive image. By thoughtfully combining these elements, photographers can transform ordinary settings into visually compelling scenes that feel intentional, cohesive, and artistically refined.
Exploring Cultural Inspiration
Incorporating cultural elements into photography can enrich both the narrative and visual appeal of your images. Folk art and traditional motifs carry history, symbolism, and texture that can transform ordinary subjects into captivating stories. Beginners can experiment by photographing handcrafted objects, textiles, or patterns, which provide strong focal points and engaging details.
For those looking to integrate artistic heritage into their compositions, the collection of folk art demonstrates how cultural patterns and unique designs can inspire color, structure, and storytelling in your photography. Observing the textures and forms in such pieces helps beginners train their eyes to notice subtle but impactful details.
Enhancing Outdoor Photography
Outdoor photography offers endless opportunities to practice lighting, composition, and perspective. From gardens to urban streets, the natural and built environments provide dynamic elements that can enhance your images. Weather, time of day, and seasonal changes all affect the mood and aesthetic of your photos.
Attention to detail is crucial in outdoor settings. Small elements like a carefully arranged porch display or seasonal decorations can anchor the composition and create visual interest. Inspiration for creating aesthetically appealing outdoor scenes can be found in guides like stylish ways to update your porch decor, which show how thoughtful arrangements elevate ordinary spaces and provide ideal subjects for photography.
Photographers can further enhance outdoor compositions by observing natural patterns, textures, and light variations. Elements such as foliage, pathways, or architectural details can be used to frame subjects and lead the viewer’s eye through the image. Experimenting with different times of day allows for varied lighting conditions, from soft morning hues to warm sunset tones, which can dramatically alter the mood. Consistently practicing these techniques helps beginners develop an eye for balance, perspective, and subtle visual storytelling in outdoor photography, transforming everyday scenes into compelling and polished images.
Telling Stories Through Interiors
Interiors offer rich opportunities for storytelling through photography. Every room conveys a narrative through its layout, objects, and ambiance. Beginners should focus on identifying the central story of the space and composing images that highlight it.
Kitchens, in particular, can serve as a lens into daily life, revealing character, culture, and domestic rituals. Capturing the interplay of surfaces, utensils, and natural light can create intimate, evocative images. The concept of the kitchen's shape as a domestic narrative illustrates how room design and arrangement inform storytelling in photography, offering guidance for framing and perspective that brings interiors to life.
Beginners can also focus on small, meaningful details such as the arrangement of ingredients, the texture of countertops, or the subtle reflections in kitchenware. Observing how light interacts with different surfaces throughout the day can highlight contrasts and add depth to the scene. Experimenting with angles—such as overhead shots or close-ups of specific areas—can reveal patterns and relationships that tell a story. By combining these techniques, photographers can capture the rhythm and personality of a kitchen, creating images that feel authentic, engaging, and visually rich.
Using Focal Points Effectively
Focal points draw the viewer’s attention and establish hierarchy within a photograph. Beginners should practice identifying and emphasizing the most important elements in each scene, whether through lighting, color, or placement. A clear focal point prevents visual confusion and strengthens the impact of your images.
Art pieces and decorative objects can serve as excellent focal points, especially when captured in their spatial context. For example, a canvas print with intricate details can anchor a composition, guiding the viewer’s gaze while maintaining balance. The opulent Lotus Reverie canvas print is an example of an object that naturally attracts attention and can be used effectively to structure your photographs.
Experimenting with the placement of multiple objects around the focal point can create a sense of depth and interaction within the frame. Paying attention to surrounding colors, textures, and lighting ensures that the focal piece stands out without feeling isolated. Adjusting the distance and angle from which you photograph the object can reveal new perspectives and highlight different details. Consistently practicing these compositional strategies helps beginners develop a more refined eye for balance, spatial relationships, and visual storytelling in their photography.
Capturing Emotion and Tradition
Photography is not just about aesthetics; it is also about conveying emotion and cultural significance. Events, traditions, and personal moments offer rich material for storytelling. Beginners can practice capturing expressions, gestures, and interactions that reveal narrative depth.
For instance, cultural celebrations like quinceañeras hold emotional resonance and offer dynamic visual compositions through costumes, décor, and candid interactions. Observing such events helps beginners anticipate moments and frame their shots for maximum impact. Insights can be drawn from the living legacy of quinceañera traditions, which emphasizes the visual and emotional layers present in cultural practices.
Additionally, photographers can focus on capturing both the grand, ceremonial moments and the smaller, intimate interactions that convey the atmosphere of the event. Paying attention to expressions, gestures, and spontaneous movements allows for authentic storytelling and emotional depth. Experimenting with different focal lengths and angles can highlight key details while maintaining context. By thoughtfully combining these elements, beginners can create images that not only document the celebration but also evoke its spirit, mood, and cultural significance, resulting in a richer, more compelling visual narrative.
Balancing Colors and Textures
Effective use of color and texture enhances the visual impact of photographs. Contrasting colors draw attention, while harmonious palettes create unity and calm. Similarly, textures—from smooth surfaces to intricate patterns—add depth and tactile interest.
Beginners should experiment with combining complementary elements to see how color and texture interact within a frame. Incorporating bold, visually striking objects can strengthen composition. For example, featuring a standout artistic piece in a room or scene, such as Paradise Serenade artwork, allows you to play with visual balance while directing focus to a central subject.
Photographers can also explore layering different materials, patterns, and finishes to create depth and dimension within their compositions. Observing how colors complement or contrast with one another helps establish mood and guides the viewer’s eye through the image. Adjusting lighting can further enhance textures and emphasize key details, making the scene feel more dynamic and engaging. By consistently experimenting with these techniques, beginners develop a stronger understanding of visual harmony, enabling them to create balanced, compelling images that capture attention and convey intentional artistry.
Exploring Scale and Perspective
Adjusting scale and perspective transforms ordinary scenes into engaging compositions. Shifting angles, moving closer or farther from your subject, and experimenting with depth of field can reveal patterns, symmetry, and new details that might otherwise go unnoticed.
Beginners often benefit from exploring both macro and wide perspectives. A small object photographed up close can reveal intricate patterns and textures, while a wide-angle view situates the subject within a broader context. Understanding how scale interacts with surrounding elements enhances the visual narrative and helps communicate your intended message.
Embracing Wildlife Inspiration
Nature provides endless opportunities for learning and experimentation in photography. Wildlife subjects, in particular, challenge beginners to consider movement, timing, and patience. Observing animal behavior and capturing subtle gestures can lead to expressive, dynamic images that tell a story beyond the frame. For those interested in incorporating animal-inspired motifs into photography practice or interior decor, collections like fox collection demonstrate the appeal of incorporating natural themes and textures. Observing the colors, patterns, and details in such subjects helps beginners refine their eye for composition and timing.
Additionally, photographing animals or animal-inspired elements encourages patience and careful observation, as capturing the right moment often requires waiting for natural movement or behavior. Paying attention to posture, expression, and interaction with the environment enhances storytelling and adds emotional depth to your images. Experimenting with backgrounds, lighting, and perspective can highlight unique textures and patterns, making the subject stand out more effectively. Regular practice with these techniques helps beginners develop sharper instincts for composition, timing, and the subtle nuances that make wildlife and themed photography engaging.
Creating a Green Sanctuary
Indoor greenery transforms a space and provides unique photographic opportunities. Plants introduce texture, color, and depth, enhancing the mood and ambiance of interior shots. Beginners can experiment with natural light filtering through leaves, the interplay of shadows, and the juxtaposition of organic shapes against structured furniture. The living room is often the focal point for experimenting with plant photography, and thoughtful arrangements can create a calming, visually appealing environment. Guides like the living room as a sanctuary of green presence illustrate how greenery can be strategically placed to enhance both aesthetics and compositional balance in photography.
Beginners can further explore the interplay between natural light and plant textures to create depth and dimension in their photographs. Observing how sunlight filters through leaves or casts shadows on surrounding surfaces can add subtle highlights and contrasts, enhancing visual interest. Experimenting with different angles, such as shooting from above or at eye level, allows for unique perspectives that emphasize shape and form. Consistently practicing these techniques helps develop a more refined understanding of composition, light, and balance, resulting in harmonious and engaging images that celebrate the beauty of greenery.
Conveying Identity Through Interiors
Every room has a story, reflecting the personality, habits, and style of its occupants. Beginners can learn to photograph interiors by focusing on details that reveal character, such as curated décor, furniture arrangements, and personal objects. These elements help convey a narrative and engage viewers beyond the superficial aspects of the space.
Capturing a living area as a reflection of identity requires attention to color harmony, spatial balance, and focal points. Illustrative examples can be found in discussions about the living room wall as a canvas of identity and atmosphere, which emphasizes how thoughtful composition enhances storytelling in interior photography.
Experimenting with different viewpoints, such as corner perspectives or elevated angles, can reveal relationships between elements and create a more dynamic composition. Paying attention to natural and artificial light sources helps highlight key areas while maintaining overall balance. By combining these considerations, photographers can craft images that not only capture the physical environment but also communicate the unique mood, style, and identity of the living area effectively.
Highlighting Cultural Vibrancy
Culture and heritage can add richness and context to your photography. Objects, textiles, and artworks with cultural significance provide opportunities to explore texture, color, and symbolism while telling compelling visual stories. Beginners should aim to photograph such items in a way that communicates their essence and narrative.
For example, vibrant art pieces or thematic displays can act as central subjects that anchor your composition. The opulent Latino Verve piece exemplifies how energy, color, and cultural motifs can be used to draw focus, add personality, and create visually striking photographs.
Considering background textures, lighting, and spacing ensures that the focal piece stands out without overwhelming the scene. Experimenting with different angles, distances, and perspectives can reveal new details and interactions within the environment, adding depth and interest. By consistently practicing these approaches, beginners develop a stronger understanding of visual hierarchy, balance, and storytelling, enabling them to create images that are both aesthetically engaging and culturally expressive.
Seasonal Inspiration and Natural Cycles
Seasonal changes provide natural opportunities for experimentation and creativity in photography. Each season introduces new colors, textures, and lighting conditions that can dramatically alter the mood of your images. Observing the subtle shifts in nature helps beginners anticipate changes in natural light, composition, and subject matter.
For example, early summer blooms or delicate floral arrangements can provide both vibrant color and intricate detail, offering excellent practice for capturing texture and depth. Exploring resources like the magic of June shows how seasonal subjects can inspire compositions that feel fresh, lively, and naturally balanced.
Beginners can also experiment with different focal points and apertures to emphasize either a single flower or the broader arrangement, creating varied moods and perspectives. Observing how natural light interacts with petals, leaves, and surrounding surfaces helps capture subtle gradients and highlights, enhancing the sense of depth and realism. Combining close-up shots with wider compositions allows for storytelling within a single scene. Regularly practicing with seasonal subjects cultivates an eye for detail, color harmony, and texture, ultimately strengthening both technical skills and creative intuition in floral and nature photography.
Working with Statement Pieces
Adding a central statement piece in your composition can dramatically improve visual interest. Beginners can experiment with both small and large items, using them to anchor the frame, create contrast, or guide the viewer’s attention. Whether photographing interiors, still life, or themed setups, statement objects provide structure and a clear point of focus.
For instance, a bold artwork or striking decorative item can become the centerpiece of a photograph, creating balance and sophistication. The Paramount Elegance canvas print demonstrates how scale, detail, and positioning of a single object can elevate an image and emphasize intentional composition.
Light is the essence of photography, and learning to manipulate it creatively is essential for beginners. Natural and artificial light sources can be used to highlight textures, create depth, and evoke emotion. Shadows, in particular, can add drama, contrast, and dimensionality to an otherwise simple scene.
Experimenting with different angles and intensities of light helps beginners understand its impact on mood and perception. Observing how light interacts with objects, surfaces, and textures provides insights that improve both technical skill and creative vision, enabling more deliberate and expressive images.
Using Metallic Tones to Enhance Visual Appeal
Incorporating metallic elements in photography adds a sense of richness and texture. Gold, silver, and bronze tones can reflect light, create contrast, and draw attention to key areas in the frame. Beginners can experiment with metallic objects in interiors, still life setups, or décor to enhance their images.
For inspiration, the collection of gold accents showcases how reflective surfaces and warm tones can create visual interest. Observing the interplay of light and metallic surfaces teaches beginners to anticipate reflections and adjust angles for optimal effect, improving both composition and detail.
Leveraging Telephoto Lenses
Lens choice dramatically influences perspective, depth, and subject isolation in photography. Telephoto lenses, in particular, allow photographers to capture distant subjects while compressing the background, creating a sense of intimacy and focus.
Beginners experimenting with telephoto techniques can practice wildlife, portrait, or architectural photography, observing how distance and compression alter perception. Guides such as the magic of telephoto lenses provide insights into maximizing the potential of specialized lenses, helping beginners understand when and how to use these tools for more professional results.
Additionally, telephoto lenses allow photographers to isolate subjects from distracting backgrounds, creating cleaner compositions and emphasizing details that might be lost with wider angles. They also enable subtle perspective adjustments, making distant objects appear closer and enhancing the sense of intimacy or scale. Practicing with varying distances, focal lengths, and aperture settings helps beginners develop precision, control, and confidence, ultimately improving the overall quality and impact of their images.
Capturing Spiritual Spaces
Photographing spaces designed for meditation, reflection, or worship requires attention to atmosphere, symmetry, and symbolic elements. Home temples or spiritual corners often contain detailed objects, delicate lighting, and meaningful arrangements that can translate into powerful compositions.
Beginners can practice by emphasizing the central elements, balancing foreground and background, and highlighting textures and patterns. Resources like home temple decorating demonstrate how design principles can inform photographic composition and enhance the storytelling aspect of images.
In addition, photographing such spaces encourages attention to symmetry, color coordination, and the placement of meaningful objects, which can transform an ordinary shot into a visually compelling narrative. Lighting plays a crucial role in highlighting details, casting gentle shadows, and creating a sense of depth. Experimenting with different angles, distances, and focal lengths allows beginners to explore multiple perspectives. Consistent practice in these settings helps cultivate a refined eye for spatial harmony, composition, and the subtle interplay between objects and light, ultimately enhancing overall photographic skill.
Integrating Statement Canvases
Incorporating a prominent artistic piece in your photograph can anchor the composition and add visual interest. Canvas prints, paintings, or murals provide color, texture, and thematic focus, allowing beginners to guide the viewer’s eye intentionally. For example, a large, intricately detailed canvas can dominate a room’s focal plane, offering opportunities for creative framing and lighting experimentation. The Parisian Grandeur canvas illustrates how scale, detail, and thematic elements can elevate an image, teaching beginners to use objects as compositional anchors rather than mere decoration.
Beginners can further experiment by positioning complementary elements around the canvas to create balance and depth, while adjusting camera angles to highlight textures and intricate details. Observing how natural or artificial light interacts with the artwork can add dimension and emphasize its visual impact. Practicing with varying focal lengths, perspectives, and distances helps develop a more refined understanding of spatial relationships and framing. By thoughtfully incorporating statement pieces like this into photographs, beginners learn to guide the viewer’s eye, establish hierarchy, and create compelling, professional-looking compositions that convey both aesthetic appeal and narrative strength.
Highlighting Traditions Through Photography
Events and rituals present unique opportunities for capturing narrative and emotion. Weddings, anniversaries, and cultural celebrations often involve dynamic interactions, vibrant décor, and expressive moments that can translate beautifully into photographs.
Beginners can practice capturing key moments while maintaining compositional balance and focus on storytelling. For guidance, 22 popular wedding traditions provides insights into symbolic elements, helping photographers anticipate visually engaging moments and frame them effectively.
Additionally, paying attention to candid interactions, gestures, and expressions allows beginners to convey emotion and narrative within each frame. Experimenting with different angles and perspectives ensures that both the main subjects and surrounding details are captured harmoniously, resulting in images that feel authentic, engaging, and visually balanced.
Working with Animal Subjects
Including animals in your compositions adds energy, character, and dynamic interaction. Pets and domesticated animals are excellent subjects for beginners, offering both posed and candid opportunities. Photographing animals requires patience, timing, and observation of behavior to capture authentic moments.
Strategic placement and creative framing allow animals to become both subjects and compositional elements. The Parisian Canine Elegance canvas exemplifies how an animal figure can act as a visual anchor, teaching beginners how to integrate living subjects with aesthetic and structural balance in their images.
Symmetry and leading lines are fundamental compositional tools that guide the viewer’s eye and create harmony. Beginners can practice identifying natural and architectural lines, repeating patterns, and mirrored elements to enhance structure within their images.
Using walls, furniture, and decorative objects, photographers can align elements to produce clean, balanced shots. Combining symmetry with thoughtful lighting and color choices reinforces the visual narrative, turning ordinary spaces into visually captivating compositions that feel intentional and polished.
Integrating Sports Themes
Capturing action and movement is a critical skill for photographers, especially when photographing sports or recreational activities. Understanding timing, motion blur, and focal points helps create dynamic, engaging images. Beginners should practice observing patterns of movement and anticipating key moments.
Golf, with its defined gestures and structured environment, provides excellent practice for compositional focus and timing. A carefully curated collection of golf-inspired prints can also serve as visual inspiration, demonstrating how athletic forms and dynamic angles can guide photographic composition and improve framing skills.
Photographers can further enhance their skills by observing the rhythm and flow of movement within the game, capturing swings, posture, and interactions between players and their environment. Experimenting with different shutter speeds helps convey motion or freeze action effectively. Consistently practicing with sports-related subjects like golf sharpens timing, anticipation, and the ability to create balanced, dynamic compositions that engage viewers.
Choosing the Right Photography Gear
Selecting appropriate gear is crucial for both technical quality and ease of shooting. Camera backpacks, tripods, and protective equipment ensure that photographers can work efficiently and safely, even in challenging environments. Beginners should focus on practical tools that support their workflow and allow them to explore new shooting conditions.
Reliable gear enhances stability, organization, and accessibility. Guides like the most reliable camera backpacks of 2025 provide insights into essential equipment choices, helping beginners make informed decisions and ensuring they can capture high-quality images without unnecessary complications.
In addition, having well-organized gear allows photographers to react quickly to changing scenes and lighting conditions, reducing missed opportunities. Proper storage and protection of cameras, lenses, and accessories also extend the lifespan of equipment. By investing time in selecting and arranging reliable gear, beginners can focus more on creativity and composition, developing confidence and efficiency while capturing professional-quality images in a variety of settings.
Playing with Neon and Color
Bold color choices can dramatically transform photographs, adding energy, focus, and mood. Neon and vibrant tones are particularly effective for highlighting subjects and creating visual contrast. Beginners should experiment with color intensity, light sources, and background interactions to see how colors influence the perception of their images.
Urban settings, signage, and interiors offer perfect opportunities for neon experimentation. Observing how colors interact with surrounding elements helps refine compositional judgment. The guide on the neon comeback shine like never before illustrates the visual potential of vivid tones and lighting, demonstrating how beginners can use color strategically to enhance storytelling.
Additionally, experimenting with reflections on glass, wet surfaces, or metallic objects can amplify the intensity and vibrancy of neon colors. Adjusting exposure and white balance allows photographers to control mood and saturation, while combining neon with ambient light creates contrast and depth. Practicing these techniques helps beginners develop an eye for color dynamics and visual impact, resulting in striking, memorable compositions.
Capturing Landscapes and Scenic Views
Landscape photography offers limitless opportunities for practice and creativity. From vast natural vistas to intimate garden corners, understanding perspective, light, and framing is essential. Beginners should focus on depth, leading lines, and color balance to convey scale and emotion in their shots.
Incorporating key focal elements, such as trees, structures, or bodies of water, strengthens composition and guides the viewer’s eye. The opulent landscape reverie canvas print exemplifies how thoughtful placement of visual anchors within a landscape enhances storytelling, creating images that feel immersive and professionally composed.
In addition, beginners can experiment with different times of day to capture varying light conditions, such as the warm glow of sunrise or the soft tones of twilight, which can dramatically affect mood and depth. Using foreground elements like rocks, flowers, or pathways can add layers and a sense of scale, drawing viewers further into the scene. Consistently practicing these techniques helps develop an intuitive understanding of balance, perspective, and visual flow, enabling photographers to create landscape images that are both engaging and aesthetically compelling.
Using Seasonal Themes
Seasonal events and holidays provide unique photographic opportunities. Capturing the essence of occasions such as Christmas, summer festivities, or seasonal blooms helps beginners practice lighting, color, and thematic composition. Observing how objects, decorations, and light change with the season enhances visual awareness and adaptability.
For instance, creating themed compositions for personal projects or gifts can refine skills in storytelling and attention to detail. Guides such as the perfect Christmas card signature offer practical advice for arranging and capturing festive scenes, helping beginners produce visually engaging seasonal photography.
Additionally, experimenting with props, lighting, and background elements allows photographers to create a cohesive and visually appealing theme. Paying attention to color schemes, textures, and small details ensures that each element contributes to the overall composition. Practicing these techniques enhances creativity, precision, and the ability to capture festive moments that are both charming and professional in appearance.
Emphasizing Elegance and Scale
Large-scale or elegant objects provide excellent subjects for experimenting with perspective, balance, and focal points. Using prominent items as anchors in your composition helps beginners practice proportion, framing, and spatial awareness.
Objects with intricate detail or sophisticated design, when positioned thoughtfully, can elevate ordinary images into striking visuals. The Parisian Pinnacle artwork demonstrates how scale, detail, and placement create a compelling visual hierarchy, allowing photographers to develop both technical precision and creative vision.
By incorporating such elements into a composition, artists can guide the viewer’s eye and establish a clear focal point without overwhelming the frame. Careful attention to lighting, perspective, and negative space further enhances the impact of these detailed objects. Over time, experimenting with complexity and restraint helps photographers refine their aesthetic sensibilities, balancing structure with imagination to produce images that resonate emotionally as well as visually.
Experimenting with Composition and Layers
Layering elements within a photograph adds depth, dimension, and narrative complexity. Beginners should practice arranging foreground, middle ground, and background elements to guide the viewer’s attention and create a sense of balance.
Observing how textures, colors, and objects interact within a layered composition enhances visual storytelling. By combining dynamic subjects, environmental details, and focal anchors, photographers can produce images that feel both deliberate and immersive, showcasing advanced compositional skills even at a beginner level.
By integrating sports themes, selecting the right gear, experimenting with color, capturing landscapes, using seasonal elements, emphasizing scale, and layering compositions, beginners can significantly improve the quality and impact of their photography. These strategies encourage observation, experimentation, and a thoughtful approach to every shot, allowing images to tell stories that are both visually striking and emotionally resonant.
Photography is a continuous journey of exploration, skill development, and creative expression. Applying these principles ensures that beginners not only enhance their technical ability but also cultivate an artistic perspective that elevates every image they capture.
Conclusion
Photography is a dynamic blend of technical skill and artistic vision, where careful observation, creativity, and practice combine to create images that communicate, inspire, and captivate. For beginners, the journey toward producing compelling photographs can feel daunting, yet understanding foundational principles and exploring creative techniques can lead to immediate improvement and lasting growth. By focusing on light, composition, perspective, and narrative, photographers can elevate even simple subjects into visually striking images that convey depth and emotion.
Mastering lighting is essential, as it sets the tone and mood of every photograph. Understanding how natural and artificial light interact with subjects, textures, and spaces enables beginners to highlight details, create dimension, and evoke specific atmospheres. Similarly, composition plays a crucial role in guiding the viewer’s eye and creating balance. Elements such as leading lines, symmetry, focal points, and layering help structure photographs, making them visually engaging while communicating the intended message.
The thoughtful use of environment and context enhances storytelling within photography. Whether capturing interiors, outdoor spaces, or cultural traditions, observing how objects, textures, and color palettes interact strengthens visual cohesion. Incorporating carefully selected subjects—such as statement pieces, cultural motifs, seasonal elements, or wildlife—provides anchors that draw attention and enrich the narrative, while subtle details add nuance and authenticity to each frame.
Experimentation is key to developing a personal style. Beginners are encouraged to explore different angles, perspectives, and focal lengths, as well as to play with color, contrast, and patterns. Adjusting viewpoint and experimenting with scale or depth of field reveals unseen dimensions, emphasizing relationships between elements and adding sophistication to compositions. Similarly, incorporating dynamic subjects, whether living beings, landscapes, or vibrant objects, allows photographers to practice timing, observation, and emotional capture, creating images that resonate with viewers.
Post-processing and careful selection of gear further empower beginners to refine their work. Editing enhances clarity, balance, and visual appeal without compromising authenticity, while appropriate equipment facilitates consistency and versatility. Understanding how to combine technical tools with creative insight ensures that every image is both well-executed and expressive.
Ultimately, improving photography is a process of mindful observation, continuous practice, and intentional experimentation. By integrating lighting mastery, compositional awareness, environmental understanding, thoughtful subject choice, and creative exploration, beginners can achieve noticeable progress and develop a confident, distinctive photographic style. Photography becomes not merely a record of moments, but a medium through which emotion, narrative, and beauty are communicated.
Through dedication and curiosity, beginners can transform ordinary scenes into extraordinary images. Each photograph becomes an opportunity to capture subtle details, tell meaningful stories, and convey personal vision. Embracing experimentation and deliberate practice ensures that every shot contributes to growth, skill development, and creative expression. Photography, in this sense, evolves from a technical endeavor into an art form—a visual language capable of conveying insight, emotion, and inspiration with every frame.


