If the idea of buying a macro lens for photography seems a little too expensive right now, there is a much cheaper alternative worth considering. Macro lens filters offer an affordable option for beginner photographers who want to explore the art of close-up photography without making a major investment. These filters are easy to use, lightweight, and can instantly transform a standard lens into a close-up tool capable of revealing the hidden beauty of small subjects such as flowers, insects, jewelry, and textures.
While they are called filters, macro lens filters do not function like polarizing or neutral density filters that control light transmission. Instead, they act more like magnifying glasses for your camera lens, extending the focal length to allow you to get closer to the subject while maintaining focus. They are sometimes referred to as diopter filters because they alter the optical power of the lens, much like corrective lenses for vision.
Macro lens filters are an ideal choice for photographers who are just beginning to explore macro photography. They provide a cost-effective way to experience the genre before committing to an expensive dedicated macro lens. Despite their affordability, they can deliver impressive results when used correctly, especially with good lighting and a steady hand. Understanding how they work and how to use them effectively will help you make the most of this simple yet powerful photographic tool.
What Are Macro Lens Filters
Macro lens filters are optical attachments that screw onto the front of your camera lens, similar to how you would attach a UV or polarizing filter. Their main function is to reduce the minimum focusing distance of your lens, allowing you to move the camera closer to your subject while still maintaining sharp focus. This creates the illusion of magnification, making small subjects appear larger and more detailed in your photos.
These filters are available in various sizes to match the thread diameter of your lens, typically ranging from 49mm to 82mm. If your filter size does not match your lens, you can use step-up or step-down rings to adapt the filter. The versatility of macro filters makes them compatible with almost any lens, from standard kit lenses to telephoto options.
Each macro filter is labeled with a diopter strength, indicated by a plus symbol followed by a number, such as +1, +2, +4, or +10. The higher the number, the stronger the magnification effect. A +1 filter provides a subtle level of magnification, while a +10 filter can produce significant close-up results. Some photographers even stack multiple filters to increase magnification further, though this can introduce challenges related to image sharpness and focus depth.
The simplicity of macro lens filters makes them a favorite among beginners. There is no need for complex setup or specialized gear; simply attach the filter, compose your shot, and adjust the distance between your camera and the subject until you achieve focus. However, it is important to note that macro filters slightly alter the optical properties of your lens, which may result in minor image distortions, chromatic aberrations, or reduced sharpness compared to professional macro lenses.
Types of Macro Lens Filters
Macro lens filters come in sets or individual pieces, each offering different magnification levels. The most common types include +1, +2, +4, and +10 filters. These numbers represent the optical power of the filter in diopters. A higher diopter value means stronger magnification but a shallower depth of field and potentially reduced image quality. For example, a +1 filter might be perfect for capturing small details in flowers, while a +10 filter would be suitable for photographing the intricate structure of an insect’s eye.
Another important aspect of macro filters is the quality of the glass used. As with any optical accessory, the quality of the material directly affects the clarity and sharpness of the image. High-quality filters are made from multi-coated optical glass that reduces reflections, minimizes lens flare, and preserves color accuracy. Cheaper filters may produce visible distortions or soft edges, which can detract from the final image.
Macro filters can also differ in their design and thickness. The higher the magnification, the thicker and more convex the glass becomes to accommodate the increased optical power. This change in curvature helps magnify the subject but also increases the likelihood of vignetting or blurring around the edges of the frame, especially when using wide-angle lenses.
When purchasing macro filters, it is advisable to start with a complete set rather than individual filters. A set allows you to experiment with different levels of magnification and stack combinations to achieve your desired effect. Stacking two filters, such as +2 and +4, gives a combined strength of +6, offering more flexibility in your creative approach. However, stacking too many filters can lead to a reduction in image quality and increased difficulty in focusing.
Choosing the Right Macro Lens Filter
Selecting the right macro lens filter depends on your photography goals, budget, and the type of camera lens you use. If you are experimenting with macro photography for the first time, start with a lower magnification filter like +1 or +2. These offer subtle magnification without drastically affecting image quality or focus distance. As you gain more experience, you can experiment with higher diopters to achieve stronger magnification.
Before purchasing, ensure the filter matches your lens thread size. You can find this information printed on the front or side of your lens, often indicated with a diameter symbol followed by a number, such as Ø58mm. If your filter size differs, step-up or step-down rings can adapt the filter to fit your lens.
Another key factor is the brand and build quality. While budget-friendly filters are suitable for beginners, investing in a trusted manufacturer ensures better optical performance and longer durability. High-quality filters feature multi-coated glass and metal frames that resist scratches, dust, and moisture.
Reading reviews from other photographers can also provide valuable insights into how well a specific filter performs under different lighting and shooting conditions. Consider whether you want a single high-quality filter or a complete set that offers multiple diopter strengths.
Finally, think about your subjects and shooting style. If you enjoy photographing textures, plants, or everyday objects, moderate magnification levels may be sufficient. However, if your goal is to capture the fine details of insects or jewelry, stronger magnification filters will be more effective, though they require steadier handling and precise focusing.
Advantages of Using Macro Lens Filters
One of the biggest advantages of macro lens filters is their affordability. Compared to a dedicated macro lens, which can cost hundreds or even thousands of dollars, a complete set of filters can be purchased at a fraction of the price. This makes them an excellent entry point for beginners who want to explore macro photography without making a significant financial commitment.
Another benefit is their convenience. Macro filters are small, lightweight, and easy to carry in a camera bag, making them perfect for travel or outdoor photography. They can be quickly attached or removed, allowing you to switch between regular and macro photography without changing lenses.
These filters are also versatile. Because they attach directly to the front of your existing lens, they can be used with a wide range of focal lengths and camera systems. Whether you are shooting with a DSLR, mirrorless, or compact camera, macro filters can enhance your ability to focus on small details.
For creative photographers, macro filters offer a chance to experiment with abstract compositions and textures. The magnification effect can reveal hidden patterns in everyday objects, transforming mundane subjects into captivating works of art. Moreover, using macro filters encourages photographers to slow down, observe their surroundings more closely, and develop a greater appreciation for fine details.
Limitations of Macro Lens Filters
Despite their many advantages, macro lens filters do have limitations that photographers should be aware of. The most notable drawback is reduced image sharpness compared to dedicated macro lenses. Since the filters add an extra layer of glass in front of the lens, they can introduce slight distortions, chromatic aberrations, and edge softness.
Depth of field also becomes extremely shallow when shooting with high magnification. Even small camera movements can cause the focus to shift, making it challenging to capture sharp images without a tripod. For handheld shooting, maintaining steady focus requires practice and patience.
Another limitation is light reduction. Adding multiple filters or using high-magnification diopters can decrease the amount of light entering the lens, which may require slower shutter speeds or higher ISO settings. In low-light conditions, this can make capturing sharp images more difficult.
Additionally, stacking multiple filters can sometimes lead to vignetting or shadowing around the corners of the image, especially with wide-angle lenses. This effect can often be minimized by cropping or using a slightly longer focal length.
Finally, while macro filters offer great flexibility, they cannot replicate the superior optical performance and focusing capabilities of a true macro lens. Dedicated macro lenses provide edge-to-edge sharpness, minimal distortion, and greater working distance, making them ideal for professional macro photography.
Getting Started with Macro Lens Filters
For beginners, the best approach is to start simple. Begin with one or two filters from a set and experiment with different magnification levels. Try photographing subjects with varying textures and shapes, such as flowers, leaves, coins, or everyday objects. Observe how magnification changes the composition and lighting requirements.
Use a tripod whenever possible to keep your camera stable, especially when working with higher diopter filters. Since the depth of field becomes very shallow, even the slightest movement can shift focus. Focus manually for more control, and use a small aperture (such as f/8 or f/11) to increase the sharp area in your image.
Pay attention to lighting. Macro photography often benefits from soft, diffused light that reduces harsh shadows and highlights fine details. Consider using natural light near a window or a small LED ring light for controlled illumination.
With practice, you will learn how different filters affect magnification, sharpness, and depth of field. Macro lens filters are a valuable learning tool that can help you understand the optical principles of macro photography while allowing creative freedom. Once you master their use, you can decide whether to upgrade to a dedicated macro lens or continue exploring with filters for artistic expression.
How Do Macro Lens Filters Work
Understanding how macro lens filters work begins with recognizing the relationship between your lens’s focusing ability and the concept of magnification. Every camera lens has a minimum focusing distance, which is the shortest distance from the subject that the lens can focus on. When you attempt to move closer than that limit, the subject becomes blurry and cannot be focused properly. Macro lens filters solve this limitation by acting like a magnifying glass for your lens, allowing it to focus at much shorter distances than it normally would.
Macro lens filters are circular pieces of glass that screw directly onto the front of a lens, just like a standard UV or polarizing filter. They have a convex shape, which alters the optical path of light entering the lens. This curvature effectively reduces the minimum focusing distance and increases magnification. The higher the diopter value (such as +1, +2, +4, or +10), the stronger the magnifying effect and the closer you can get to your subject while maintaining focus.
The concept is similar to using a magnifying glass to view small objects. When you place a magnifying glass between your eye and an object, it enlarges the appearance of the object because it bends light rays inward before they reach your eye. In the same way, macro filters bend light rays entering the lens, allowing the camera’s sensor to record a magnified image of the subject.
This optical process is simple yet effective. When a macro filter is attached, it shortens the lens’s focal distance, making it possible to focus on subjects that are only a few centimeters away. Without a macro filter, your lens might only be able to focus at distances of 30 centimeters or more. With a +4 or +10 diopter filter, that distance could reduce to as little as 10 centimeters or even less, depending on the focal length of the lens you are using.
It’s important to understand that macro lens filters don’t actually zoom in on the subject; rather, they let the lens focus closer, which creates the illusion of magnification. The magnification ratio changes depending on the diopter strength and the focal length of the base lens. Telephoto lenses tend to produce stronger magnification effects when combined with macro filters because they naturally compress the background and isolate the subject. Wide-angle lenses, on the other hand, may produce some edge distortion and are less suitable for extreme close-ups.
The simplicity of the screw-on design makes macro filters easy to use for any photographer. You can attach them within seconds, and they are compatible with most lenses as long as the filter thread matches. If your filter size differs, step-up or step-down rings can be used to adapt the filter to your lens. However, for the best results, always ensure the filters are properly aligned and tightly fitted to avoid light leaks or vignetting.
When you look through the viewfinder after attaching a macro filter, you’ll notice that your lens now focuses at much shorter distances. You may have to physically move your camera closer or farther from the subject to find the sharpest point. This process requires patience, as even a small shift can throw the image out of focus, especially at higher magnification levels. Many photographers prefer to use manual focus and move the camera gently back and forth until the subject appears sharp.
One of the key aspects to understand is that macro lens filters are stackable. This means you can combine multiple filters to achieve a higher magnification level. For instance, stacking a +2 and a +4 filter gives you a combined +6 effect. While this can get you much closer to your subject, it also amplifies optical imperfections such as chromatic aberrations, edge softness, and light falloff. Therefore, while stacking can be useful for experimenting with extreme close-ups, it should be done with caution if image quality is a priority.
Another important factor when using macro filters is the depth of field. As magnification increases, the depth of field becomes extremely shallow, meaning only a very small portion of the image will be in sharp focus while the rest becomes blurred. This can be both a challenge and a creative advantage. The narrow depth of field can draw attention to specific details, such as the veins of a leaf or the texture of an insect’s wing, creating a visually striking composition. However, it also makes focusing more difficult, especially if you’re shooting handheld.
To compensate for this shallow depth of field, photographers often use smaller apertures (higher f-stop numbers like f/8 or f/11). This helps increase the area of sharp focus, though it may also require slower shutter speeds or higher ISO settings to maintain proper exposure. Using a tripod or stable surface becomes essential at this stage, as even the slightest movement can ruin focus.
Light also plays an essential role when working with macro filters. Because the lens is positioned closer to the subject, less light reaches the sensor, resulting in darker images. Additionally, the camera or lens itself might cast a shadow on the subject. Using external lighting such as a ring light, LED panel, or even natural light from a window can help maintain consistent illumination. Some photographers also use reflectors to bounce light onto the subject and fill in shadows.
Understanding how to control focus, depth of field, and lighting will dramatically improve the quality of your macro filter photography. Once you master these elements, you can produce images that rival those taken with professional macro lenses, especially when the goal is creative exploration rather than scientific precision.
Using Macro Lens Filters Effectively
Using macro lens filters may seem straightforward, but mastering their application requires practice and understanding of technique. The key to achieving sharp, detailed macro images lies in controlling focus, maintaining stability, and working with light effectively.
Start by choosing a subject that doesn’t move much, such as a flower, a jewelry piece, or a texture on an object. This allows you to concentrate on perfecting your focusing technique before progressing to more challenging subjects like insects or moving elements. Attach your macro filter securely to the lens, ensuring it’s clean and free of smudges, as dust or fingerprints can appear more prominently in close-up shots.
Next, position your camera close to the subject, but not so close that the lens cannot focus. Each diopter has its own optimal focusing distance, which varies depending on the filter strength and the focal length of your lens. For example, a +1 filter may allow focusing at around 40 centimeters, while a +10 filter may reduce that to less than 10 centimeters. Move the camera slowly until the subject appears sharp in the viewfinder or on the LCD screen.
When working with macro filters, manual focusing often produces better results than autofocus. Autofocus systems can struggle at very short focusing distances, especially if the subject has limited contrast or the lighting is low. By manually adjusting the focus ring and moving your camera slightly forward or backward, you can find the precise focus point with greater control.
Depth of field management is crucial when using macro filters. Even at small apertures like f/8 or f/11, only a narrow plane of the subject will appear sharp. To make the most of this limited focus range, align your camera so the most important parts of your subject fall within the focused area. If you want more of your subject in focus, consider focus stacking — a technique where multiple images are taken at slightly different focus points and later combined in editing software to create a single image with extended depth of field.
Lighting can make or break a macro photograph. Because the lens is so close to the subject, light has less space to fill the scene evenly, leading to shadows or dim areas. Natural light works well when diffused through a window or thin curtain, creating a soft, even glow. For more control, use artificial lighting like ring lights or small LED panels positioned at an angle to minimize reflections. Avoid direct flash as it can create harsh highlights and overexposed spots, especially on reflective subjects like glass or metal.
When shooting handheld, stability is essential. Even the slightest tremor in your hands can cause blur due to the shallow depth of field. Try bracing your elbows against your body or using a wall or table for support. Alternatively, use a tripod or monopod to stabilize the camera, especially when shooting at slower shutter speeds. Some photographers also use remote shutter releases to prevent camera shake during exposure.
Experimentation is key when using macro filters. Because the magnification and focusing distances vary widely between filters, you may need to take multiple test shots to find the perfect balance between sharpness, composition, and exposure. Pay close attention to how your subject’s details appear and how the background blur contributes to the overall aesthetic.
Macro filters also open creative opportunities. You can use them to explore abstract photography by focusing on colors, patterns, and textures that are not easily visible to the naked eye. Everyday items such as fabrics, leaves, or even kitchen utensils can become fascinating subjects when viewed through a macro filter.
Another practical tip is to use the lowest ISO possible to maintain image quality. Since macro filters often reduce the light reaching the sensor, you might be tempted to increase ISO to brighten the image, but this can introduce noise and reduce sharpness. Instead, adjust your aperture and shutter speed or use additional lighting to achieve proper exposure.
White balance is equally important. Because you’re often working with artificial or mixed lighting sources, colors may shift. Setting your white balance manually or using a gray card can help maintain color accuracy, ensuring that the tones in your macro images look natural.
Post-processing can further enhance your results. Adjusting sharpness, contrast, and color balance can bring out details that may not have been visible straight from the camera. Cropping can also help improve composition and eliminate distracting edges or vignetting. However, it’s best to aim for the best possible results in-camera to minimize heavy editing.
Understanding Magnification and Focus Challenges
Magnification is the heart of macro photography, and understanding how it works helps photographers make informed decisions about filter strength and camera settings. The level of magnification you achieve depends on the diopter value of the macro filter and the focal length of your lens. A higher diopter and a longer focal length result in greater magnification.
However, with increased magnification comes greater difficulty in maintaining focus. Even a minor movement can shift the focal plane, causing your subject to appear blurry. This is especially challenging when photographing live subjects such as insects, where both the photographer and the subject might move slightly.
To overcome this, patience and precision are essential. Using a tripod helps keep the camera steady, and shooting in burst mode can increase your chances of capturing at least one sharp frame. It’s also helpful to take advantage of your camera’s focus peaking feature if available. Focus peaking highlights the areas of the image that are in focus, allowing you to adjust precisely without guesswork.
The working distance between your lens and subject also becomes critical at higher magnifications. Some filters require you to be only a few centimeters away from your subject, which can make lighting tricky. Consider using side lighting or diffused overhead lighting to avoid shadows caused by the proximity of the lens.
The higher the magnification, the thinner the depth of field becomes. This means only a small slice of your subject will appear in focus. To manage this effectively, align the subject parallel to the sensor plane when possible. For example, when photographing a leaf, position the camera so the surface of the leaf runs parallel to the lens, maximizing the area that remains in focus.
Macro filters introduce optical effects such as vignetting, chromatic aberration, and slight distortion, especially toward the edges of the frame. These effects are more noticeable with cheaper filters and when stacking multiple diopters. Choosing high-quality glass with anti-reflective coatings can significantly minimize these issues.
While macro lens filters are not perfect substitutes for dedicated macro lenses, they provide an excellent starting point for understanding close-up photography. The experience gained from mastering focus control, lighting balance, and magnification with filters translates directly to using more advanced macro equipment later.
Macro Lens Filters versus Macro Lenses
One of the most common questions photographers ask when exploring close-up photography is whether they should invest in a dedicated macro lens or start with macro lens filters. While both tools aim to achieve similar results—magnifying small subjects and capturing intricate details—they differ significantly in cost, performance, flexibility, and image quality. Understanding these differences can help photographers decide which option best suits their creative goals, budget, and skill level.
A macro lens is a specialized lens designed specifically for close-up photography. It allows a 1:1 reproduction ratio, meaning that the subject appears life-size on the camera sensor. Macro lenses are optically optimized to deliver exceptional sharpness, minimal distortion, and excellent color accuracy even at very close focusing distances. They also offer greater control over focus and depth of field, making them the preferred choice for professional macro photographers.
On the other hand, macro lens filters provide a more budget-friendly solution for beginners or hobbyists who want to explore macro photography without spending a large amount of money. These filters attach directly to the front of an existing lens, altering its optical path to allow closer focusing. Although they don’t match the precision or image quality of dedicated macro lenses, they are capable of producing impressive results when used skillfully.
The most obvious difference between the two lies in cost. A high-quality macro lens can range from mid to high prices, depending on the brand, focal length, and aperture range. In contrast, a complete set of macro filters with varying diopters can be purchased for a fraction of that cost. This affordability makes filters an excellent entry point for beginners who want to experiment with close-up photography before committing to a larger investment.
Another key distinction is image sharpness. Dedicated macro lenses feature complex optical designs, with multiple glass elements that correct for chromatic aberration, distortion, and edge softness. This ensures images are crisp and detailed across the entire frame. Macro filters, however, add an extra layer of glass in front of your existing lens, which can slightly degrade sharpness and introduce color fringing, particularly toward the edges of the frame. The degree of degradation depends on the quality of the filter glass and coatings.
Working distance also differs significantly between macro filters and macro lenses. Macro lenses typically allow greater working distances—the space between the lens and the subject—making it easier to photograph small or skittish subjects like insects without disturbing them. In contrast, macro filters often require the photographer to get very close to the subject, sometimes within a few centimeters. This can make lighting more difficult and increase the risk of casting shadows on the subject.
Despite these limitations, macro filters have advantages in terms of portability and convenience. They are small, lightweight, and easy to carry, making them ideal for travel or outdoor photography. Attaching and removing them takes only a few seconds, and they can be used with multiple lenses as long as the thread size matches. Macro lenses, on the other hand, are heavier and require more careful handling, especially when working in challenging environments like forests or beaches.
Another point of comparison is versatility. A macro lens is usually fixed in its magnification capabilities; while you can vary the distance to the subject, the lens itself has a defined magnification ratio, such as 1:1 or 1:2. Macro filters, however, can be stacked in different combinations to adjust magnification levels as needed. For instance, stacking a +2 and a +4 filter gives a +6 effect, allowing more creative flexibility. However, stacking can also increase the risk of light loss and optical distortion.
Autofocus performance is another factor worth considering. Macro lenses typically have precise autofocus systems designed for close focusing distances, though many professionals still prefer manual focus for accuracy. When using macro filters, autofocus can become unreliable, especially at higher magnifications. In such cases, switching to manual focus gives better results and more control over the exact point of focus.
Depth of field behaves similarly in both macro lenses and filters—it becomes shallower as magnification increases. However, macro lenses often handle this better due to their superior optics and longer working distances. With filters, the shallow depth of field can make focusing extremely challenging, and even slight camera movements can shift the focus point. Using a tripod or focus rail becomes essential for precise composition.
Another major advantage of macro lenses is their ability to handle light more efficiently. The optical coatings and larger apertures allow more light to reach the sensor, producing cleaner images with less noise even in low-light situations. Macro filters, by contrast, can slightly reduce the amount of light entering the lens, especially when multiple filters are stacked. This can require slower shutter speeds or higher ISO settings, both of which can affect image quality.
For photographers who want to experiment with macro photography casually or occasionally, macro lens filters are a sensible choice. They offer an accessible way to explore the world of small subjects and practice techniques such as managing depth of field, adjusting lighting, and maintaining stability. Once a photographer gains experience and decides to pursue macro photography more seriously, upgrading to a dedicated macro lens becomes a natural next step.
In short, macro lenses deliver superior optical performance and professional-grade image quality, while macro filters provide affordability, convenience, and flexibility. The best choice depends on individual goals and experience level. Both tools can produce beautiful, detailed images when used skillfully, and understanding their unique characteristics helps photographers make informed creative decisions.
Best Practices for Using Macro Lens Filters
To get the most out of macro lens filters, it’s important to develop good shooting habits and understand the technical considerations that affect image quality. While macro filters are simple to attach, mastering their use involves attention to detail, patience, and practice.
The first step is to ensure the filters are clean and free from dust or fingerprints. Because macro photography involves capturing fine details, even a small smudge or speck of dust on the filter can appear in your final image. Always use a microfiber cloth or lens cleaning solution to wipe the filter before each shoot.
Next, pay close attention to the focusing distance. Each diopter value has an optimal working range, and exceeding it will cause your subject to appear blurry. Start by positioning your camera at the approximate distance where the subject appears sharpest, and then fine-tune by moving slightly forward or backward. Using live view mode on your camera screen can help you see the exact focus point more clearly than through the viewfinder.
Lighting is another critical element. When shooting close-up subjects, the proximity of the lens often blocks natural light from reaching the subject. Using an external light source, such as a ring light or small LED panel positioned at an angle, can help create even illumination and highlight textures. If you’re outdoors, shoot during the golden hours—early morning or late afternoon—when the sunlight is soft and diffused. Avoid harsh midday sunlight as it can create unwanted glare and contrast.
A tripod is highly recommended when using macro filters, especially at high magnifications. Even the slightest camera shake can ruin focus. A sturdy tripod allows you to keep the camera perfectly still while making fine adjustments to focus and composition. You can also use a remote shutter release or your camera’s self-timer to prevent movement when pressing the shutter button.
If you prefer handheld shooting, brace your arms against your body or a stable surface to minimize motion. Increase your shutter speed slightly to counteract hand movements, but remember that increasing ISO too much can introduce noise. Balancing shutter speed, ISO, and aperture is key to achieving sharp, well-exposed macro shots.
When setting your aperture, aim for mid-range values like f/8 to f/11. These provide a good balance between sharpness and depth of field. Wider apertures, such as f/2.8, create a dreamy background blur but make focusing extremely challenging, while very small apertures like f/16 can introduce diffraction and reduce overall sharpness.
Color and white balance also deserve attention. Close-up photography often amplifies subtle color variations, so ensuring accurate white balance will help preserve natural tones. If you’re using artificial light, manually set your white balance to match the color temperature of your light source. Shooting in RAW format is ideal because it allows for more flexibility in adjusting colors during post-processing.
Another effective technique for macro photography is focus stacking. Since the depth of field at high magnification is very narrow, it can be difficult to get the entire subject in focus in a single shot. Focus stacking involves taking multiple images at slightly different focus points and blending them in editing software. This technique creates a composite image with a greater depth of field and sharper details throughout the frame.
Experimentation is vital. Macro filters allow you to discover beauty in everyday objects—from the texture of paper to the fine details on coins or plants. Changing your perspective, playing with angles, and using creative backgrounds can help produce unique and compelling images.
Post-processing is the final step in refining your macro filter photography. Adjust sharpness and clarity to emphasize textures, and use selective contrast to make your subject stand out. Be cautious with saturation, as macro photography already highlights vivid colors. Cropping can help improve composition and remove distracting elements from the frame edges.
The goal is to use macro filters as a learning tool and creative extension of your photography. They encourage you to slow down, observe your surroundings closely, and develop patience and precision—qualities that benefit every aspect of your photographic journey.
Common Mistakes When Using Macro Lens Filters
Even though macro lens filters are simple to use, beginners often make mistakes that affect image quality or ease of shooting. Being aware of these common pitfalls can help you avoid frustration and achieve better results.
One of the most frequent mistakes is misjudging the focusing distance. Because macro filters shorten the minimum focus range, getting too close or too far from the subject can easily lead to blurry images. Always take the time to find the right distance by moving the camera slowly and using manual focus if necessary.
Another mistake is relying solely on autofocus. At high magnifications, the autofocus system may struggle to lock onto the correct point, especially if the subject lacks strong contrast. Manual focusing allows for greater precision and consistency, particularly when combined with live view or focus peaking.
Over-stacking filters is another issue. While stacking can increase magnification, it also introduces optical degradation, vignetting, and light loss. Use stacking sparingly and only when necessary for specific creative effects.
Neglecting stability is another common problem. Many photographers attempt to shoot handheld at high magnification without realizing how sensitive the setup becomes. Even minor hand tremors can cause motion blur. Using a tripod or other stabilizing equipment greatly improves sharpness and consistency.
Lighting challenges also arise frequently. Because the lens and camera are so close to the subject, they often cast unwanted shadows. Solving this issue requires creative lighting techniques, such as using angled side lights or reflectors to fill in dark areas.
Ignoring the shallow depth of field can lead to poorly composed images where only a tiny part of the subject is in focus. Understanding how aperture affects depth and how to position the subject parallel to the camera sensor helps maximize the focused area.
Lastly, many beginners forget about background control. Since macro filters magnify everything within the frame, distracting backgrounds can easily draw attention away from the subject. Using plain backdrops or adjusting your shooting angle to create a pleasing blur can significantly enhance composition.
By understanding these common mistakes and learning how to correct them, photographers can make the most of their macro lens filters and produce professional-quality close-up images with minimal frustration.
Understanding the Optical Challenges of Macro Lens Filters
Macro lens filters offer an affordable entry into the world of close-up photography, yet they come with certain optical challenges that can affect image quality and overall shooting experience. When a photographer begins using these filters, one of the first issues encountered is a reduction in sharpness. Since macro filters add an extra layer of glass in front of your lens, even the smallest imperfections or misalignments in the glass can cause softness, distortion, or color fringing. This doesn’t mean macro lens filters are ineffective, but rather that they have limits based on how they manipulate light.
Each lens filter modifies how light passes through the glass. A dedicated macro lens has internal optics designed specifically for close-up work, maintaining sharpness and color accuracy even at short focusing distances. In contrast, a macro lens filter is more of a magnifying glass attached to the lens, which can introduce minor aberrations. You may notice the edges of your frame appearing softer than the center, especially at higher magnification levels such as +8 or +10.
Another important consideration is vignetting, or darkened corners, which often occurs when using lower-quality filters or stacking multiple filters together. The more glass elements you place in front of your camera, the more the light path is disrupted. Vignetting can be minimized by using step-up rings and larger filter sizes, allowing light to pass more freely. However, some degree of corner darkening is almost inevitable when pushing magnification limits with filters.
Chromatic aberration, where colors slightly misalign along the edges of subjects, can also appear more prominently with cheaper filters. This happens because the filter glass cannot perfectly bend all wavelengths of light at the same angle. While professional editing tools can correct this issue, it’s better to minimize it by investing in filters made with high-quality optical glass and multi-coating. These coatings reduce reflections and enhance color fidelity, leading to more natural-looking images.
Despite these optical limitations, macro lens filters are still excellent for learning macro photography fundamentals. They allow photographers to explore composition, focus, lighting, and depth without committing to expensive macro lenses. The key is to understand these filters’ constraints and work within them creatively, finding the right balance between cost, convenience, and image quality.
Focusing Techniques for Macro Lens Filter Photography
Focusing on macro photography is often the most challenging part of the process. With macro lens filters, this difficulty becomes more pronounced due to the reduced depth of field. Even a small movement forward or backward can shift the point of focus dramatically. The key to success lies in understanding how focus distance and magnification interact when filters are applied.
When you attach a +1 or +2 macro filter, your lens can focus closer to the subject than it normally would. However, as magnification increases, the available focus range becomes narrower. Autofocus may struggle to lock on, especially under low light or with highly reflective subjects. For this reason, manual focus is often the preferred method when using macro lens filters.
One effective technique is to pre-focus your lens and then move the camera slightly until the subject appears sharp in the viewfinder or on the screen. Many macro photographers use a tripod and a focusing rail to control minute movements, ensuring the subject remains perfectly sharp. If you are shooting handheld, brace your elbows against your body or a stable surface to reduce movement.
Focus peaking, available on many modern cameras, can be a great help. It highlights in-focus areas with a colored outline, making it easier to see where your focus plane lies. This is especially useful when photographing small insects, flowers, or textures where precise focusing is crucial.
Lighting also plays a big role in maintaining focus. A well-lit subject allows faster shutter speeds and reduces motion blur. Using an external flash, ring light, or continuous LED light can help maintain sharpness and prevent camera shake. Keep your ISO as low as possible to retain image quality, and use aperture values around f/8 to f/11 to strike a balance between depth of field and sharpness.
It is also helpful to remember that each lens and filter combination behaves differently. Experimenting with your camera setup is the only way to understand where the focus range lies. Over time, you’ll develop muscle memory for how far you need to move to achieve critical focus, turning what initially feels like trial and error into second nature.
Creative Uses of Macro Lens Filters
Macro lens filters open up a fascinating world of creative possibilities that extend far beyond simple close-up shots. While most photographers initially use them to capture detailed images of flowers, insects, and jewelry, their versatility allows for artistic experimentation across genres.
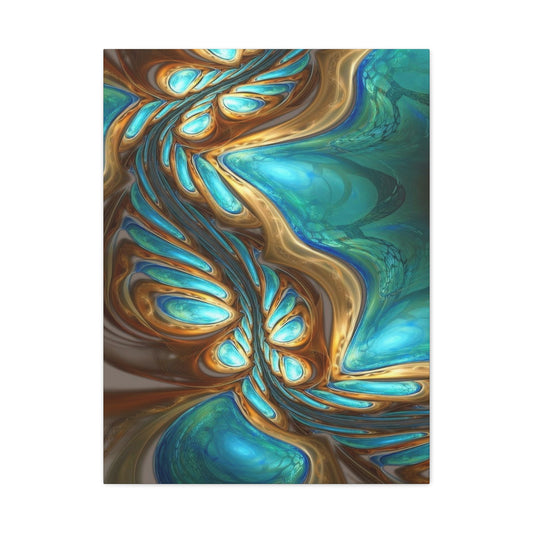
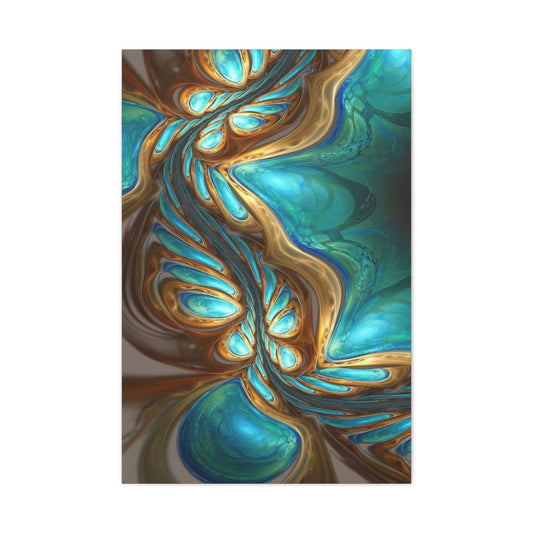
One popular use is abstract photography. By focusing on textures such as water droplets, fabric weaves, or metal surfaces, macro filters can transform everyday objects into visually compelling works of art. These filters magnify the hidden patterns in objects we usually overlook, revealing intricate details and creating an entirely new perspective.
They are also excellent tools for product photography. For small objects like watches, coins, cosmetics, or handmade crafts, macro lens filters help you achieve professional-looking results without the need for expensive macro lenses. The added magnification enhances product detail, showing surface textures, labels, and materials clearly—something especially valuable in e-commerce and advertising photography.
In nature photography, macro lens filters allow you to get closer to delicate subjects such as butterflies or dew-covered leaves without scaring them away. You can maintain a reasonable distance while still capturing impressive details. Using natural light creatively in combination with these filters can produce images that feel both intimate and vibrant.
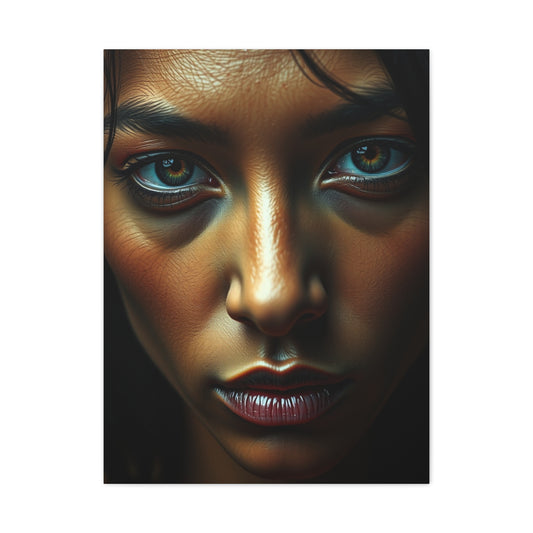
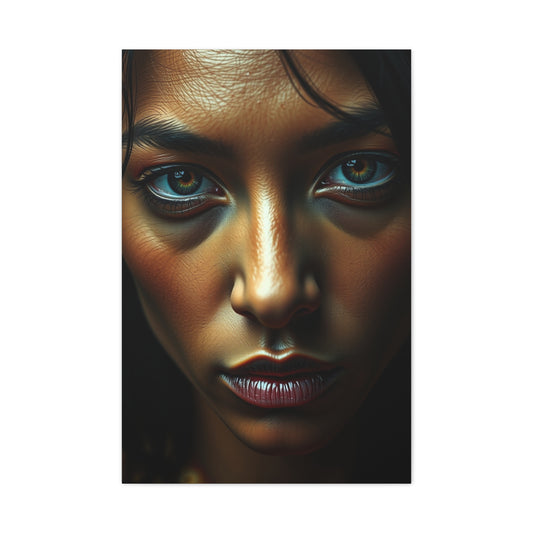
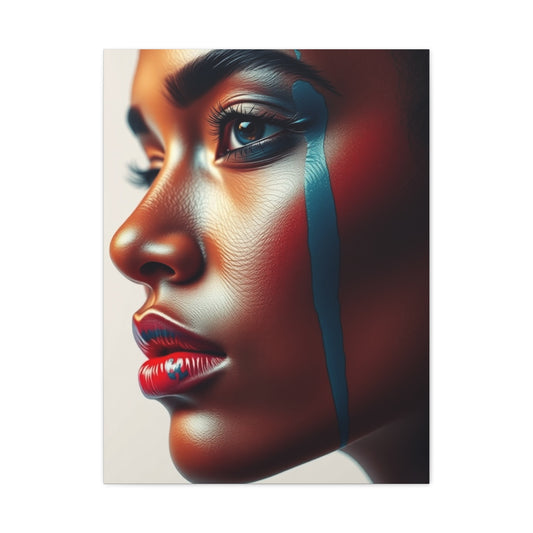
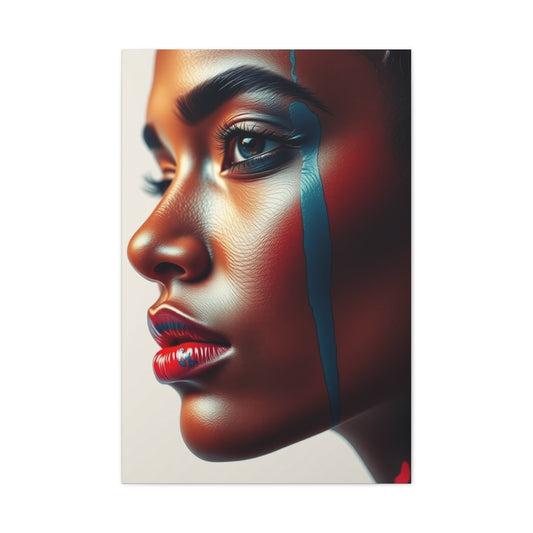
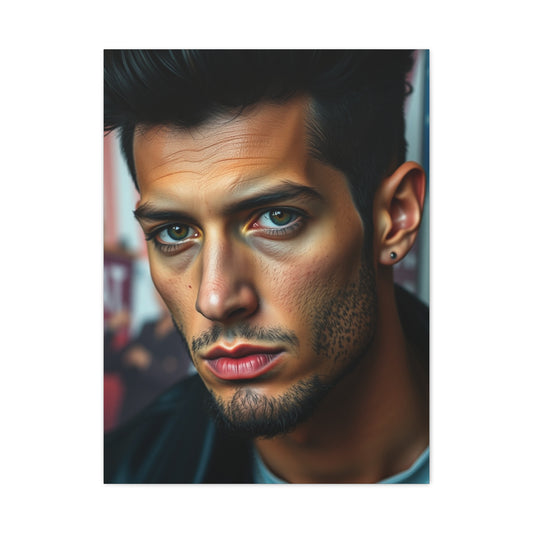
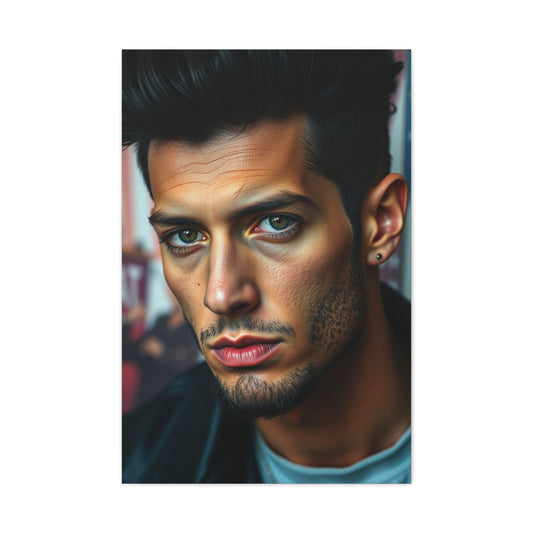
You can also use macro filters for portrait photography to highlight specific features like eyes or lips. Though unconventional, this technique creates dramatic visual emphasis and adds a surreal feel to portraits. Combining this with shallow depth of field results in an ethereal, dreamlike quality that can make portraits stand out artistically.
Experimentation is key when using macro lens filters creatively. Try shooting through translucent materials like glass or plastic, or incorporate reflections and water surfaces. Change your angles frequently, explore backlighting, and embrace imperfections like blur or flare to craft unique visual narratives. These filters offer a playground for creativity, allowing you to push boundaries and develop your personal style as a photographer.
Managing Light and Exposure in Macro Filter Photography
Lighting plays a crucial role in macro photography, and it becomes even more significant when using macro lens filters. Because the filters increase magnification, they reduce the amount of light reaching your camera’s sensor. As a result, you’ll often find yourself working with slower shutter speeds or higher ISO values. Managing exposure effectively is essential for achieving sharp, noise-free images.
Natural light can be your best ally, especially when diffused. Overcast days provide soft, even lighting that prevents harsh shadows and highlights. If shooting indoors or under direct sunlight, using a diffuser or softbox helps scatter light evenly across your subject. Avoid using the camera’s built-in flash directly on the subject, as it can cause harsh reflections and unwanted glare.
An external ring light or LED panel is a great accessory for macro filter photography. These lights provide even illumination around your subject, eliminating unwanted shadows and highlighting fine details. Some photographers prefer twin macro flashes mounted on either side of the lens for more directional lighting control.
Shutter speed, aperture, and ISO need careful balancing. A tripod helps stabilize your camera for longer exposures, allowing you to keep ISO low to preserve image quality. However, when shooting moving subjects like insects, faster shutter speeds become necessary. In those cases, use additional lighting or slightly raise ISO to compensate for reduced brightness.
Reflections and glare can also become problematic when shooting highly reflective subjects like glass, metal, or water droplets. To counter this, adjust your shooting angle or use a polarizing filter along with your macro lens filter if possible. While stacking filters can introduce more distortion, it can also solve lighting challenges when done carefully.
Experimenting with different lighting directions—front lighting, side lighting, and backlighting—can drastically alter the mood of your macro shots. Front lighting enhances details evenly, while side lighting reveals texture and depth. Backlighting can create silhouettes or illuminate translucent subjects like flower petals from behind, adding drama and beauty to your images.
Post-Processing Macro Filter Images
Post-processing is an important step in refining macro lens filter photographs. Even with careful shooting, minor distortions, softness, or color issues are common due to the optical nature of these filters. Editing software provides tools to correct these imperfections and enhance your final image.
Start by adjusting exposure and white balance to ensure natural tones. Macro images often benefit from slight increases in contrast and clarity to bring out the fine details that might otherwise appear muted. Be cautious not to overdo sharpening or texture adjustments, as they can introduce unwanted noise or halos.
Chromatic aberration correction is particularly useful for macro filter photos. Many editing programs have automatic tools that remove purple or green fringes around edges, improving color accuracy. Lens correction profiles can also help reduce distortion, though macro filters may not always have preloaded profiles. Manual correction using distortion sliders often achieves the desired result.
Selective editing can enhance focus and composition. Use radial filters or masking to draw attention to the main subject while subtly blurring the background further for a more pronounced depth effect. This technique mimics the look of high-end macro lenses and creates a professional finish.
Color grading adds an artistic touch. Slight adjustments in hue, saturation, and luminance can emphasize mood. For nature photography, warmer tones may highlight organic beauty, while cooler tones can evoke tranquility. For product or artistic macro images, consider experimenting with black and white conversions to emphasize texture and form.
Noise reduction is often necessary when shooting at higher ISO levels due to low light. Apply it selectively to maintain detail in key areas while smoothing out the background. Finally, always export images in high resolution to preserve all the intricate details that make macro photography so captivating.
The Art of Composition in Macro Lens Filter Photography
Macro lens filters open the door to a completely new way of seeing the world. They let photographers explore the intricate beauty of small subjects and find compositions that are often invisible to the naked eye. Yet, using these filters effectively requires an understanding of composition beyond the basic rules applied in regular photography. When shooting close-up, every millimeter counts, and a slight shift in framing can dramatically change the result.
Composition in macro photography revolves around controlling three key elements: focus, framing, and depth. Because macro lens filters compress the focusing distance, your working area becomes extremely limited. That means you need to be intentional with how you arrange your subject in the frame. The rule of thirds still applies, but is often less relevant when shooting tiny subjects. Instead, focus on leading lines, symmetry, and negative space to guide the viewer’s attention to your main focal point.
Texture and pattern play a major role in macro composition. Macro lens filters reveal minute details, and patterns like the veins of a leaf or the ridges of a shell can become striking design elements. Position these patterns to draw the eye naturally across the frame, ensuring there’s a sense of flow and direction. This technique works particularly well for subjects that are repetitive in structure.
Background control is another critical aspect. Since macro filters create a shallow depth of field, backgrounds tend to blur beautifully, but they can still introduce distractions if not managed carefully. Before capturing the shot, examine your background through the viewfinder and reposition slightly to eliminate unwanted shapes or colors. A uniform, softly blurred background helps emphasize your subject.
Lighting also impacts composition more than most photographers realize. Shadows can either add drama or become an unwanted distraction. For artistic images, experiment with side lighting to emphasize texture and create contrast. If you want a cleaner, softer aesthetic, diffuse your light source using a reflector or a translucent material. This helps avoid harsh shadows that overpower delicate details.
Framing with intention transforms a simple macro image into a compelling visual story. You can use elements in the environment to create natural frames—such as blades of grass or petals curving around your subject. Even in close-up work, framing adds a sense of context and depth that enhances visual appeal.
Patience is also a vital compositional tool. Macro photography often involves waiting for the right moment, especially when shooting insects or plants swaying in the wind. Learning to anticipate movement and time your shots precisely will help you achieve sharper, better-composed images.
Finally, remember that macro lens filter photography isn’t just about documenting small objects. It’s about expressing creativity through intimate detail. A strong composition doesn’t merely show what the subject is; it evokes curiosity and emotion. By combining thoughtful framing, precise focus, and controlled depth, macro lens filters allow photographers to create compositions that feel immersive and full of wonder.
The Role of Depth and Perspective
Depth and perspective play powerful roles in defining the emotional impact of a macro photograph. With macro lens filters, you can manipulate how depth is perceived because of the narrow focus range. Even though the depth of field is naturally shallow in macro shots, how you handle it can determine whether the image feels flat or dynamic.
Shallow depth of field can be both a challenge and a creative advantage. On one hand, it limits how much of the subject remains sharp; on the other, it allows you to isolate details and create striking visual focus. The closer you are to the subject, the shallower your depth becomes, regardless of aperture. Adjusting your shooting angle can help balance this effect. Shooting slightly diagonally instead of directly head-on increases the amount of the subject that falls within the focus plane.
Perspective also changes dramatically in macro photography. What appears flat to the naked eye becomes sculptural and dramatic under magnification. To emphasize this effect, try varying your shooting height or angle. Photographing from the side, below, or even through translucent elements gives the subject dimension and depth.
Foreground elements can also be used to add perspective. Placing a blurred shape or texture between the lens and the subject creates a sense of spatial layering. This technique can make even the smallest subjects feel like part of a larger environment rather than isolated objects. It works beautifully for nature photography, where surrounding leaves or grass can create a natural vignette.
Lighting, again, plays a defining role in shaping depth. Directional light from one side helps sculpt texture, emphasizing three-dimensionality. Backlighting can outline the subject and separate it from the background, making it pop visually. Experimenting with light angles helps you control the perception of depth far more than aperture adjustments alone.
When using macro lens filters, always consider how perspective affects storytelling. A head-on view of a flower might highlight its symmetry, while a side view reveals depth and curvature. Each perspective conveys a different emotional tone—symmetry often feels calm and balanced, while oblique angles suggest movement and life.
Depth in macro photography isn’t only about physical distance but also emotional distance. By carefully choosing your viewpoint, you can invite the viewer to feel either immersed within the scene or observing it from a respectful distance. Mastering this balance will elevate your images from technical close-ups to expressive visual narratives.
Overcoming Technical Limitations of Macro Lens Filters
Every tool has limitations, and macro lens filters are no exception. While they provide a cost-effective solution for achieving magnified shots, understanding their shortcomings helps you overcome them creatively. The two most common issues photographers face are image softness and focus instability.
Softness often results from the optical quality of the filter. Since these filters act as magnifying glasses, even high-end options can introduce slight blur around the edges of the frame. To reduce this effect, shoot using the center portion of the image where the lens is sharpest. You can crop later during post-processing to achieve better composition without sacrificing clarity.
Focus instability happens because macro filters reduce the lens’s focusing range dramatically. Small shifts in distance can cause the focus point to move, especially at higher magnifications. Using manual focus and stabilizing your setup with a tripod helps maintain consistency. If shooting handheld, take multiple shots while gently rocking forward and backward; this increases the chance of getting at least one perfectly focused frame.
Color fringing and chromatic aberration can also occur, particularly in bright light or when shooting reflective surfaces. Using a smaller aperture like f/8 or f/11 can minimize these effects by increasing sharpness and reducing edge distortion. Additionally, cleaning your filters before each shoot prevents micro-dust particles from scattering light, which can reduce overall contrast.
Light loss is another limitation to consider. Macro filters slightly darken the image because they alter how light enters the lens. This can be compensated for by increasing ISO or lengthening exposure time. If your camera struggles in low light, consider adding an external light source or shooting during brighter conditions.
Field curvature, where the edges of the frame fall out of focus even when the center is sharp, is common with cheaper filters. This happens because the glass curvature doesn’t perfectly align with the lens’s optical path. Again, shooting with smaller apertures and avoiding extreme magnifications helps mitigate this issue.
While these limitations may sound discouraging, they actually encourage skill development. Learning to work around technical constraints builds precision and adaptability. Many professional photographers began their macro journey using simple filters, mastering lighting and focus long before investing in specialized lenses.
The Emotional Power of Macro Photography
Macro photography, especially when done with lens filters, has a unique emotional pull. It invites viewers to slow down and appreciate the overlooked beauty in everyday life. The details captured through macro lens filters reveal an unseen world—a dewdrop reflecting the morning light, the texture of fabric fibers, or the geometric perfection of an insect’s eye. These small wonders inspire awe and curiosity.
Emotion in macro photography comes from intimacy. By magnifying small subjects, you allow the viewer to experience closeness that is impossible with the naked eye. This intimacy creates a sense of connection and wonder, evoking feelings of discovery and appreciation for the natural world.
Colors play a major role in shaping mood. Warm tones like gold, red, and amber evoke comfort and vitality, while cooler hues like blue and green create calm and introspection. When composing with macro lens filters, pay attention to the color palette and how it contributes to the emotion you want to convey.
Textures also evoke tactile emotions. Smooth, reflective surfaces feel clean and serene, while rough textures suggest strength and resilience. Macro filters capture these subtle details vividly, allowing you to use texture as a storytelling device.
Lighting further enhances emotion. Soft diffused light gives a dreamy and delicate appearance, suitable for flowers or soft materials. Hard light with strong shadows introduces intensity, ideal for metallic or industrial subjects. Combining lighting style with composition gives your images a distinct emotional personality.
Even imperfections—slight blur, lens flare, or chromatic fringing—can contribute to emotion when used purposefully. Instead of viewing these as flaws, embrace them as artistic expressions. The unpredictability of macro filters can create a painterly, organic quality that enhances mood rather than detracting from it.
Ultimately, macro lens filter photography is about perspective—not just optical but emotional. It teaches mindfulness and observation. By engaging with subjects at a close range, you begin to notice subtle variations in color, form, and light that reveal the quiet poetry of the world.
Practical Shooting Tips for Macro Filter Photography
Using macro lens filters effectively requires a combination of technical awareness and practical habits. Before shooting, always ensure your lens and filters are spotless. Even the tiniest dust particle becomes visible at high magnification, potentially ruining your image. Use a soft microfiber cloth or lens blower to clean your equipment regularly.
Set your camera to manual mode or aperture priority for greater control over exposure. Macro shots often benefit from smaller apertures like f/8 to f/11, which increase depth of field slightly without sacrificing sharpness. However, avoid going too narrow, as diffraction can reduce image quality.
Stability is crucial. Even slight vibrations can blur a macro image. If possible, use a sturdy tripod and a remote shutter release or timer function to prevent camera shake. When shooting handheld, support the camera with both hands and brace yourself against a stable object.
Use continuous shooting mode to increase the likelihood of capturing a perfectly sharp image. Since focus is so sensitive at close range, taking multiple shots ensures at least one will have ideal sharpness.
When working outdoors, watch for environmental factors like wind, which can move your subject and cause blur. Shooting early in the morning or late in the evening often provides calm conditions and beautiful natural light. Indoors, you have full control, so use adjustable lighting and backgrounds to refine your setup.
If your subject is reflective, slightly change your shooting angle to avoid glare. For shiny surfaces, a polarizing filter used in combination with a macro lens filter can help reduce reflections, though stacking filters should be done carefully to avoid added distortion.
Lastly, don’t forget about experimentation. Try photographing unusual subjects such as paper textures, spices, or fabrics. The joy of macro filter photography lies in rediscovering the beauty of simple things. With time and practice, your eye for detail will sharpen, and your ability to visualize compositions at a miniature scale will grow naturally.
Building Confidence and Creativity in Macro Photography
Confidence in macro lens filter photography comes from repetition, observation, and experimentation. The first few attempts may produce inconsistent results, but that’s part of the learning process. Every image, whether successful or flawed, teaches something new about focus, light, and perspective.
Start by shooting subjects that don’t move—flowers, jewelry, or textures. This helps you refine your control over focus and lighting. Once comfortable, challenge yourself with dynamic subjects like insects or water droplets. Each new scenario pushes your technical and creative boundaries.
Creativity grows when you allow yourself to play. Break traditional rules of composition and experiment with unconventional angles, reflections, and color contrasts. Try shooting through translucent materials, or introduce motion blur for artistic effect. These experiments often lead to unique results that set your photography apart.
Review your work critically but positively. Analyze what went right and what could be improved. Over time, you’ll develop an intuitive understanding of how different magnification levels, lighting conditions, and camera settings interact.
Most importantly, stay patient. Macro photography rewards persistence. The smallest changes in lighting or position can transform an image completely. As you gain experience, the technical aspects will become second nature, freeing your creativity to flow naturally.
Macro lens filters are not just tools; they are gateways to a different visual universe. They teach you to slow down, observe, and find wonder in the overlooked. By combining technical skill with creative intuition, you’ll transform simple close-ups into compelling works of art that reveal the extraordinary hidden within the ordinary.
Choosing the Best Macro Lens Filters
Selecting the right macro lens filter is essential to achieving sharp, high-quality close-up images. As with most photography gear, your choice depends on your goals, budget, and camera setup. A beginner might not need the most premium filters, but it’s important to understand what makes one filter better than another. The quality of glass, coating, and magnification power all play a role in how effectively the filter captures fine details. Some filters may introduce chromatic aberration or slight distortion, but higher-end options minimize these effects through superior optical design.
Macro lens filters are available in various magnifications such as +1, +2, +4, +10, and combinations in between. A +1 filter allows subtle magnification, which works well for slightly enlarged details like flowers or insects. A +4 or +10 filter gets you much closer, often suitable for capturing intricate textures like jewelry, fabrics, or water droplets. However, with higher magnification comes reduced sharpness and a shallower depth of field, so using a tripod becomes essential for stability.
The best macro lens filter for you depends on how often you plan to shoot macro subjects and what kind of camera you use. Entry-level photographers can start with a set that includes several magnification levels. This approach allows experimentation with different degrees of closeness until you find your preferred level of detail. It also saves money compared to purchasing individual filters separately.
Some brands design macro filters with multi-coated glass that resists reflections and glare. This coating also enhances color accuracy and minimizes light loss, which is especially beneficial in bright outdoor settings. It is worth investing in filters that offer such coatings, as they produce clearer and more vibrant images. Additionally, make sure the filter’s thread size matches your camera lens. If it doesn’t, step-up or step-down adapter rings are available to make them fit perfectly.
Understanding the Effects of Magnification
Magnification in macro lens filters changes how close your subject appears in the frame. The higher the number on the filter, the greater the magnification effect. However, it’s not only about how close you can get—higher magnification also changes how your camera handles light and focus. When using a +10 filter, for instance, even the slightest camera shake can blur the image. The depth of field becomes extremely shallow, meaning only a small part of your subject remains in focus.
Magnification filters also affect the focal plane, requiring the photographer to adjust the distance between the lens and the subject manually. This might take practice at first, especially if you’re shooting handheld. Each step closer to your subject can create beautiful details, but it can also exaggerate imperfections like dust or scratches on your lens or subject. Cleaning your equipment and ensuring good lighting will help avoid such issues.
Another factor to consider is distortion. When magnification increases, lenses may produce slight curvature or fringing around the edges. This effect becomes noticeable especially in cheaper filters with lower-quality glass. For photographers interested in professional-level macro work, upgrading to higher-end filters or eventually investing in a dedicated macro lens might be worth it.
For those experimenting creatively, stacking filters is another way to intensify magnification. For instance, combining a +2 and a +4 filter results in a +6 magnification effect. While stacking helps achieve extreme close-ups, it also increases the risk of image degradation due to multiple glass surfaces. To reduce distortion, use fewer stacked filters whenever possible and keep the front element of your lens clean.
Practical Tips for Using Macro Lens Filters
Using macro filters requires some practice, but a few key techniques can dramatically improve results. The first is controlling camera shake. Even small vibrations can ruin a macro image, especially when shooting handheld. A sturdy tripod helps maintain stability. When shooting outdoors, shield the camera from the wind to prevent movement. Using a remote shutter release or your camera’s timer also minimizes motion during exposure.
Lighting is another crucial aspect of macro photography. Because filters reduce the amount of light reaching your sensor, the image may appear darker. Shooting in bright natural light or using a ring light helps compensate for this light loss. Soft, diffused light often works better than direct sunlight, as it avoids harsh reflections on shiny subjects like glass or metal.
When working at high magnifications, focusing can become challenging. Autofocus might struggle, so manual focus is often preferred. You can slowly move the camera forward or backward to find the exact focus point. For small subjects, like insects or textures, it may take patience to achieve precision, but the results are worth the effort.
Aperture settings also play a significant role. Even though you might close the aperture to increase depth of field, macro photography still produces a shallow area of focus due to proximity to the subject. Experiment with apertures between f/8 and f/16 to balance sharpness and background blur. Using focus stacking—taking multiple shots with slightly different focus points and blending them later—can further enhance sharpness across your subject.
Balancing Cost and Quality
Budget considerations often influence the choice between macro lens filters and dedicated macro lenses. Filters are much more affordable, making them ideal for photographers exploring close-up work for the first time. A set of good-quality filters costs a fraction of a macro lens, yet provides impressive results with minimal setup.
However, as you advance, you might notice limitations such as edge softness or chromatic aberrations. These flaws are more visible in high-resolution images. Investing in higher-end filters can improve performance, but the price difference between premium filters and entry-level ones may not justify the upgrade for every user.
For hobbyists, macro filters are a perfect introduction to macro photography. They allow experimentation with composition, depth of field, and lighting. Once you understand what kind of macro subjects interest you—nature, still life, or product photography—you can decide if upgrading to a macro lens is necessary.
If you use macro filters often, proper care will extend their lifespan. Store them in padded cases and clean them regularly with a microfiber cloth and lens cleaning solution. Dust or fingerprints can cause unwanted flares and reduce clarity. Avoid stacking too many filters when not required, as additional glass layers may degrade image quality.
Creative Applications of Macro Lens Filters
Macro lens filters unlock a world of creative possibilities beyond typical close-up photography. They allow you to explore textures, patterns, and fine details that are invisible to the naked eye. Everyday objects like coins, leaves, and fabrics transform into fascinating compositions under magnification. Experimenting with lighting angles and backgrounds can produce striking effects that highlight the subject’s form and structure.
For example, shooting water droplets on petals can create a surreal scene with reflections inside each drop. Transparent materials, glass objects, or metallic surfaces reveal unique patterns when illuminated from behind or below. Abstract macro photography thrives on these subtle interactions between light and texture.
You can also combine macro filters with artistic techniques such as double exposure, long exposure, or selective focus to create dreamy imagery. In product photography, filters help emphasize details like jewelry engravings or fabric stitching, making them valuable tools for commercial photographers.
In the field of education or science, macro filters are used for capturing biological specimens, textures, and other micro-details without investing in specialized equipment. Their portability and ease of use make them an excellent tool for on-the-go documentation or creative experimentation.
The Future of Macro Filters
As technology evolves, macro lens filters are becoming more sophisticated. Manufacturers are now producing higher-quality glass with improved coatings that minimize aberrations and enhance clarity. Some even feature magnetic mounting systems that allow quick attachment and removal, making the workflow smoother for photographers who frequently switch between filters.
Hybrid filters that combine macro magnification with other effects, like polarization or diffusion, are also entering the market. These innovations expand creative control and reduce the need for multiple accessories. Future filters may even include smart adjustments that communicate with cameras to optimize focus and exposure automatically.
Despite the growing popularity of advanced macro lenses, macro filters continue to hold a strong place in photography. Their affordability and convenience make them accessible to enthusiasts, students, and professionals alike. Whether used for experimentation or serious projects, they remain an excellent gateway into the fascinating world of macro imagery.
Conclusion
Macro lens filters are an accessible and versatile tool that opens up the fascinating world of close-up photography. They provide an affordable alternative to dedicated macro lenses, allowing photographers—especially beginners—to explore magnification, detail, and texture without a large financial investment. By understanding their strengths and limitations, photographers can achieve impressive results while learning the fundamentals of composition, lighting, and focus.
While macro filters may introduce minor optical challenges such as softness, chromatic aberration, or reduced depth of field, these can be managed through careful technique, proper lighting, and post-processing. The shallow focus they produce encourages creativity, helping photographers isolate subjects, emphasize textures, and experiment with perspective in ways that standard lenses cannot.
Macro photography with filters also nurtures patience and observation. It teaches photographers to slow down, notice details, and engage with their subjects on a deeper level. Whether capturing the delicate veins of a leaf, the intricate patterns of a fabric, or the reflective surface of water droplets, macro lens filters reveal the hidden beauty in everyday objects.
Ultimately, macro lens filters are more than just a budget-friendly tool—they are a gateway to creative exploration. They allow photographers to experiment, learn, and refine their skills, all while discovering the extraordinary in the ordinary. By combining technical understanding with artistic vision, photographers can use macro filters to create compelling images that captivate and inspire, proving that even the smallest subjects can make a big visual impact.