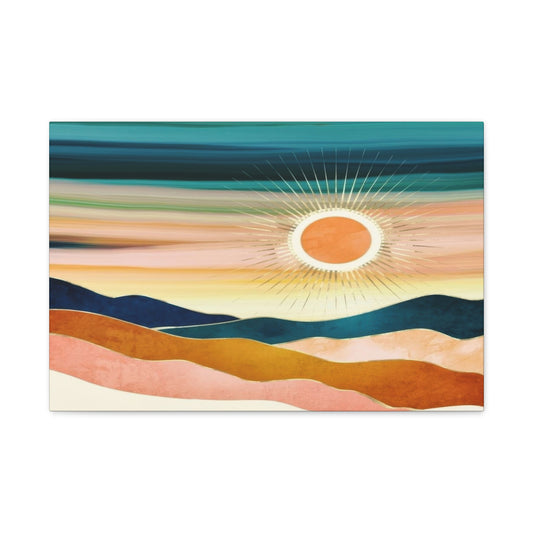
The art of stretching a canvas is one of the most pivotal processes in the creation of fine art prints and custom artwork. Whether you’re an artist working on an original masterpiece or a printmaker transforming digital art into a physical creation, proper canvas stretching is essential for achieving a taut, smooth surface that supports your work and maintains its aesthetic integrity for years to come. Stretching a canvas properly is not just about pulling fabric over a frame; it’s about ensuring the longevity, vibrancy, and flawless presentation of the artwork. In this first part of our guide to stretching canvas, we will break down the essential steps and best practices that ensure your artwork remains firmly stretched, maintaining a high-quality finish that will stand the test of time.
Why Canvas Stretching Matters
Canvas stretching is the process of securing a canvas to a frame—known as stretcher bars—ensuring that it remains taut without sagging or warping. A canvas that is stretched properly provides a firm, even surface, enhancing the visual impact of the artwork. When stretching a canvas, the goal is to eliminate any wrinkles or slack, which can distort the image, and to achieve a smooth, tight surface that allows light to reflect off the canvas evenly. Without the right tension, the artwork can feel uneven or droopy, detracting from the visual appeal. Beyond the aesthetics, properly stretched canvases also enhance the durability of the artwork, preventing damage over time due to slackness, environmental changes, or pressure on the fabric.
The importance of a well-stretched canvas extends to more than just its appearance—it affects how the artwork will hold up as it ages. An improperly stretched canvas may experience warping, uneven surface areas, or even deterioration due to shifting tension. Therefore, mastering the technique of stretching canvas is not just a matter of skill but also one of craftsmanship and care.
Tools You’ll Need for Canvas Stretching
Before we dive into the actual process, it’s essential to gather all the necessary tools and materials. With the right equipment at hand, the process becomes much easier and more efficient. Below is a list of the items you’ll need to properly stretch a canvas:
1. Stretcher Bars: These are the frame pieces that form the structure onto which the canvas will be stretched. They come in various sizes and depths, so it’s important to choose the right stretcher bars based on the size of your canvas.
2. Canvas: The fabric you will stretch. Opt for high-quality, durable canvas material that can withstand the tension and handling required during the stretching process.
3. Staple Gun: This tool is used to attach the canvas to the stretcher bars. Choose a high-quality staple gun that can handle heavy-duty use and provide consistent staples.
4. Stretching Pliers: These pliers are designed to grip the canvas firmly and allow you to pull it taut, ensuring an even stretch across all sides.
5. Measuring Tape: Precise measurements are critical when cutting and positioning the canvas. A good measuring tape will ensure your canvas fits the frame perfectly.
6. Scissors or Utility Knife: You’ll need these tools to trim any excess fabric once the canvas is stretched onto the bars.
Having these tools ready before you begin will allow you to work efficiently and minimize errors, ultimately ensuring a successful stretch.
Assembling the Stretcher Bars
The first task in the canvas stretching process is assembling the stretcher bars into a rectangular frame. Begin by carefully fitting the corners of the stretcher bars together. Most stretcher bars come with interlocking joints that snap together easily. It’s crucial that the frame is square, as any misalignment at the corners can lead to uneven tension when stretching the canvas. To ensure the frame is perfectly square, use a framing square or a right-angle tool to check the alignment of the corners. If the stretcher bars have cross braces, attach them securely to the back of the frame. Cross braces are essential for larger frames, as they prevent the frame from warping or bowing over time.
When assembling the stretcher bars, handle them gently to avoid causing any damage. A properly assembled frame will ensure that the canvas remains taut and smooth once stretched.
Cutting the Canvas
Once the frame is ready, it’s time to cut the canvas to size. Start by laying your canvas flat on a clean, smooth surface. Use a measuring tape to ensure that the canvas will have enough material to wrap around the stretcher bars. You should add at least 3-4 inches of excess canvas on each side of the frame. This extra material is necessary for folding the canvas around the bars and securing it with staples. The extra fabric ensures that the canvas remains tight and even when the stretching process is completed.
Related Catagories:
Using a pencil or chalk, mark the areas where you will cut the canvas. This will help you make precise cuts and avoid wasting fabric. When cutting the canvas, be careful not to stretch or pull the fabric, as this can distort the fibers and affect the final result. Use a sharp utility knife or scissors to make clean cuts, ensuring that the edges of the canvas are straight and even.
Positioning the Canvas
Now that your canvas is cut to size, it’s time to position it on the stretcher bars. Begin by laying the stretcher frame face down on a flat, clean surface. Place the canvas over the frame, ensuring the printed side is facing down toward the surface. It’s crucial to center the canvas carefully, ensuring that there is an even overhang on all four sides of the frame. This symmetry is important because it ensures the canvas will stretch evenly, which is key to maintaining consistent tension.
Take your time to adjust the canvas so that it is perfectly aligned with the stretcher frame. Once you’re satisfied with the positioning, you’re ready to begin the stapling process.
Stapling the Canvas
The stapling process is where the magic of stretching begins. Start by securing the canvas at the center of one side of the frame. Use a staple gun to attach the canvas to the stretcher bar, ensuring that the staple is placed securely but without driving it too deep into the fabric. This will help maintain the integrity of the canvas and prevent any tearing or damage.
Once the canvas is secured at the center, move to the opposite side and repeat the process, placing another staple at the center. After securing both sides, work your way outwards toward the corners, placing additional staples along the way. Remember to apply even tension as you go, pulling the canvas taut without overstretching it. Continue this process on all sides of the canvas, always starting from the center and working your way outwards to the edges. This method helps prevent wrinkles and ensures that the canvas remains evenly stretched.
Handling the Corners
Handling the corners is one of the trickiest aspects of the canvas stretching process. To create clean, professional-looking corners, fold the excess canvas neatly at each corner, making sure the fabric lies flat without any bunching or excess folding. A neat fold is essential for achieving a smooth, even surface without wrinkles or distortions.
Once the corners are folded neatly, staple them securely to the back of the stretcher bars. Make sure the fabric is pulled tight, and the corner is flat and well-formed. Take your time with this step, as poorly handled corners can ruin the appearance of the entire piece.
Tightening the Canvas
After stapling all four sides, it’s time to tighten the canvas to ensure it remains taut and smooth. If any areas of the canvas are still loose or have slack, use stretching pliers to gently grip the fabric and pull it toward the center of the frame. These pliers are designed to provide extra grip and leverage, allowing you to tighten the canvas evenly without damaging the material.
As you tighten the canvas, continue stapling it along the way. Be sure to maintain consistent tension across all sides, as uneven tension can cause the fabric to shift or sag in some areas. When using the stretching pliers, avoid pulling the canvas too tight, as overstretching can damage the fibers and create an undesirable finish.
Verifying the Tension
Once the canvas is fully stretched and stapled, gently press down on the center to check the tension. A well-stretched canvas should feel firm to the touch and slightly bouncy. If there are any loose or sagging areas, adjust the tension accordingly by using the stretching pliers to pull the fabric tighter. This step ensures that your canvas is evenly stretched, with no areas of slack or wrinkles.
Trimming the Excess Canvas
Finally, once you’re satisfied with the tension and appearance of the canvas, it’s time to trim the excess fabric. Use a utility knife or scissors to carefully cut the canvas along the edges of the stretcher bars, leaving a clean and neat finish. Be careful not to cut too close to the staples, as you don’t want to risk the canvas coming loose.
Mastering the Technique: Advanced Tips and Troubleshooting for Perfect Canvas Stretching
Refining Your Craft
In the first part of our guide to stretching canvas, we covered the essential steps necessary to create a taut, smooth surface that highlights your artwork's brilliance. However, as with any craft, mastering canvas stretching requires more than just the basics. In this second part of our series, we’ll dive deeper into advanced techniques and troubleshooting tips that will help you elevate your skills and ensure your stretched canvas is nothing short of perfection. Whether you’re working with large canvases, dealing with tricky fabric types, or encountering tension issues, the knowledge shared in this section will equip you with the tools to handle any challenge that comes your way.
Choosing the Right Canvas Material
Before tackling the technical aspects of stretching, it’s essential to emphasize that the choice of canvas material can significantly impact the stretching process. Not all canvases are created equal, and some materials are more prone to stretching or warping than others. Artists typically use either cotton or linen canvas, both of which have distinct characteristics.
· Cotton Canvas: This material is the most common choice for both beginners and professionals. It’s affordable, durable, and readily available. Cotton canvas tends to stretch more easily, making it ideal for beginners. However, it can also sag over time, especially if the tension isn’t applied evenly during stretching.
· Linen Canvas: Linen is a higher-end option, known for its strength and durability. It has a smoother texture compared to cotton and resists sagging. However, linen is more difficult to stretch because of its dense fibers. If you’re working with linen, be prepared for a more challenging stretching process. It’s crucial to apply gradual, even tension to avoid damaging the fabric.
Choosing the right canvas material for your project is the first step in ensuring a smooth, successful stretching process. Take into account the type of artwork you’re creating and how the material will interact with the frame and tension.
Related Catagories:
Handling Larger Canvases
Stretching large canvases presents a unique set of challenges. When dealing with larger artwork, the stretching process becomes more intricate, as maintaining even tension across the entire surface is much more difficult. Here are a few advanced tips for tackling larger canvases:
1. Use Extra Support: When working with oversized canvases, ensure that your stretcher bars are sturdy and well-constructed. Larger canvases are more prone to warping, so extra cross braces or a reinforced frame will help keep the structure stable.
2. Work with a Partner: Stretching a large canvas is often a two-person job. Having an extra pair of hands can ensure that the canvas is stretched evenly and that no section of the fabric becomes slack. One person can hold the canvas taut on one side, while the other uses the staple gun to secure it to the frame.
3. Stretching in Sections: Instead of trying to stretch the canvas in one go, break it into sections. Start by securing the center of one side, and then move to the opposite side. Stretch and staple one half of the canvas before moving to the next. This technique allows you to maintain consistent tension without overexerting yourself on any one part of the fabric.
4. Use a Canvas Stretching Machine: For professional artists and printmakers working with exceptionally large canvases, investing in a canvas stretching machine can save time and provide even tension. These machines are designed to stretch the canvas evenly, eliminating the need for manual stretching and ensuring the fabric is pulled tight across the frame.
Handling large canvases requires precision and patience, but with the right tools and techniques, you can achieve a beautifully stretched surface that enhances the artwork.
Troubleshooting Common Stretching Issues
Even with the best preparations, issues can arise during the stretching process. Understanding how to troubleshoot common problems will ensure that your canvas remains taut and smooth throughout the entire process. Below are some of the most common challenges and how to overcome them.
1. Uneven Tension Across the Canvas: One of the most common problems is uneven tension. This can occur if the canvas is not stretched symmetrically or if tension is applied too forcefully on one side of the frame. To avoid this issue, always start by securing the center of each side of the canvas and work your way outwards, keeping tension even as you staple. Additionally, regularly check the tension by pressing down on the center of the canvas to ensure uniformity.
2. Canvas Sagging Over Time: If your canvas begins to sag or droop after stretching, it could be due to several factors. First, check the tension. If the fabric was not pulled tight enough during the initial stretching process, the canvas will naturally sag. Secondly, make sure you’ve used enough excess fabric to wrap around the stretcher bars. If the canvas was cut too short, the tension may not be sufficient to keep it taut. Finally, consider the humidity and temperature of your workspace. Changes in environmental conditions can cause the canvas to expand or contract, leading to sagging.
To fix this issue, you may need to restretch the canvas or use stretching pliers to tighten specific areas that have loosened. Be sure to check the canvas regularly over time to catch any issues before they become permanent.
3. Wrinkles or Bubbles in the Canvas: Wrinkles and bubbles can occur if the canvas is not properly aligned on the stretcher bars, or if the tension isn’t applied evenly. To avoid wrinkles, always ensure that the canvas is centered and evenly positioned on the frame before stapling. If bubbles or wrinkles do appear, gently pull the fabric taut using the stretching pliers, and restaple the canvas in place. If the wrinkles are significant, it may be necessary to remove the staples and re-stretch the canvas entirely.
4. Loose Corners: Sometimes, the corners of the canvas can become loose or uneven, leading to unsightly folds and wrinkles. To prevent this issue, be sure to fold the corners neatly, as explained in the first part of our guide. Use the stretching pliers to pull the fabric tight around the corners and staple securely. If a corner becomes loose after stretching, simply pull it tighter and restaple it, ensuring that the fabric is smooth and flat.
Maintaining Tension and Stability Over Time
Once your canvas is stretched and stapled, it’s essential to ensure that the tension remains stable over time. To maintain the tension and prevent sagging or warping, take the following steps:
1. Store Properly: Store your stretched canvas in a cool, dry place, away from direct sunlight or humidity. Excessive heat or moisture can cause the canvas to stretch unevenly or become loose. If you’re storing multiple stretched canvases, be sure to keep them upright and avoid stacking them on top of one another, as this can apply pressure and disturb the tension.
2. Use a Backing Board: For extra support, consider attaching a backing board to the canvas. This additional layer helps prevent the canvas from shifting and keeps it taut, especially if the artwork is large or heavy.
3. Regular Inspections: Even after stretching, it’s important to inspect your canvas regularly to ensure that the tension remains consistent. Over time, environmental factors and handling can cause the fabric to shift. If you notice any slack or sagging, use stretching pliers to gently pull the canvas tighter and secure it with additional staples if necessary.
Finalizing the Stretching Process: Enhancing the Presentation of Your Stretched Canvas
Introduction: The Finishing Touches for Professional-Quality Canvas Prints
By now, you’ve mastered the essential techniques of canvas stretching, from assembling your stretcher bars to troubleshooting common issues like uneven tension and wrinkles. However, the stretching process doesn’t end once your canvas is secured to the frame. To truly elevate your artwork and ensure its longevity, there are several crucial steps involved in finalizing the canvas stretch and enhancing its presentation.
In this part of our series, we will delve into how to properly finish the edges of your stretched canvas, prepare it for hanging, and apply protective measures to preserve the integrity of your artwork. These finishing touches are essential for achieving a professional, polished look that will showcase your canvas prints in the best possible light.
Finishing the Edges: Adding a Neat, Clean Look
One of the most important aspects of the stretching process is the way you finish the edges of the canvas. A clean, neat edge not only improves the overall appearance of your piece but also ensures it looks polished and professional when displayed. Here are the steps to follow to achieve a crisp, tidy finish:
1. Trim Excess Canvas Fabric: Once the canvas is tightly stretched and stapled, you’ll have excess fabric around the edges. It’s crucial to trim this fabric carefully to maintain a clean look. Use sharp scissors or a utility knife to trim the excess canvas as close to the staples as possible. Be cautious not to cut into the fabric that is stretched across the frame, as this could cause it to loosen.
2. Wrap the Edges: If you want to add an extra layer of detail to the edges of the canvas, consider wrapping the fabric around the sides of the stretcher bars. This is especially useful for pieces that will be displayed without a frame. To do this, pull the fabric around the edges, folding it neatly over the sides of the stretcher bars. Secure it with staples on the back, ensuring the folds are smooth and consistent. This method gives the canvas a more finished appearance without the need for a traditional frame.
3. Use a Canvas Tape or Decorative Trim: For an added touch of style, you can apply a decorative trim or canvas tape to the edges of your stretched canvas. This method works particularly well for contemporary art pieces or when you want to add a unique detail to your canvas. Canvas tape can be glued or stapled around the edges of the frame, giving your canvas a refined, elegant look that elevates the overall aesthetic.
Preparing the Canvas for Hanging: The Importance of Support and Balance
Once your canvas is securely stretched and the edges are neatly finished, it’s time to prepare the piece for hanging. Proper hanging techniques not only help display your artwork at its best but also ensure that it remains secure on the wall over time. Follow these steps for proper canvas preparation:
1. Adding Hanging Hardware: There are several methods for adding hanging hardware to the back of your stretched canvas, depending on the size and weight of the piece. The most common options include:
o D-Rings and Wire: For most standard-sized canvases, attaching D-rings to the back of the frame is a reliable choice. To install D-rings, measure and mark two points on the upper corners of the back of the canvas, then attach the D-rings using screws. Next, thread a length of wire between the two D-rings, securing it tightly. Be sure the wire is taut and can support the weight of the canvas.
o Sawtooth Hangers: For smaller canvases or those with a lighter weight, sawtooth hangers are an easy and effective option. These hangers attach to the back of the frame using nails or screws and are designed to hook onto a nail in the wall for secure hanging.
o French Cleats: For heavier or larger canvases, a French cleat system provides additional support and stability. This system consists of two interlocking strips, one attached to the top of the canvas frame and the other to the wall. The interlocking cleats allow the canvas to hang securely and evenly, preventing it from shifting over time.
2. Ensure Even Placement: Before securing the hardware, it’s important to ensure that the canvas is centered and balanced on the frame. Use a level to check the alignment of the canvas before attaching the hanging hardware. This will help prevent the artwork from leaning to one side and ensure that it hangs perfectly straight.
3. Protecting the Canvas: To prevent any damage from occurring to the back of the canvas or the artwork itself, it’s recommended to cover the back of the frame with protective backing paper. This paper serves as a barrier against dust, moisture, and physical damage, ensuring that your canvas remains in pristine condition. Use a strong adhesive to attach the backing paper to the back of the stretcher bars, trimming away any excess to create a smooth, secure finish.
Applying a Protective Coating: Ensuring Longevity and Durability
Once the canvas is stretched, finished, and ready to hang, it’s essential to apply a protective coating to safeguard the artwork from environmental factors such as UV rays, dust, and moisture. There are several options to consider when applying a protective layer:
1. Gloss or Matte Varnish: Applying a varnish coating to the surface of the canvas provides added protection while enhancing the color and vibrancy of the print. You can choose between a gloss or matte finish, depending on the desired aesthetic. Gloss varnishes provide a shiny, reflective finish that can make colors appear more vibrant, while matte varnishes offer a more subtle, non-reflective look. Use a soft brush or spray varnish to apply the coating evenly across the surface of the canvas.
2. UV Protection: UV varnishes are an excellent choice for preserving the colors and preventing fading from exposure to sunlight. If your canvas will be displayed in a bright or sunny area, a UV-protective varnish is highly recommended. This coating not only helps to protect the artwork but also reduces the likelihood of cracking or yellowing over time.
3. Clear Acrylic Spray: For a more affordable and easy-to-apply solution, clear acrylic spray can be used to protect the surface of the canvas. Acrylic sprays are available in both glossy and matte finishes, and they offer a quick-drying, durable layer of protection. While not as long-lasting as varnish, acrylic sprays are a convenient option for artists who need a fast solution.
4. Applying the Protective Layer: Regardless of the type of coating you choose, be sure to apply it in a well-ventilated area. Use smooth, even strokes to cover the surface, ensuring that the protective layer is applied uniformly. Allow the varnish or spray to dry fully before handling the canvas, and be sure to follow the manufacturer’s instructions for curing times.
Final Inspection and Hanging Your Canvas
Once the protective coating has dried, conduct a final inspection of the canvas to ensure that everything is in place. Check the hanging hardware to confirm that it is securely attached and that the canvas is balanced and aligned. Also, take a moment to inspect the edges of the canvas to make sure there are no loose areas or uneven spots.
Finally, it’s time to hang your canvas on the wall. Choose a location that complements the artwork and ensures that the piece will be showcased in its best light. Use a tape measure to mark the desired height and placement of the canvas, and be sure to place the nails or hooks securely into the wall, using a level to ensure perfect alignment.
Caring for and Maintaining Your Stretched Canvas: Preserving the Beauty of Your Artwork
Introduction: Extending the Lifespan of Your Canvas
Now that your stretched canvas is completed, hanging proudly on your wall, it’s important to understand how to maintain and care for it to ensure its longevity and preserve its aesthetic appeal. Proper care of your canvas prints is crucial to keeping them looking fresh and vibrant for years. Factors such as environmental conditions, cleaning, and handling can all impact the durability and appearance of your artwork, but with a few simple steps, you can ensure that your canvas stays in pristine condition.
In this final part of our guide, we will delve into the best practices for caring for your stretched canvas, covering essential cleaning techniques, environmental considerations, and tips for avoiding damage. Whether your artwork is displayed in a busy living room, a serene office space, or a sunny hallway, these tips will help keep your canvas looking its best.
Cleaning Your Stretched Canvas: Keeping It Fresh and Pristine
The first step in maintaining your stretched canvas is knowing how to clean it properly. Dust, dirt, and environmental pollutants can accumulate on the surface over time, so regular cleaning is essential to preserving the look of your artwork. However, it’s important to approach cleaning with care to avoid damaging the surface or the print. Here are the best methods for cleaning your canvas:
1. Dusting: The easiest and most effective way to clean a canvas is by dusting it regularly. Dust can accumulate on the surface and detract from the clarity of the print, so it’s important to remove it. Use a soft, microfiber cloth or a feather duster to gently wipe the surface of the canvas. Be sure to avoid abrasive materials that could scratch or damage the fabric. Light dusting once a week will help keep your canvas looking fresh.
2. Vacuuming: For a more thorough cleaning, you can use a vacuum with a soft brush attachment. Gently pass the vacuum across the surface of the canvas to remove dust and dirt. Be sure to set the vacuum to a low setting to avoid any damage to the fabric. This method is especially useful for large canvases that collect a lot of dust.
3. Spot Cleaning: If you notice stains or marks on the canvas, it’s important to act quickly to clean them. Use a damp cloth with water (or a mild, non-abrasive soap solution for stubborn stains) to gently blot the stained area. Avoid rubbing the canvas, as this can damage the print. Once the stain is removed, blot the area with a dry cloth and allow it to air dry completely. Never use harsh cleaning agents, as they can affect the print or finish.
4. Avoiding Water Damage: It’s crucial to prevent water from coming into direct contact with the canvas. Excess moisture can warp the stretcher bars and potentially damage the print itself. Always use a lightly dampened cloth, never soak the canvas. In case of heavy spills or stains, seek professional cleaning services to avoid potential damage.
Environmental Considerations: Protecting Your Canvas from the Elements
The environment in which your canvas is displayed plays a significant role in its long-term preservation. Light, temperature, and humidity all affect the canvas and print over time, potentially leading to fading, warping, or cracking. Here are some key environmental factors to consider and how to protect your artwork from them:
1. Avoid Direct Sunlight: One of the primary causes of fading in canvas prints is exposure to direct sunlight. UV rays can cause the colors in the print to fade over time, especially if the canvas is exposed to constant sunlight. To protect your canvas, hang it in a location where it won’t be exposed to direct sunlight for long periods. If this isn’t possible, consider using UV-protective varnish (which was discussed in the previous part) to shield the print from UV damage.
2. Control Temperature and Humidity: Extreme temperatures and humidity levels can cause your canvas to warp, crack, or even shrink. Ideally, your canvas should be displayed in a room with a temperature between 60 and 70 degrees Fahrenheit (15–21°C) and a humidity level of 40–50%. Avoid placing the canvas in areas prone to temperature fluctuations, such as near radiators, fireplaces, or air conditioners. Additionally, excessive moisture in the air can cause mold and mildew to develop, so it’s crucial to maintain balanced humidity in the room.
3. Dust and Pollutants: Airborne pollutants and dust particles can settle on the surface of the canvas, affecting the print over time. Regular cleaning, as mentioned earlier, is essential to prevent dust buildup. If you live in an area with high pollution or heavy dust, consider placing your canvas in a room with an air purifier to reduce the amount of dust and debris in the air.
4. Avoiding High-Traffic Areas: Hanging your canvas in a high-traffic area, such as a hallway or a room with pets or small children, increases the likelihood of accidental bumps, scratches, or other physical damage. If you must display your canvas in a busy space, ensure it is placed high enough on the wall to avoid being accidentally touched. Alternatively, consider using a protective frame or glass cover to safeguard the print from damage.
Handling Your Stretched Canvas: Proper Care During Transport and Storage
While your stretched canvas is safe when properly displayed, handling it with care is crucial if you need to move or store it. Improper handling can lead to stretching issues, surface damage, or physical harm to the print. Here are a few important tips for caring for your canvas during transport or storage:
1. Handling During Transport: When moving your canvas, always handle it by the stretcher bars or frame. Avoid touching the surface of the canvas itself, as oils and dirt from your hands can damage the print. If you need to transport a large canvas, consider wrapping it in a protective material like bubble wrap or foam padding to prevent it from getting scratched or bumped during the move.
2. Storing Your Canvas: If you need to store your canvas for a period of time, it’s important to keep it in a safe, dry, and cool place. Never store a canvas in a damp or humid environment, as this can lead to mold growth or warping. Additionally, avoid placing heavy objects on top of the canvas, as this could cause pressure marks or bending. If possible, store the canvas vertically and place a protective covering over it to keep it dust-free.
3. Re-stretching if Necessary: Over time, even the most carefully maintained canvas may begin to lose its tension. If your canvas becomes loose or saggy, it may need to be re-stretched. The process of re-stretching involves removing the canvas from the stretcher bars, re-tightening it, and reattaching it securely to the frame. If you are unsure how to do this yourself, it’s best to consult a professional to ensure the artwork is properly re-stretched.
Conclusion:
Stretching canvas onto stretcher bars is both a practical skill and an artistic endeavor that ensures your artwork is displayed at its best. From assembling the stretcher frame to carefully positioning, stapling, and tightening the canvas, each step contributes to the overall professional finish of the piece. Understanding how to properly stretch and handle your canvas guarantees not only a taut and smooth surface but also enhances the longevity of your art.
By following the meticulous steps outlined in this guide, you can transform your artwork into a polished piece that will stand the test of time. Each detail, from selecting the correct stretcher bars to handling the corners with precision, plays a vital role in achieving a professional-quality canvas print.
Furthermore, proper care and maintenance are crucial to preserving the beauty of your stretched canvas. Regular cleaning, controlling environmental factors like temperature and humidity, and handling your artwork with care during transport and storage all contribute to extending its lifespan. By protecting your canvas from dust, pollutants, and extreme conditions, you ensure that your artwork remains vibrant and intact for years to come.
Ultimately, the skill and patience required to stretch a canvas properly are well worth the effort. Not only does it enhance the aesthetic value of your home, but it also ensures that your prints or paintings remain timeless, enduring as cherished pieces in your collection. Whether you are an artist looking to display your own creations or someone looking to showcase a special photo, mastering the art of stretching canvas is the key to bringing your artwork to life in the most professional and enduring way possible.
With these steps and care techniques in mind, your stretched canvas prints will not only serve as beautiful visual pieces but also as long-lasting memories and artistic investments that will be enjoyed for years, if not generations.


